-
Prep Time20 minutes
-
Cook Time40-50 minutes plus canning time
-
Serv SizeYield 4 pints
Delicious and unique Chioggia pickled beets recipe with easy step-by-step instructions.
Ingredients
Directions
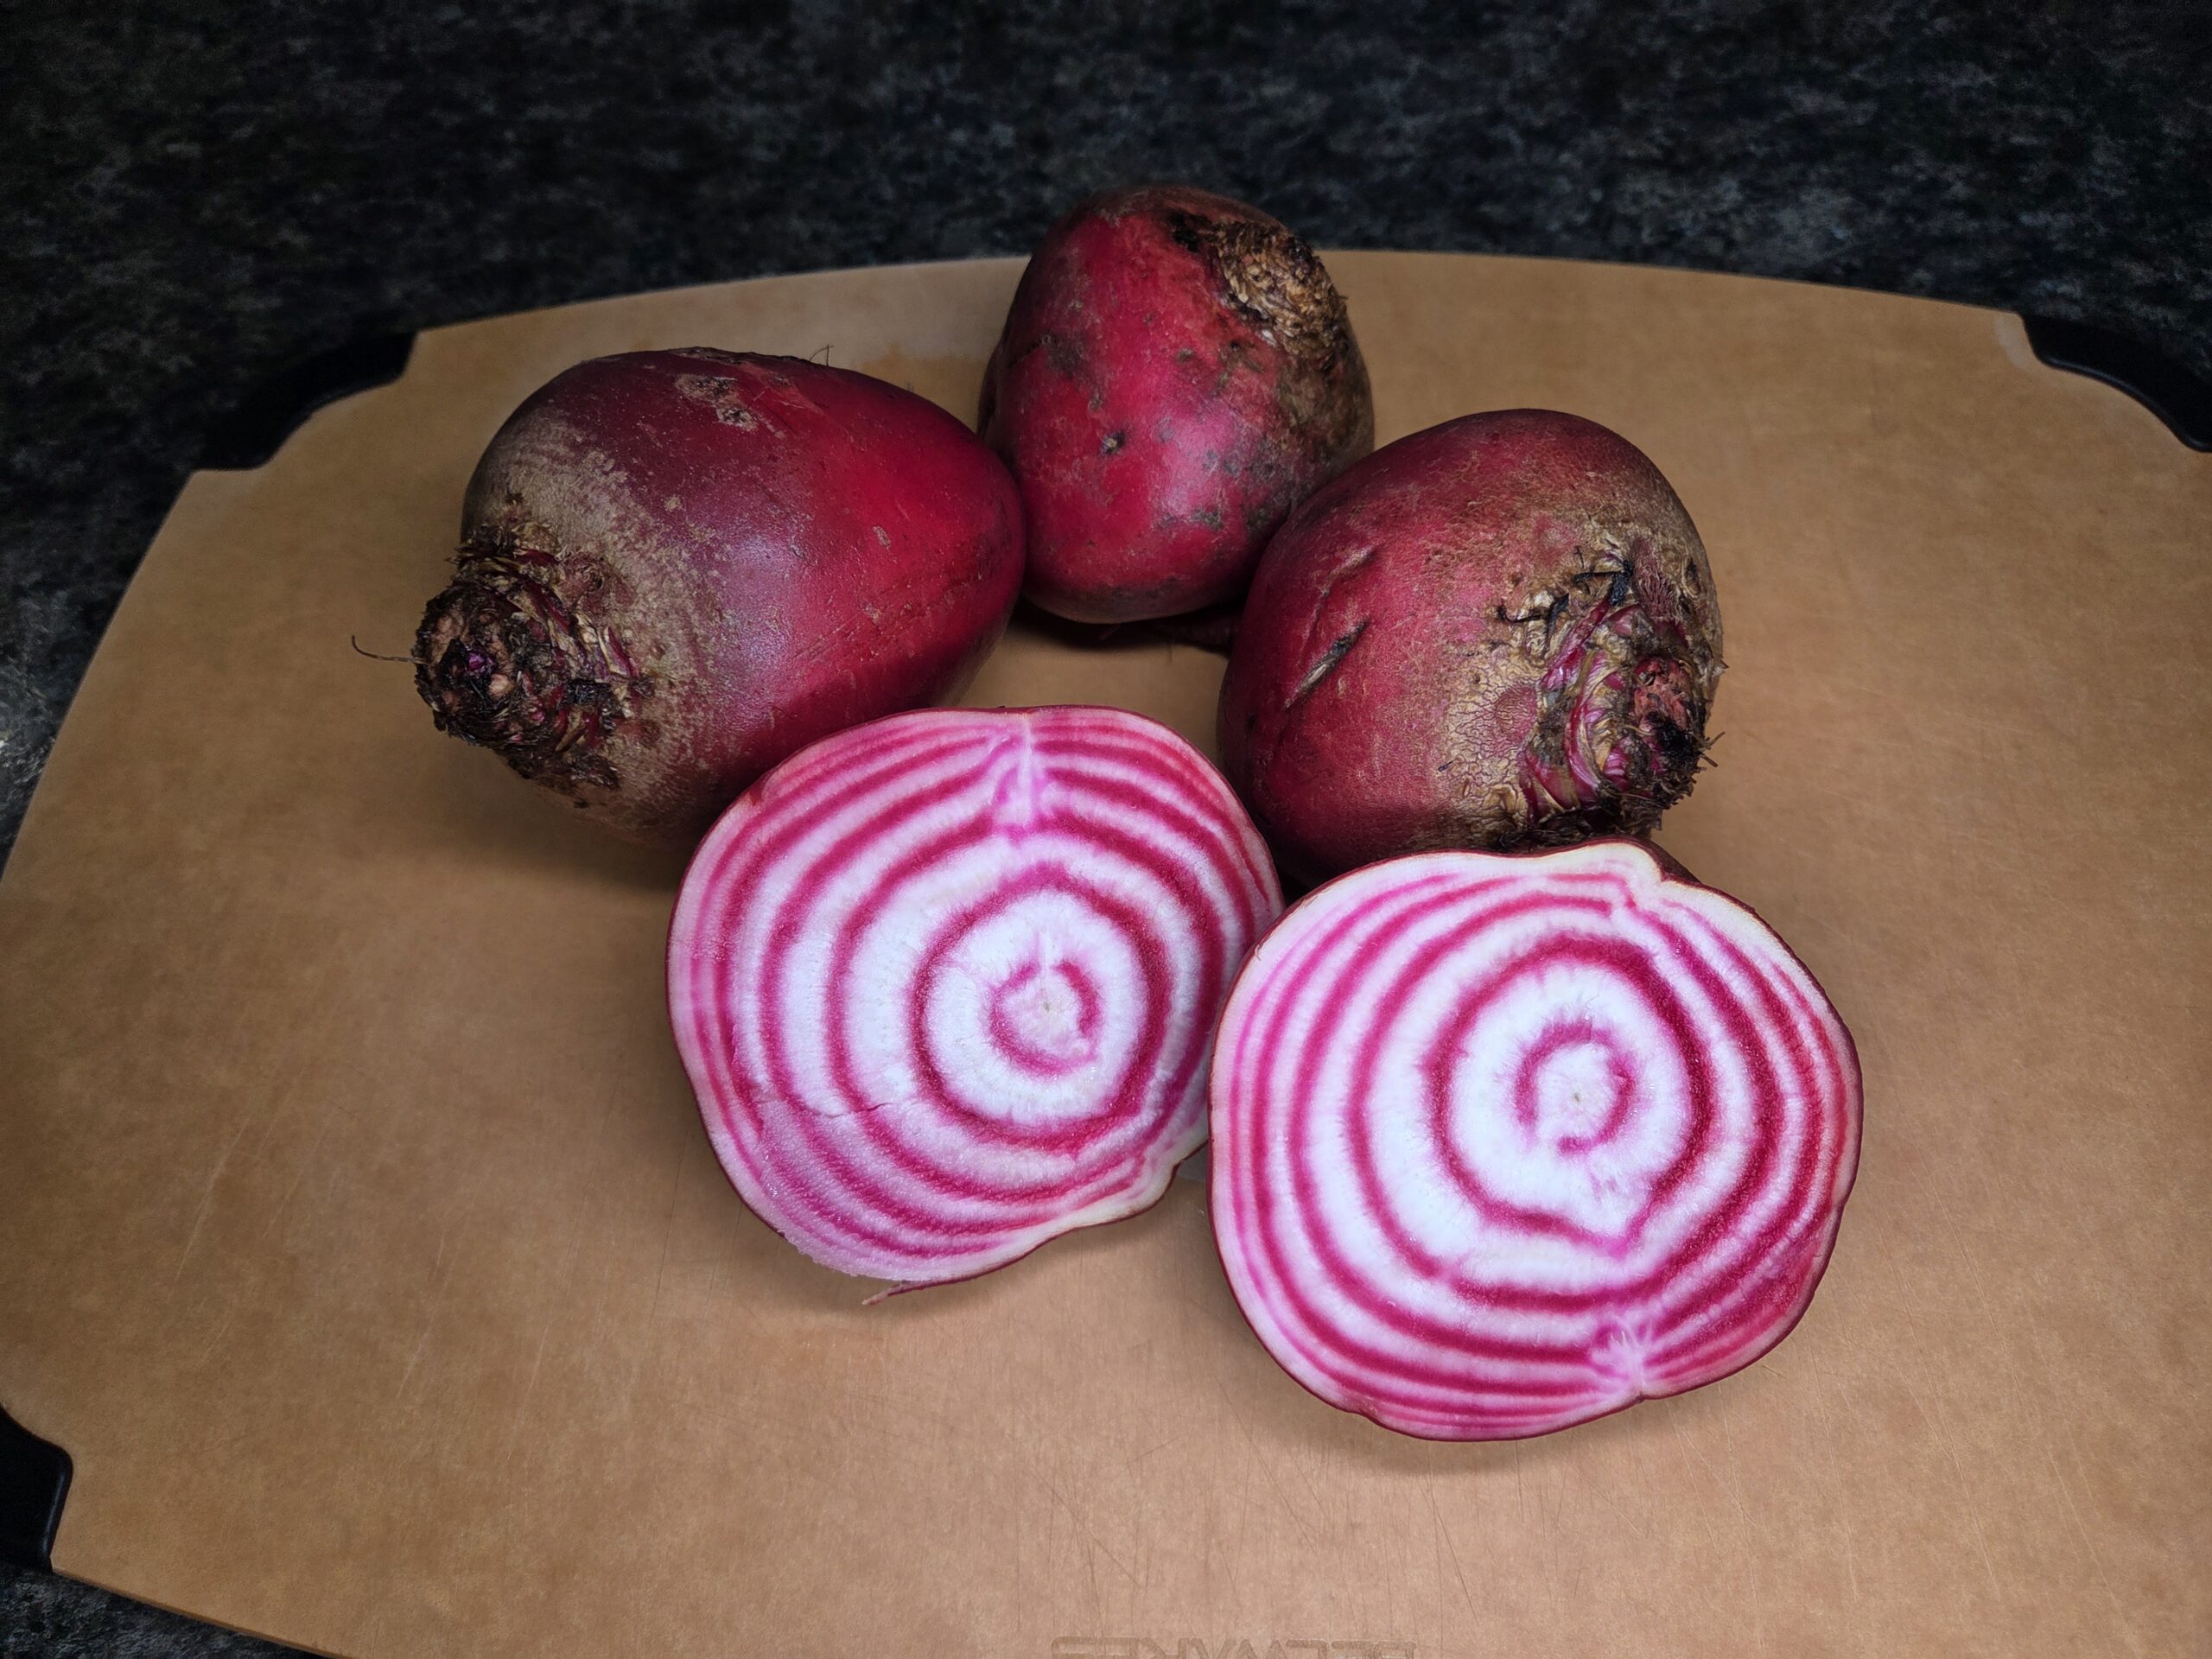
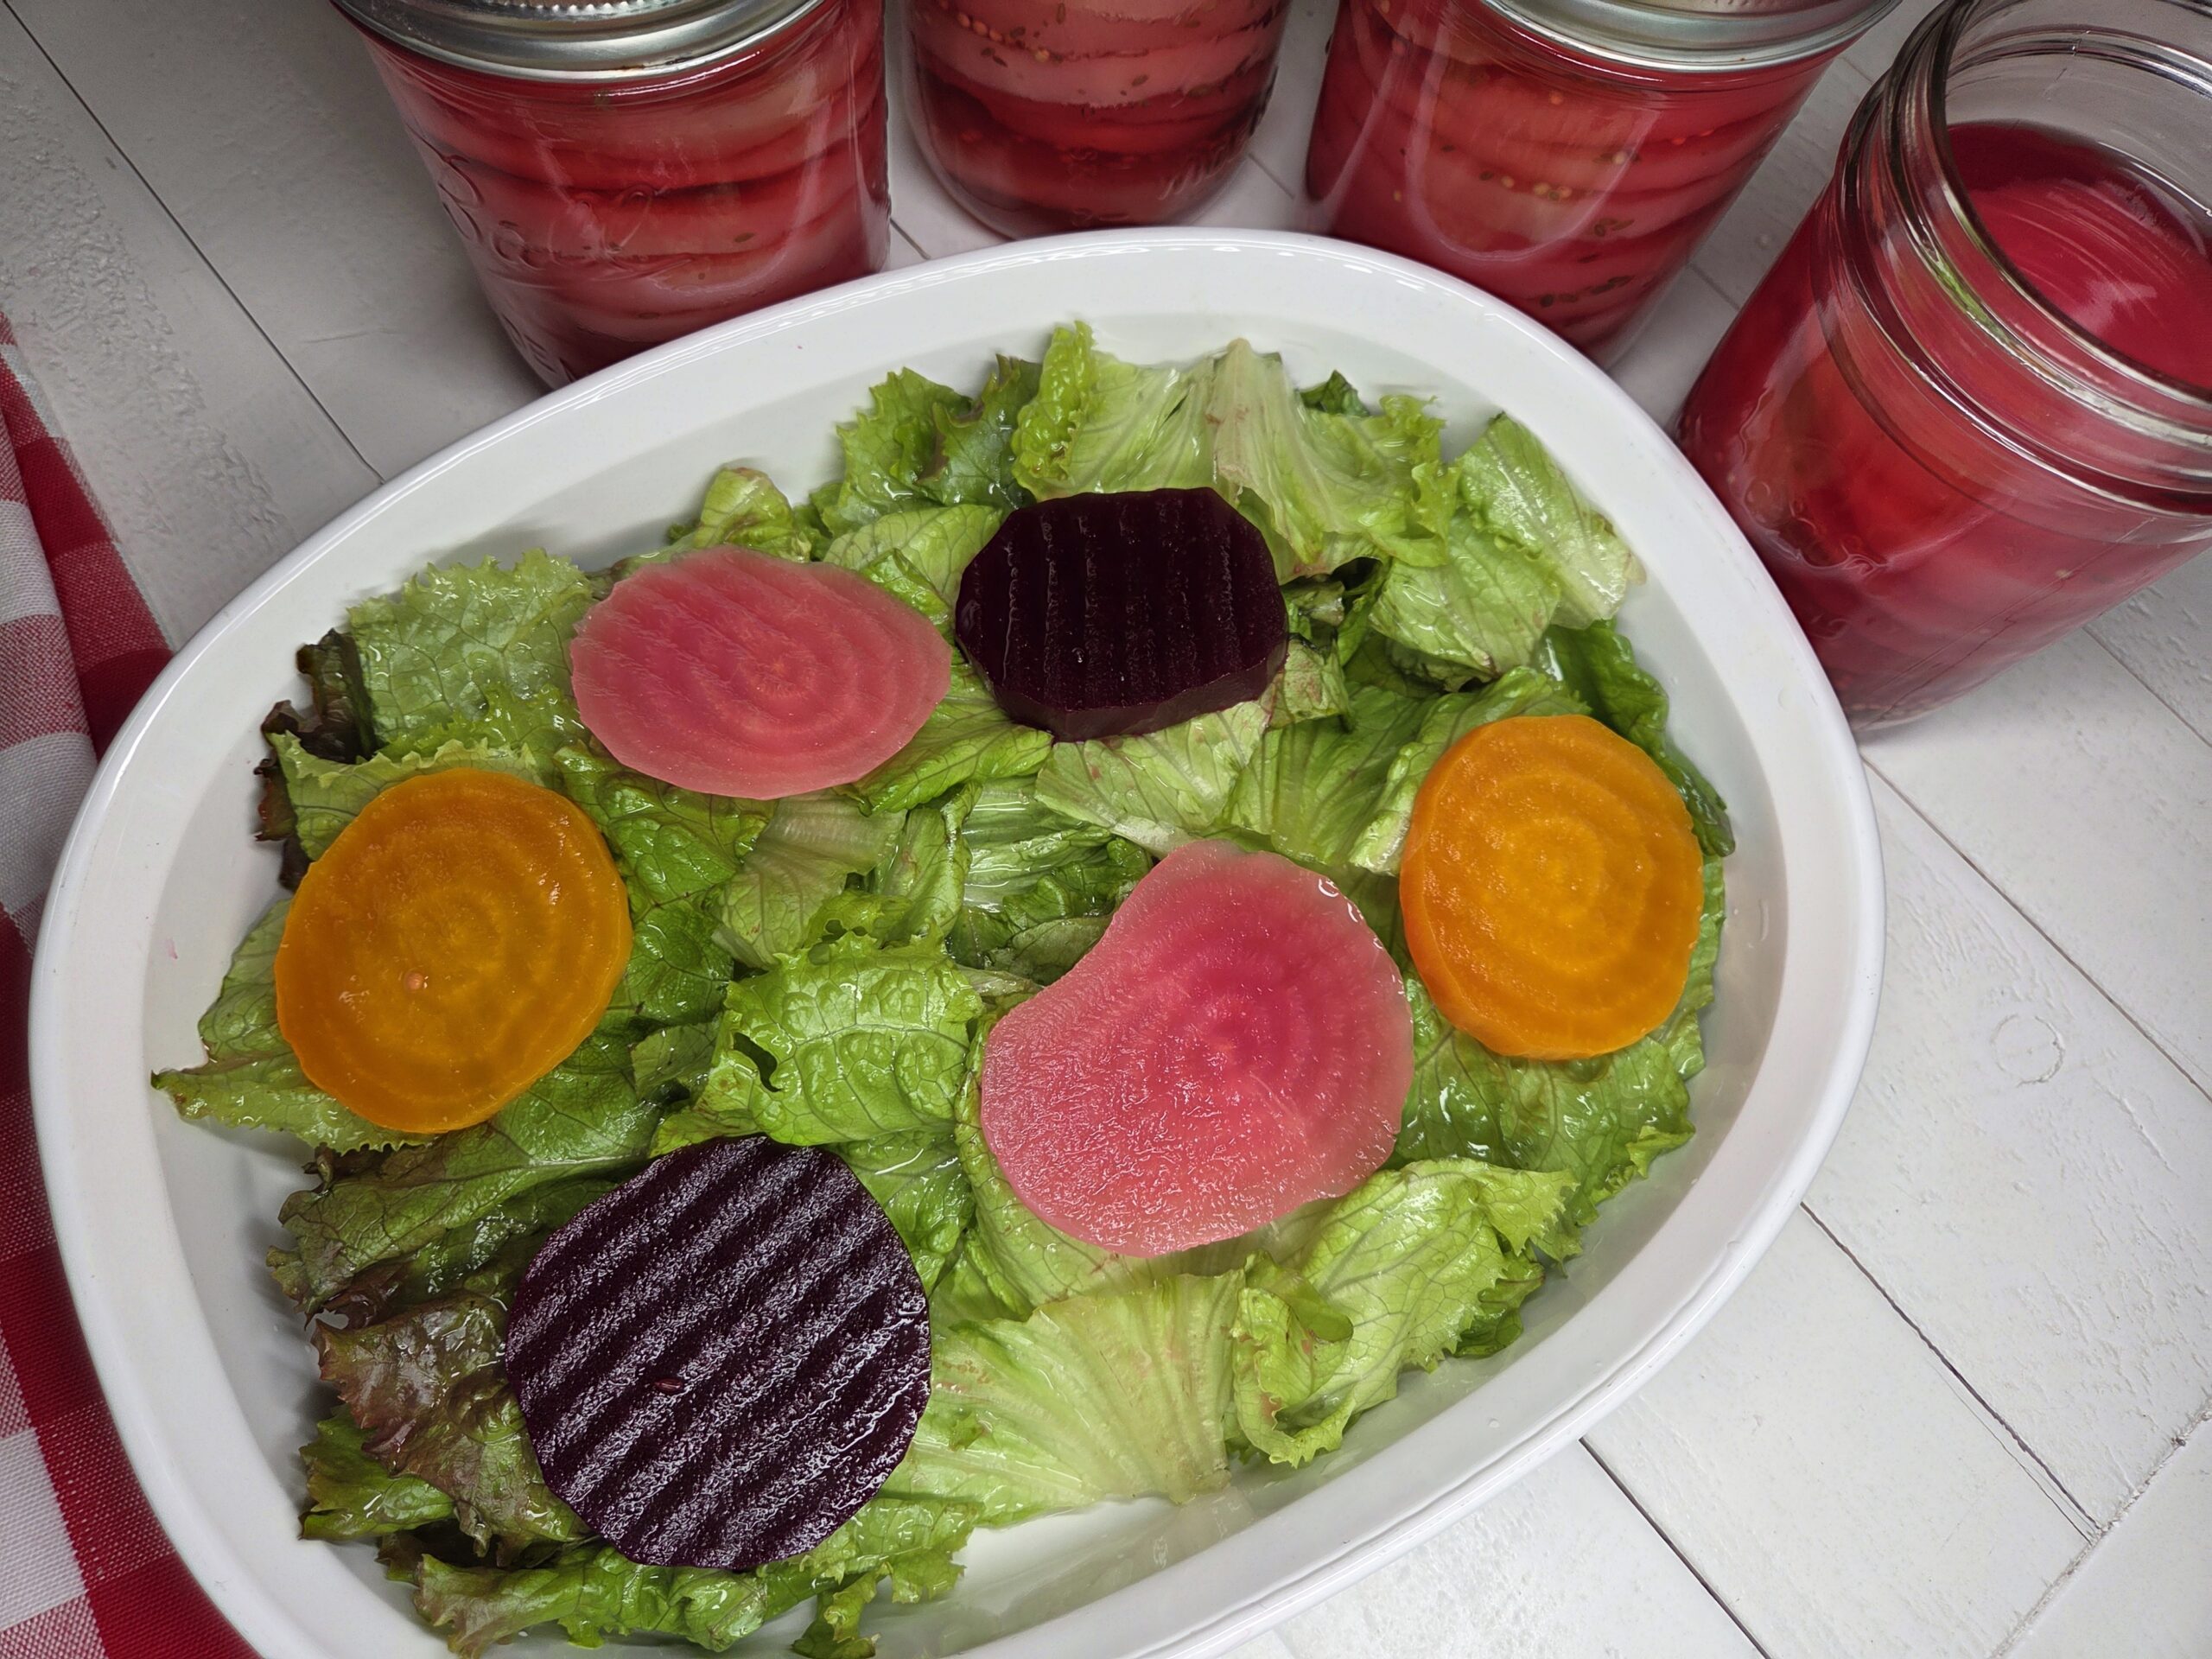
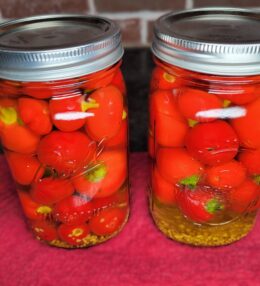
Chioggia beets are beautiful pink‑and‑white striped beets with a mild, sweet flavor. They originated in the coastal town of Chioggia near Venice, Italy, and are often called candy‑stripe or bullseye beets because of their striking rings. This recipe and tutorial make four pints of pickled beets, and we offer three versions—red, golden, and Chioggia—so you can choose the variety that best suits your garden or your taste. The recipe and care instructions are identical for all three, but we’ve included photos of each type so you can see exactly how the process looks from start to finish. Every year, my husband and I grow a large garden, and beets are one of our favorite crops. They’re delicious in salads, perfect for snacking, and honestly irresistible straight from the jar. If you’d prefer to skip the canning step and make simple refrigerator pickled beets, you can follow the same recipe and simply omit the canning portion.

Wash the jars, lids, and bands in warm, soapy water and rinse well. Place the jars right side up in a boiling‑water canner fitted with a rack. Do not boil lids. Add warm water until it covers the jars by about 1 inch. Bring the water to a boil and boil the jars for 10 minutes if you are below 1,000 feet elevation; add 1 minute of boiling time for every additional 1,000 feet. Reduce the heat and keep the jars hot until you’re ready to fill them. Remove and drain one hot jar at a time, leaving the remaining jars in the canner so the water can be used for processing.
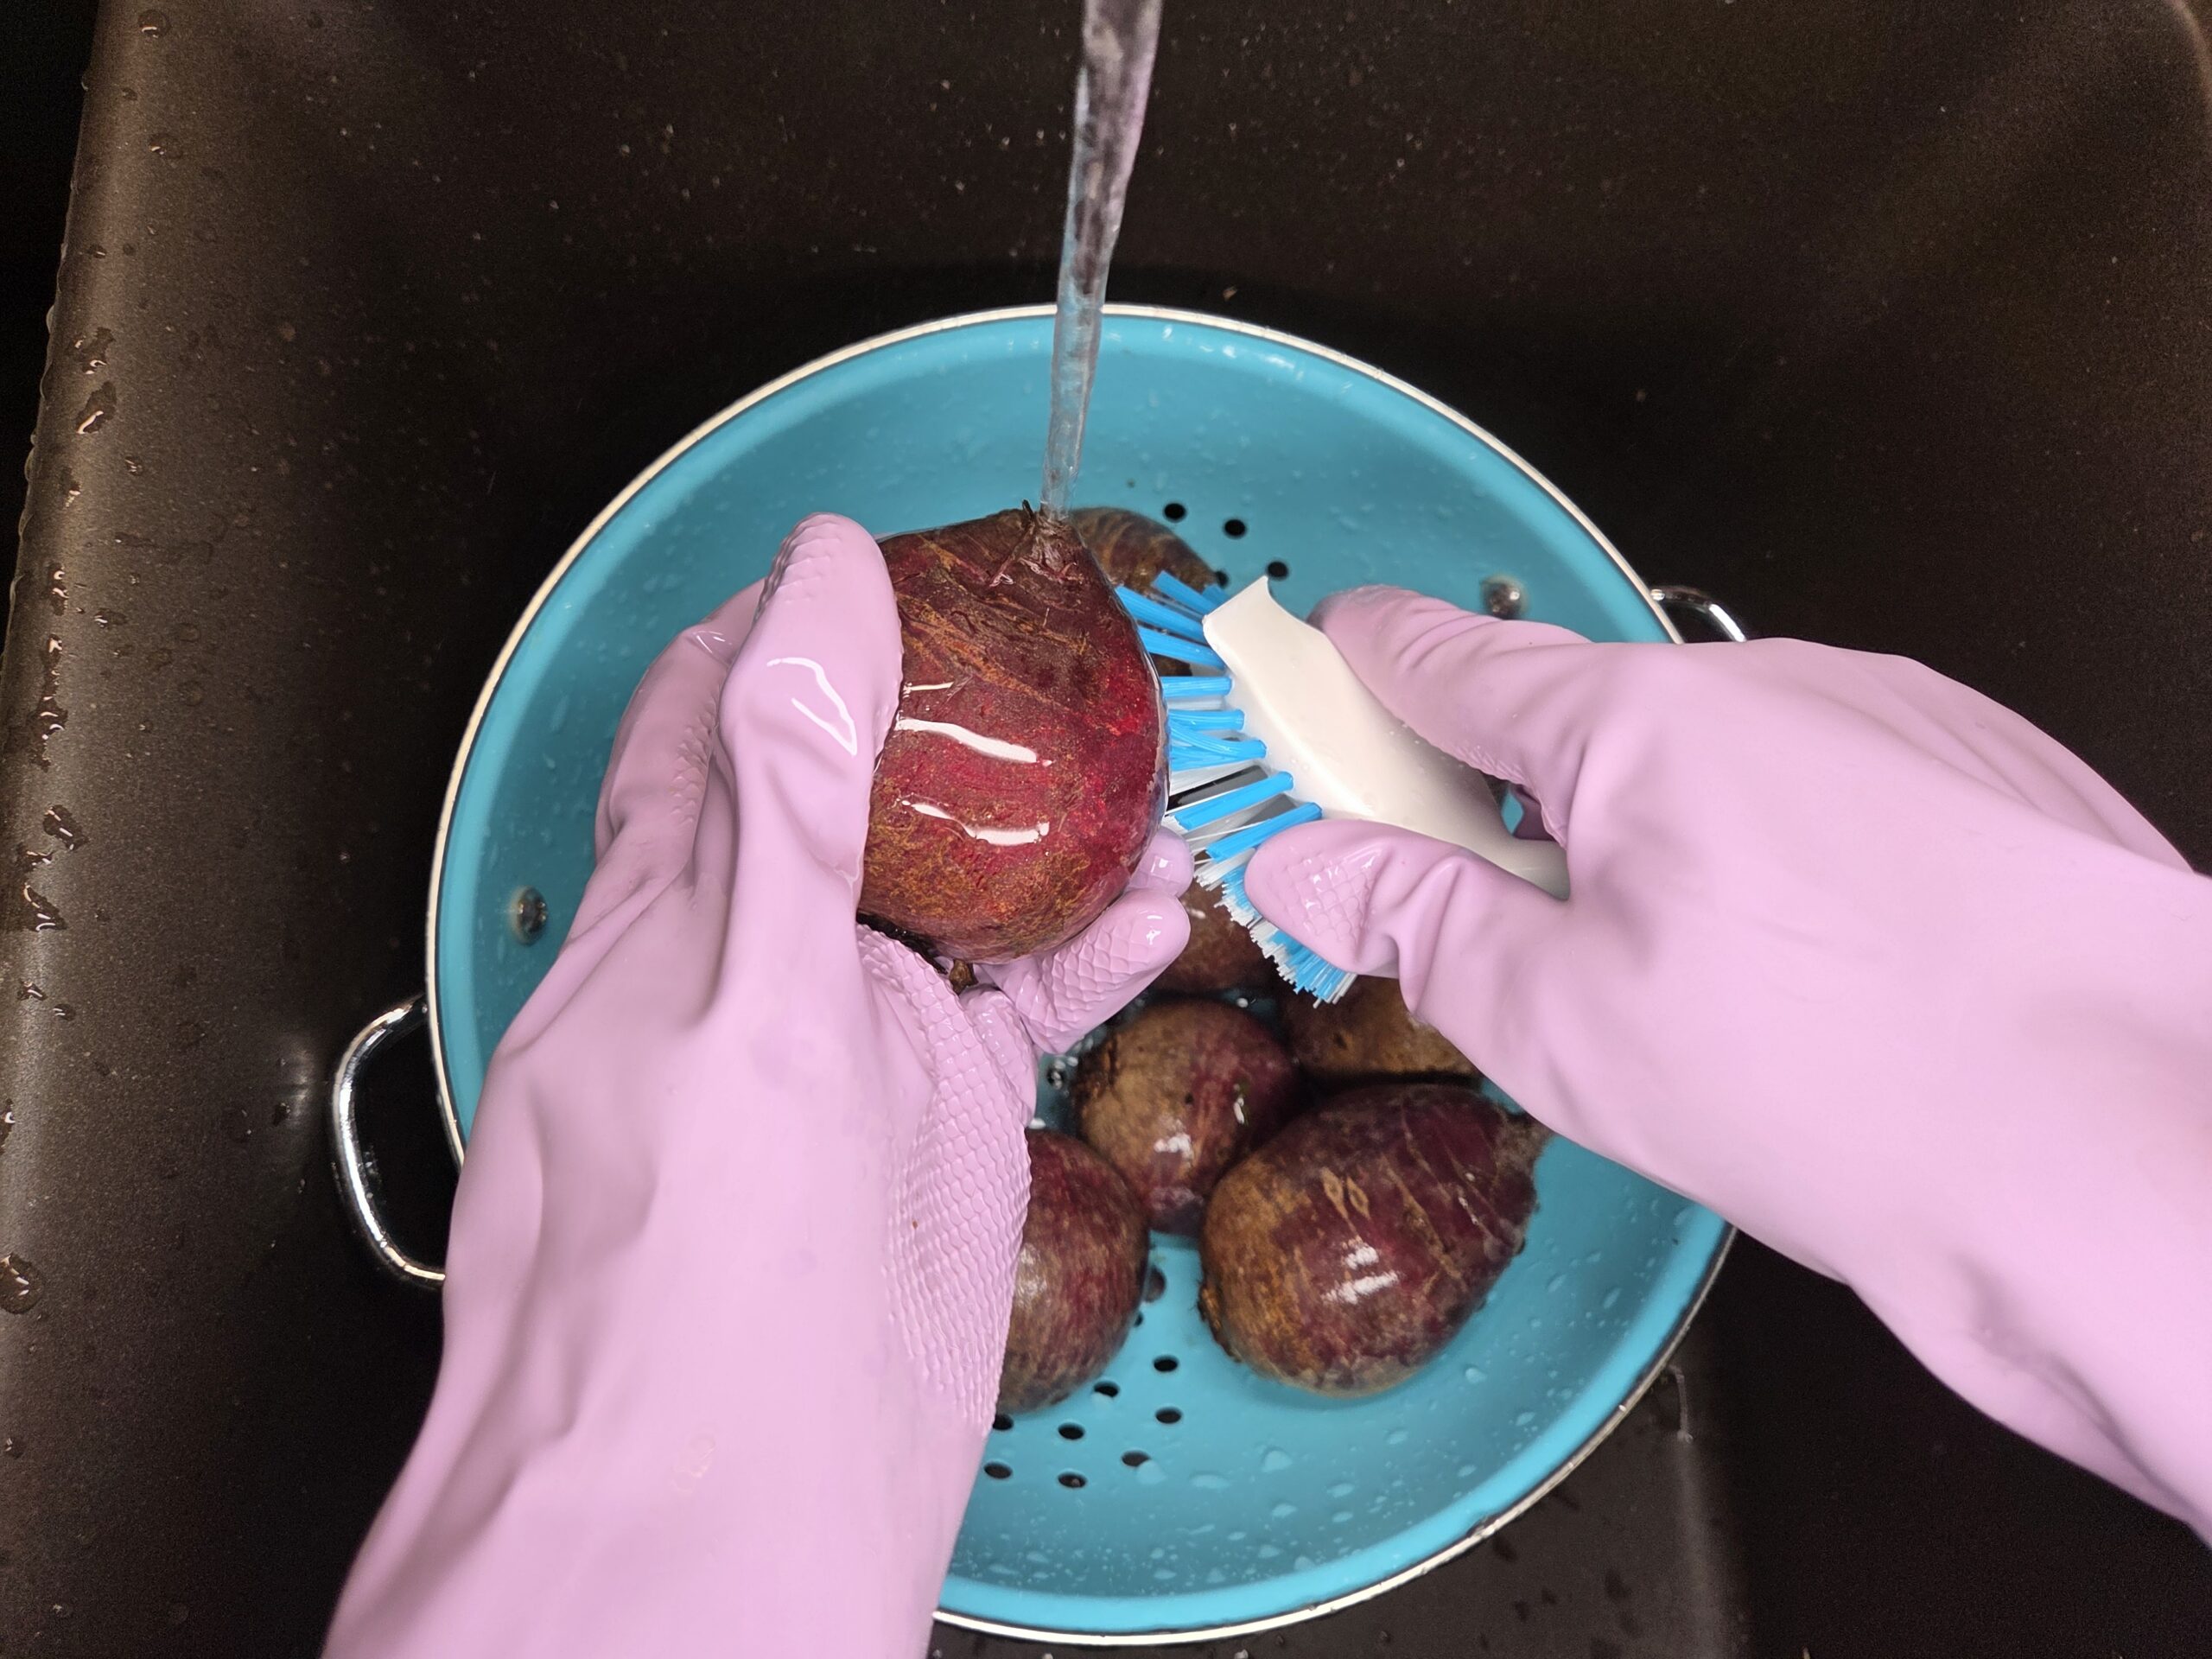
Trim the ends off the beets, leaving about 1 inch of stem attached to help prevent color loss, and scrub well to remove any dirt.

In a stainless‑steel, nonreactive 5‑quart pot, boil the beets until they are just tender enough to pierce with a fork but not fully soft.
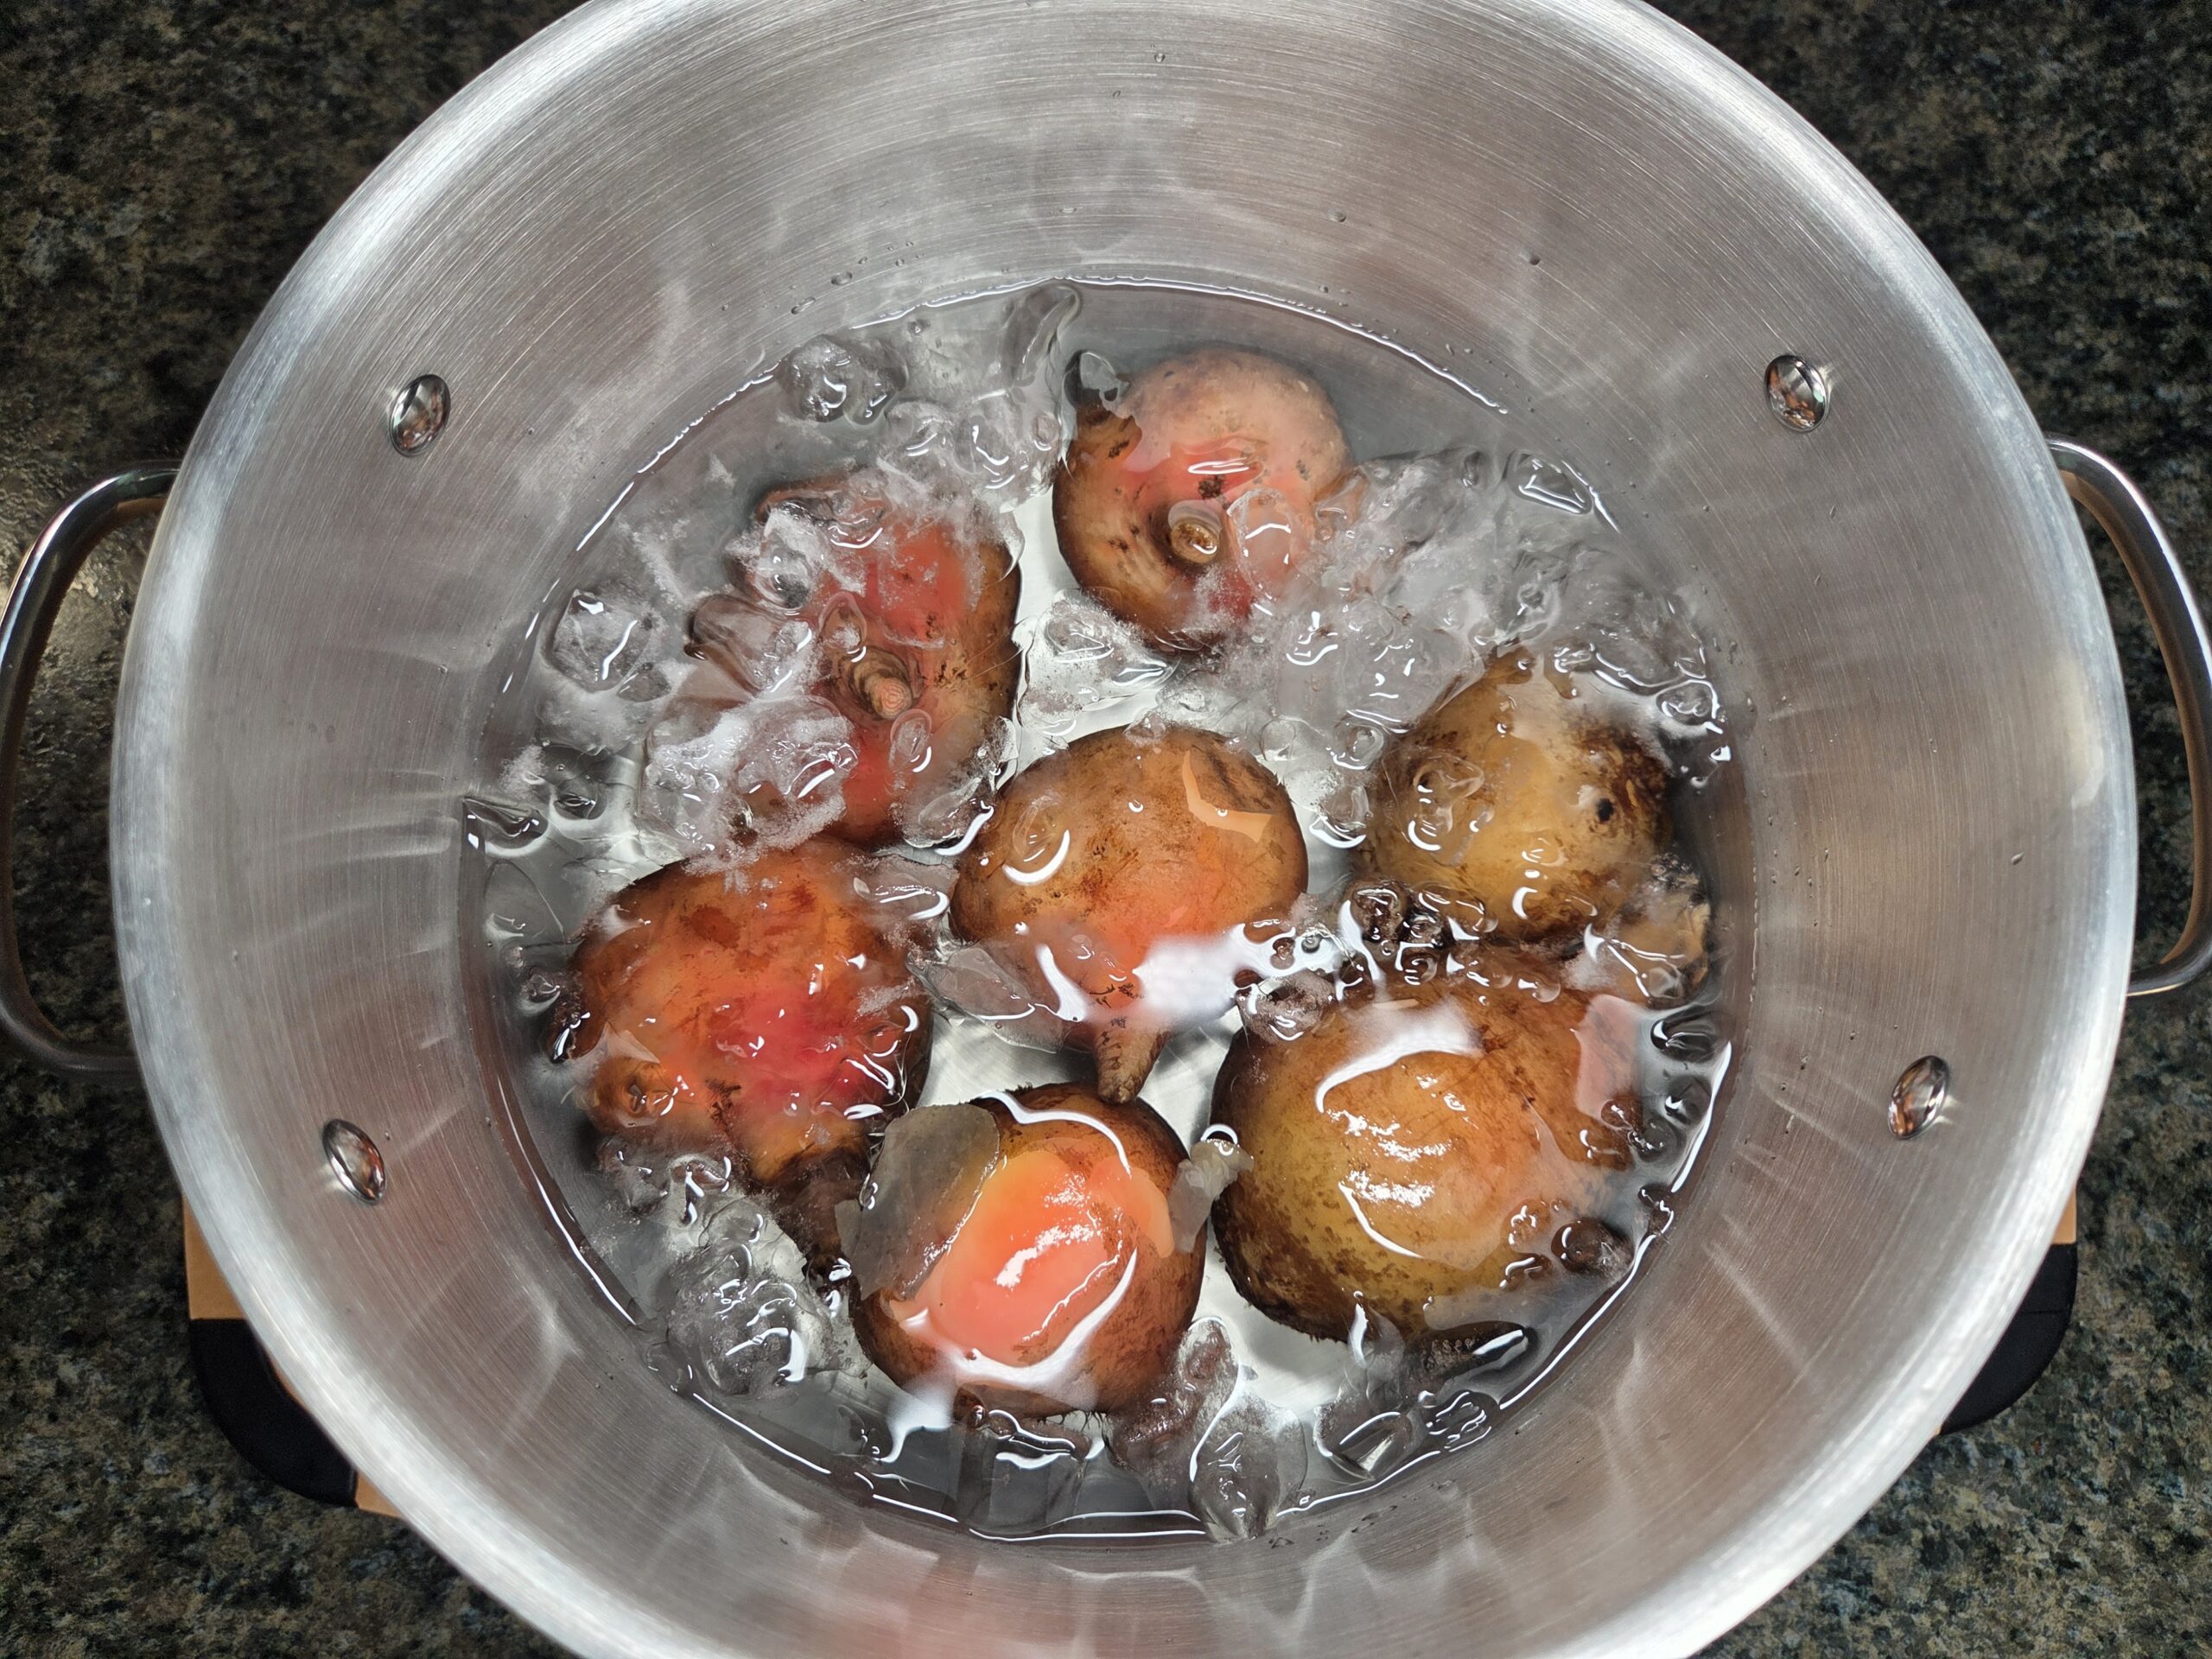
Remove them and immediately place them into an ice‑water bath to cool until they can be handled comfortably.
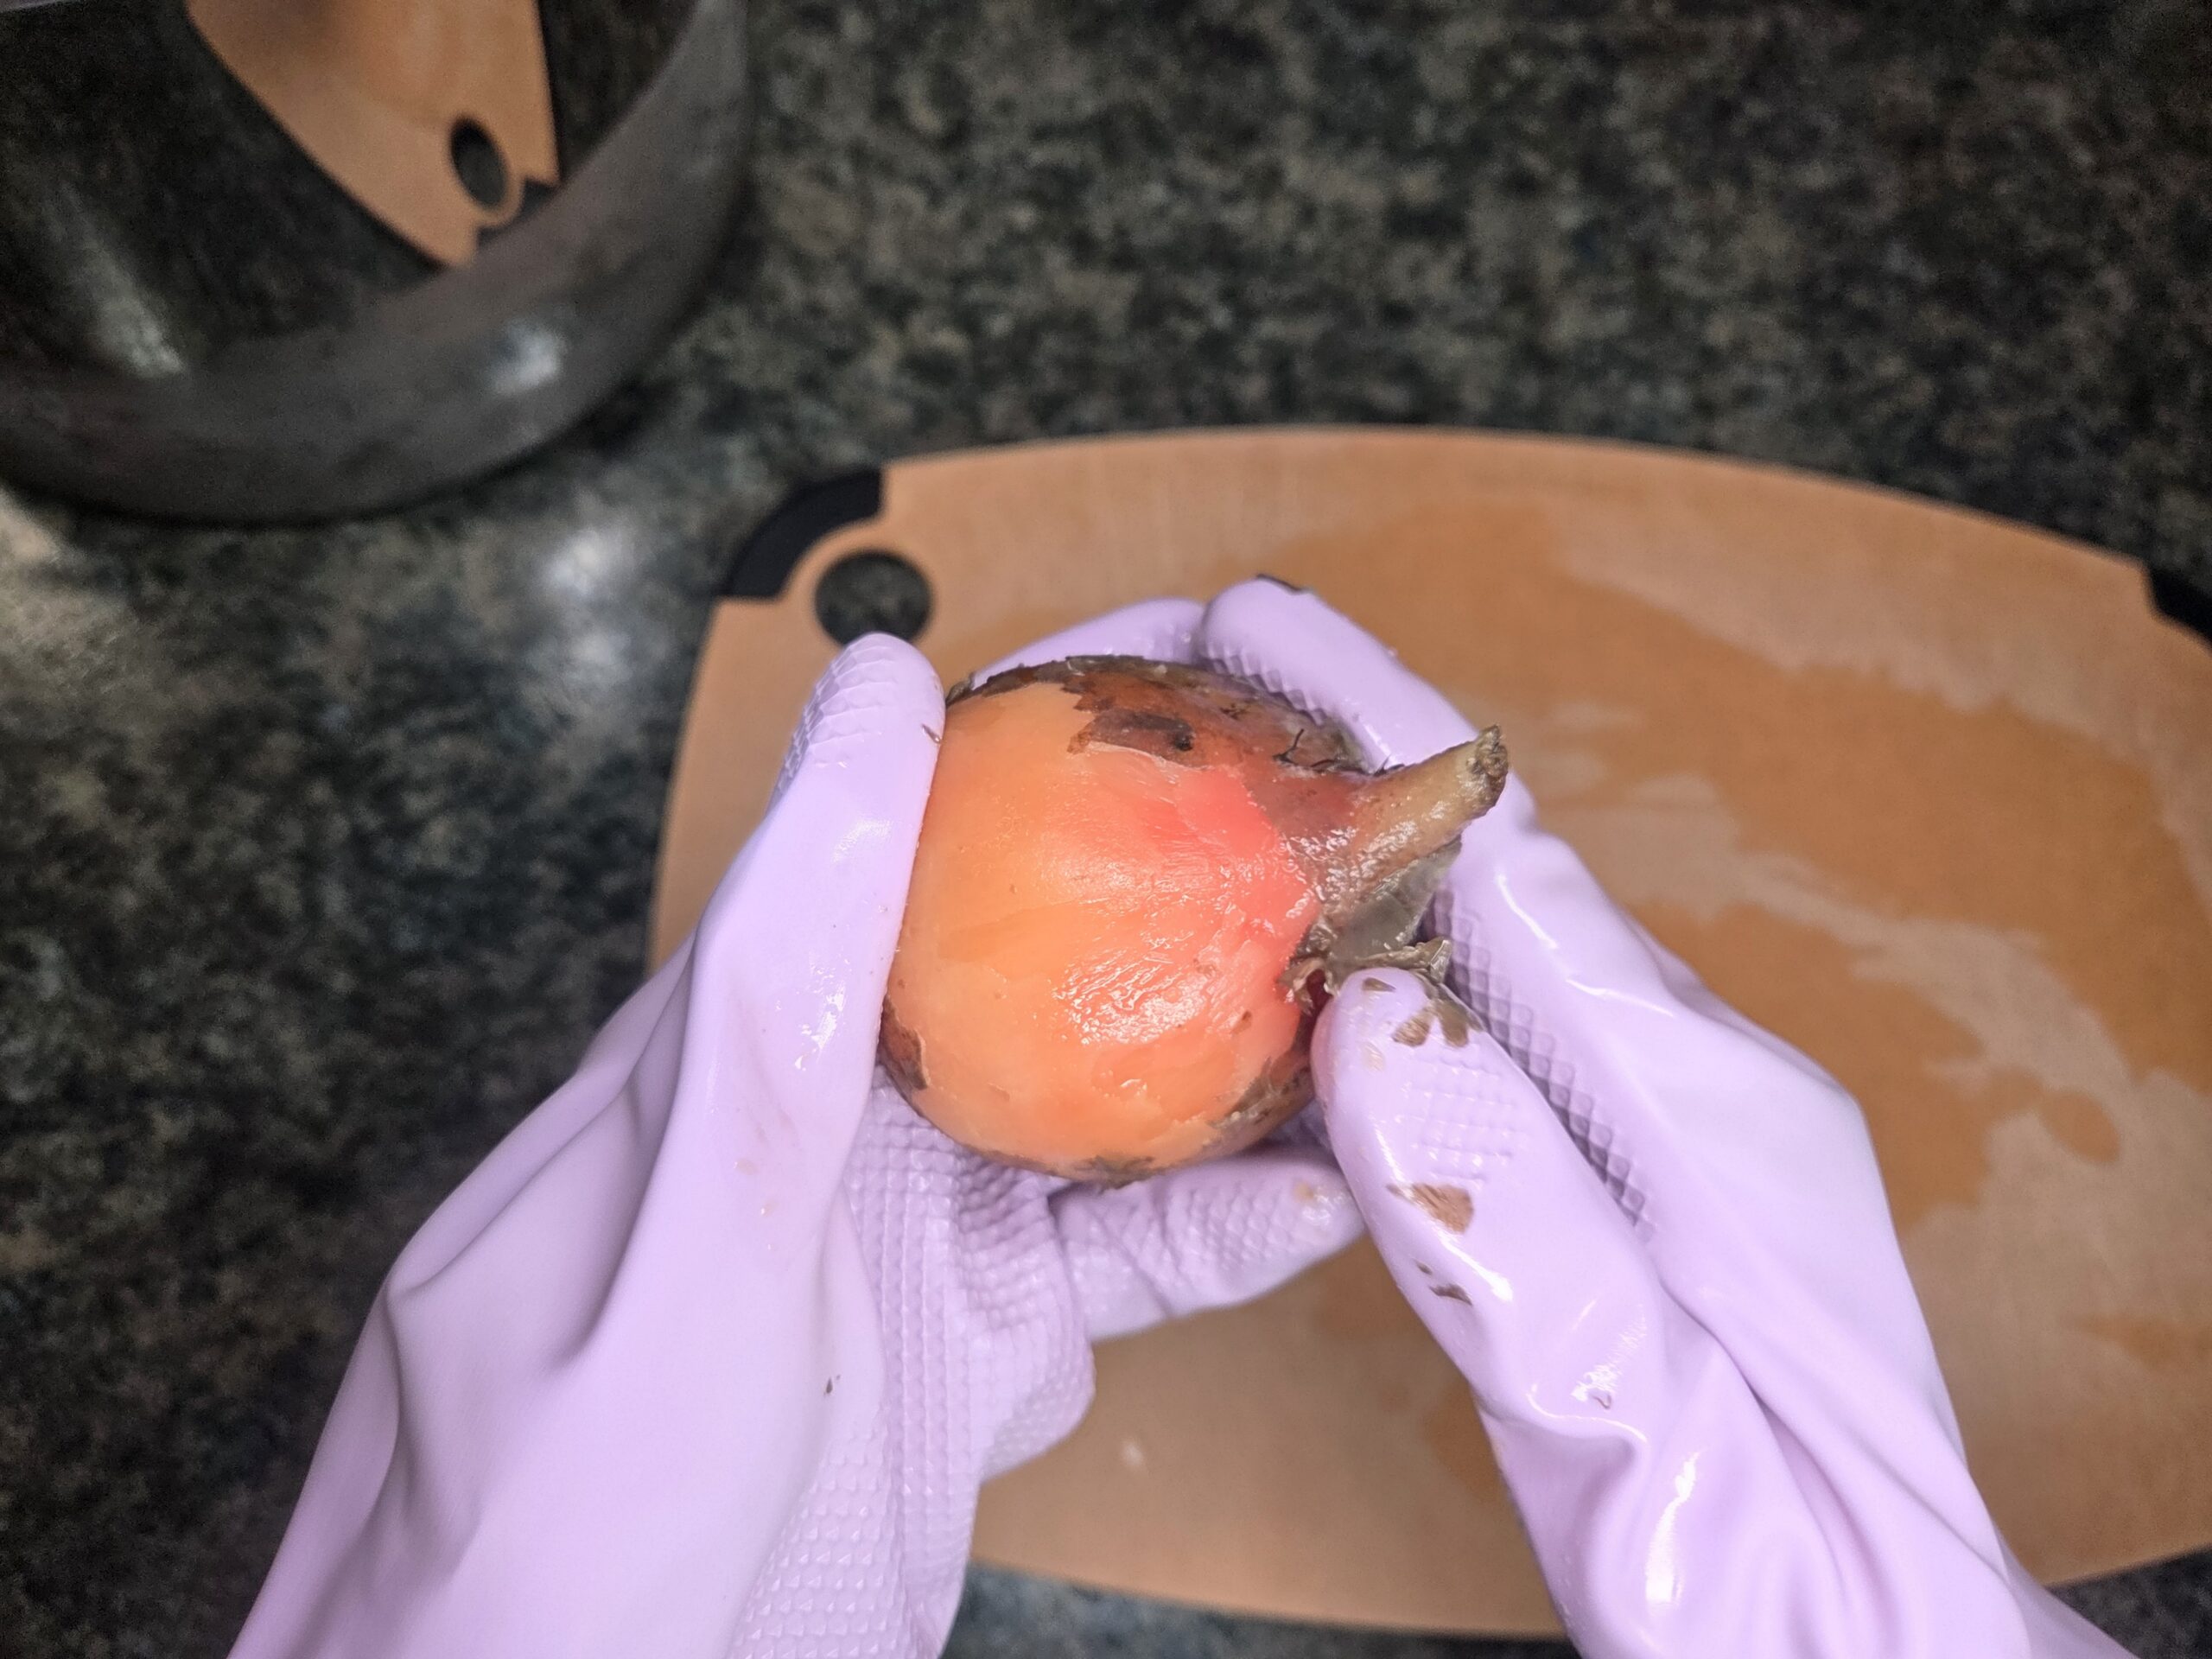
Once the beets are cool enough to handle, trim the ends and gently rub the skins off with your hands. Wearing gloves can help prevent stains. The skins should come off easily, but if any are stubborn, a potato peeler works well.
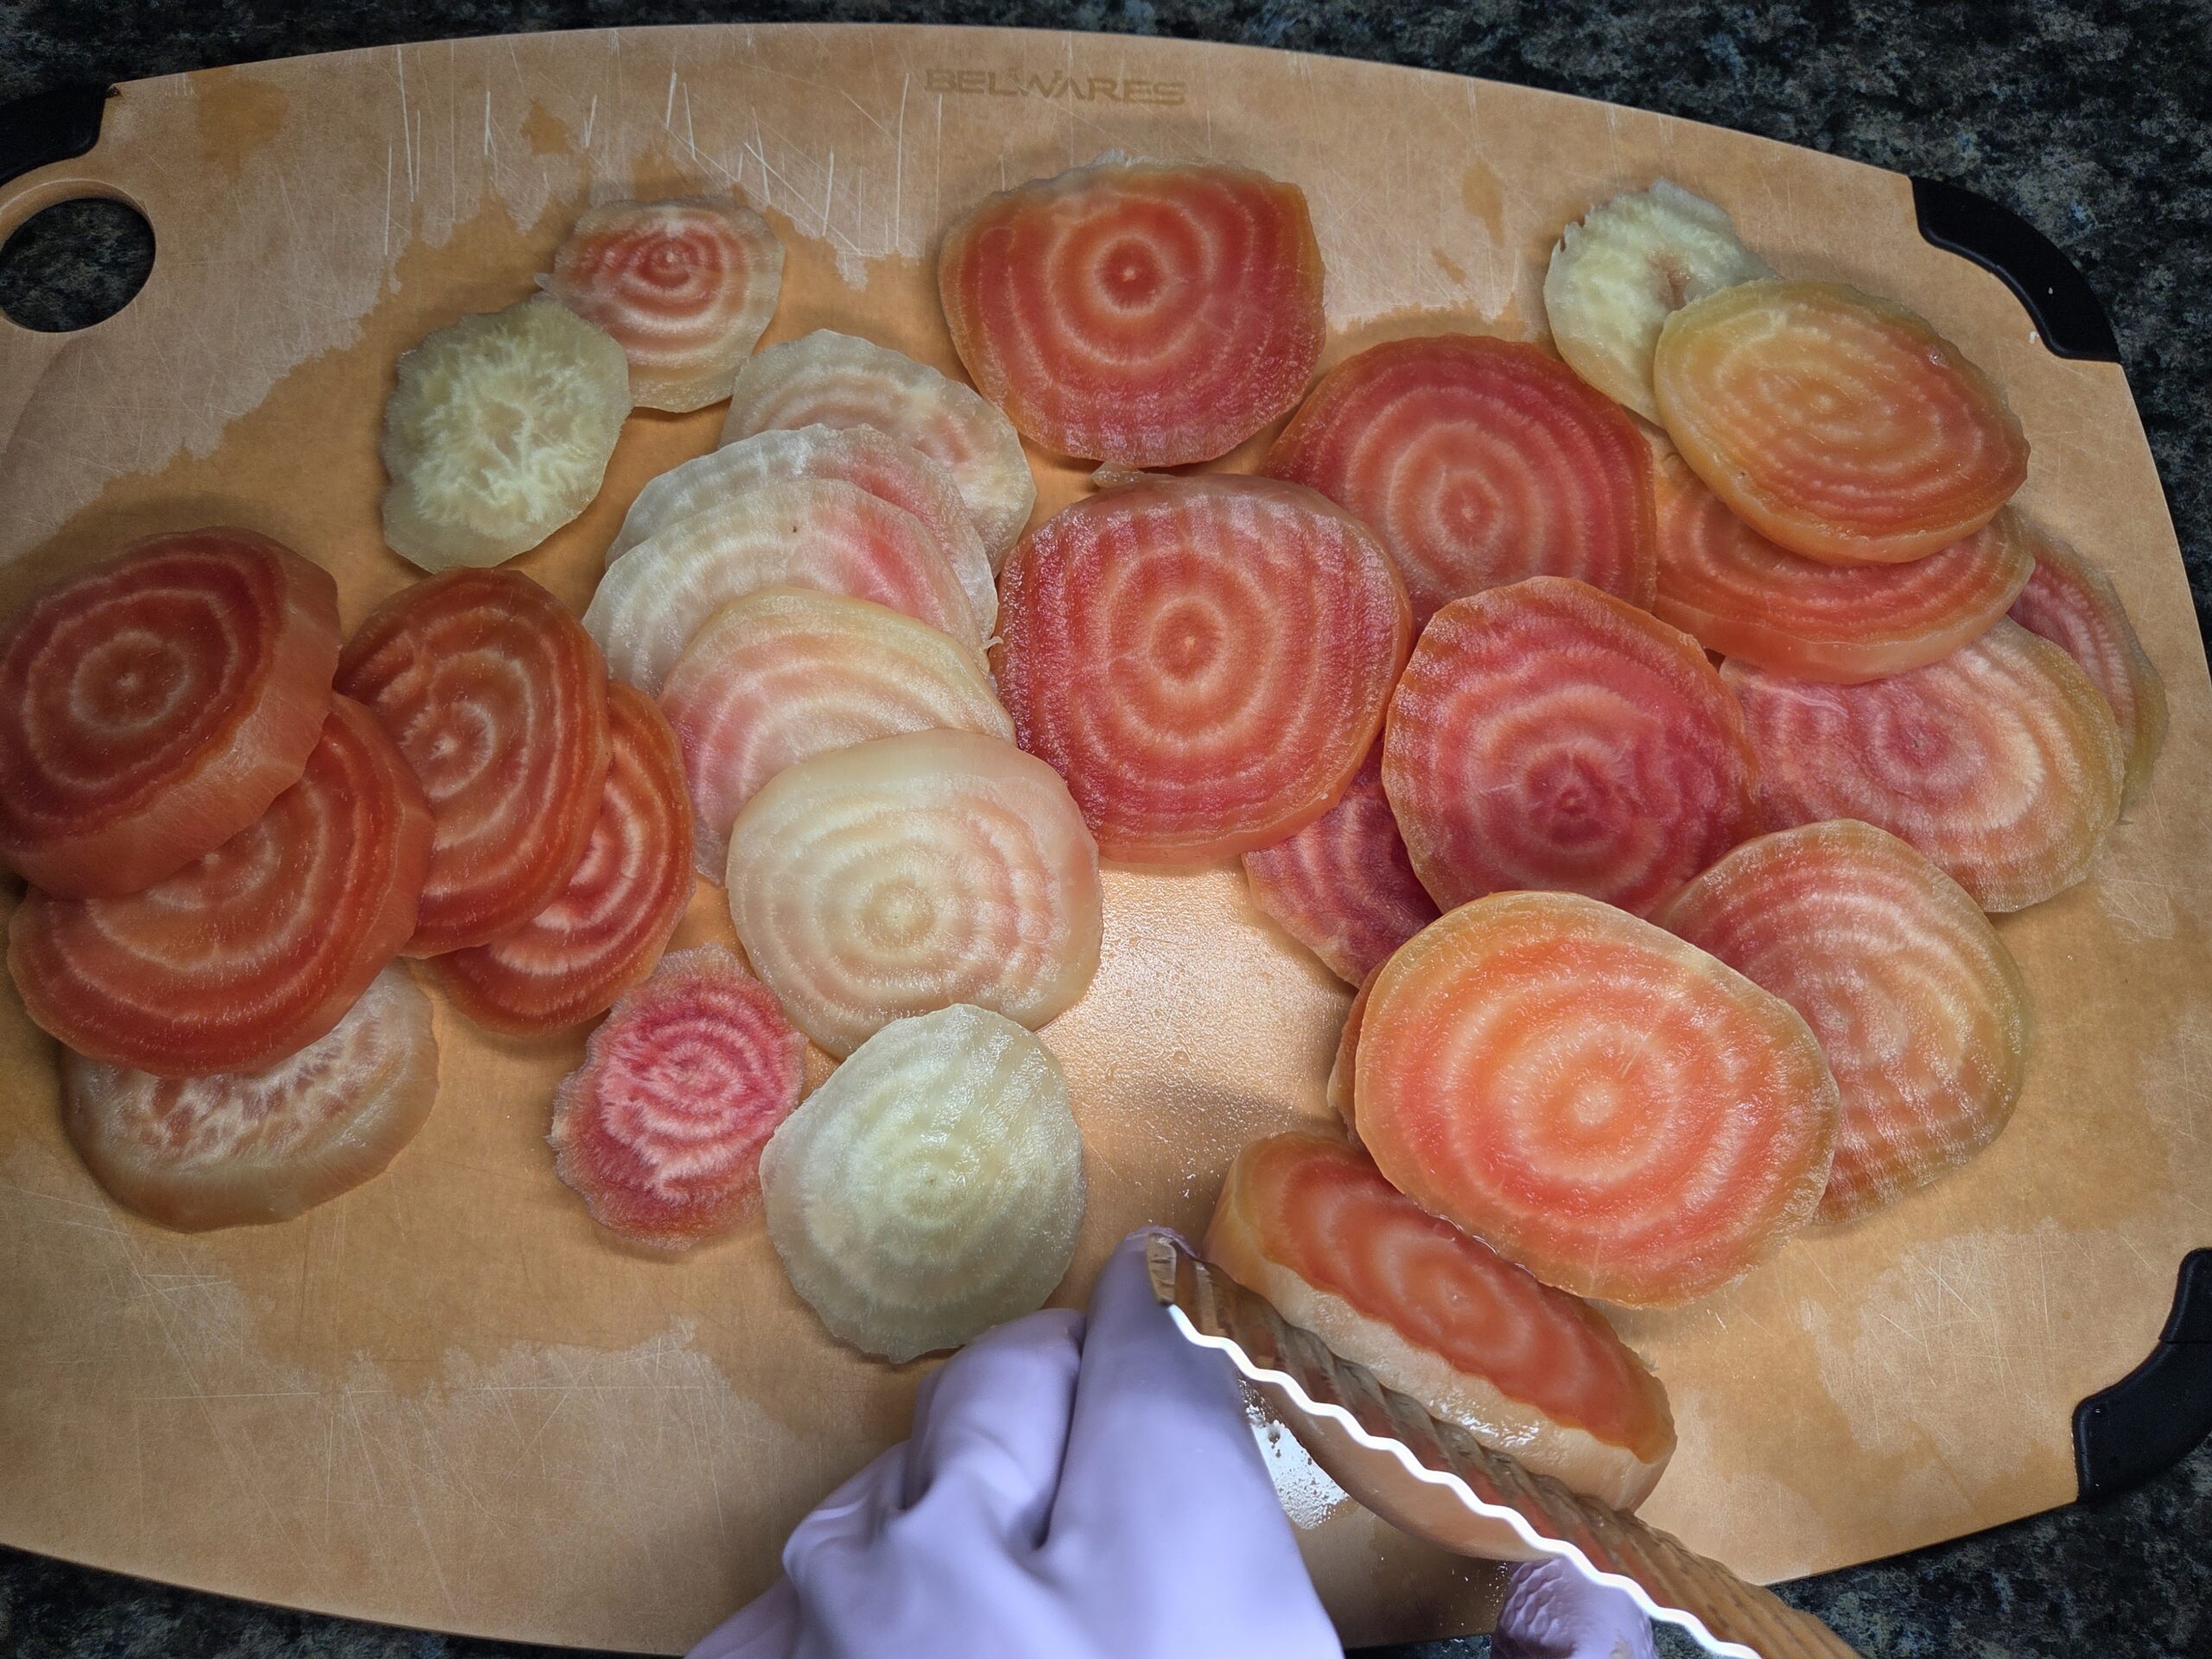
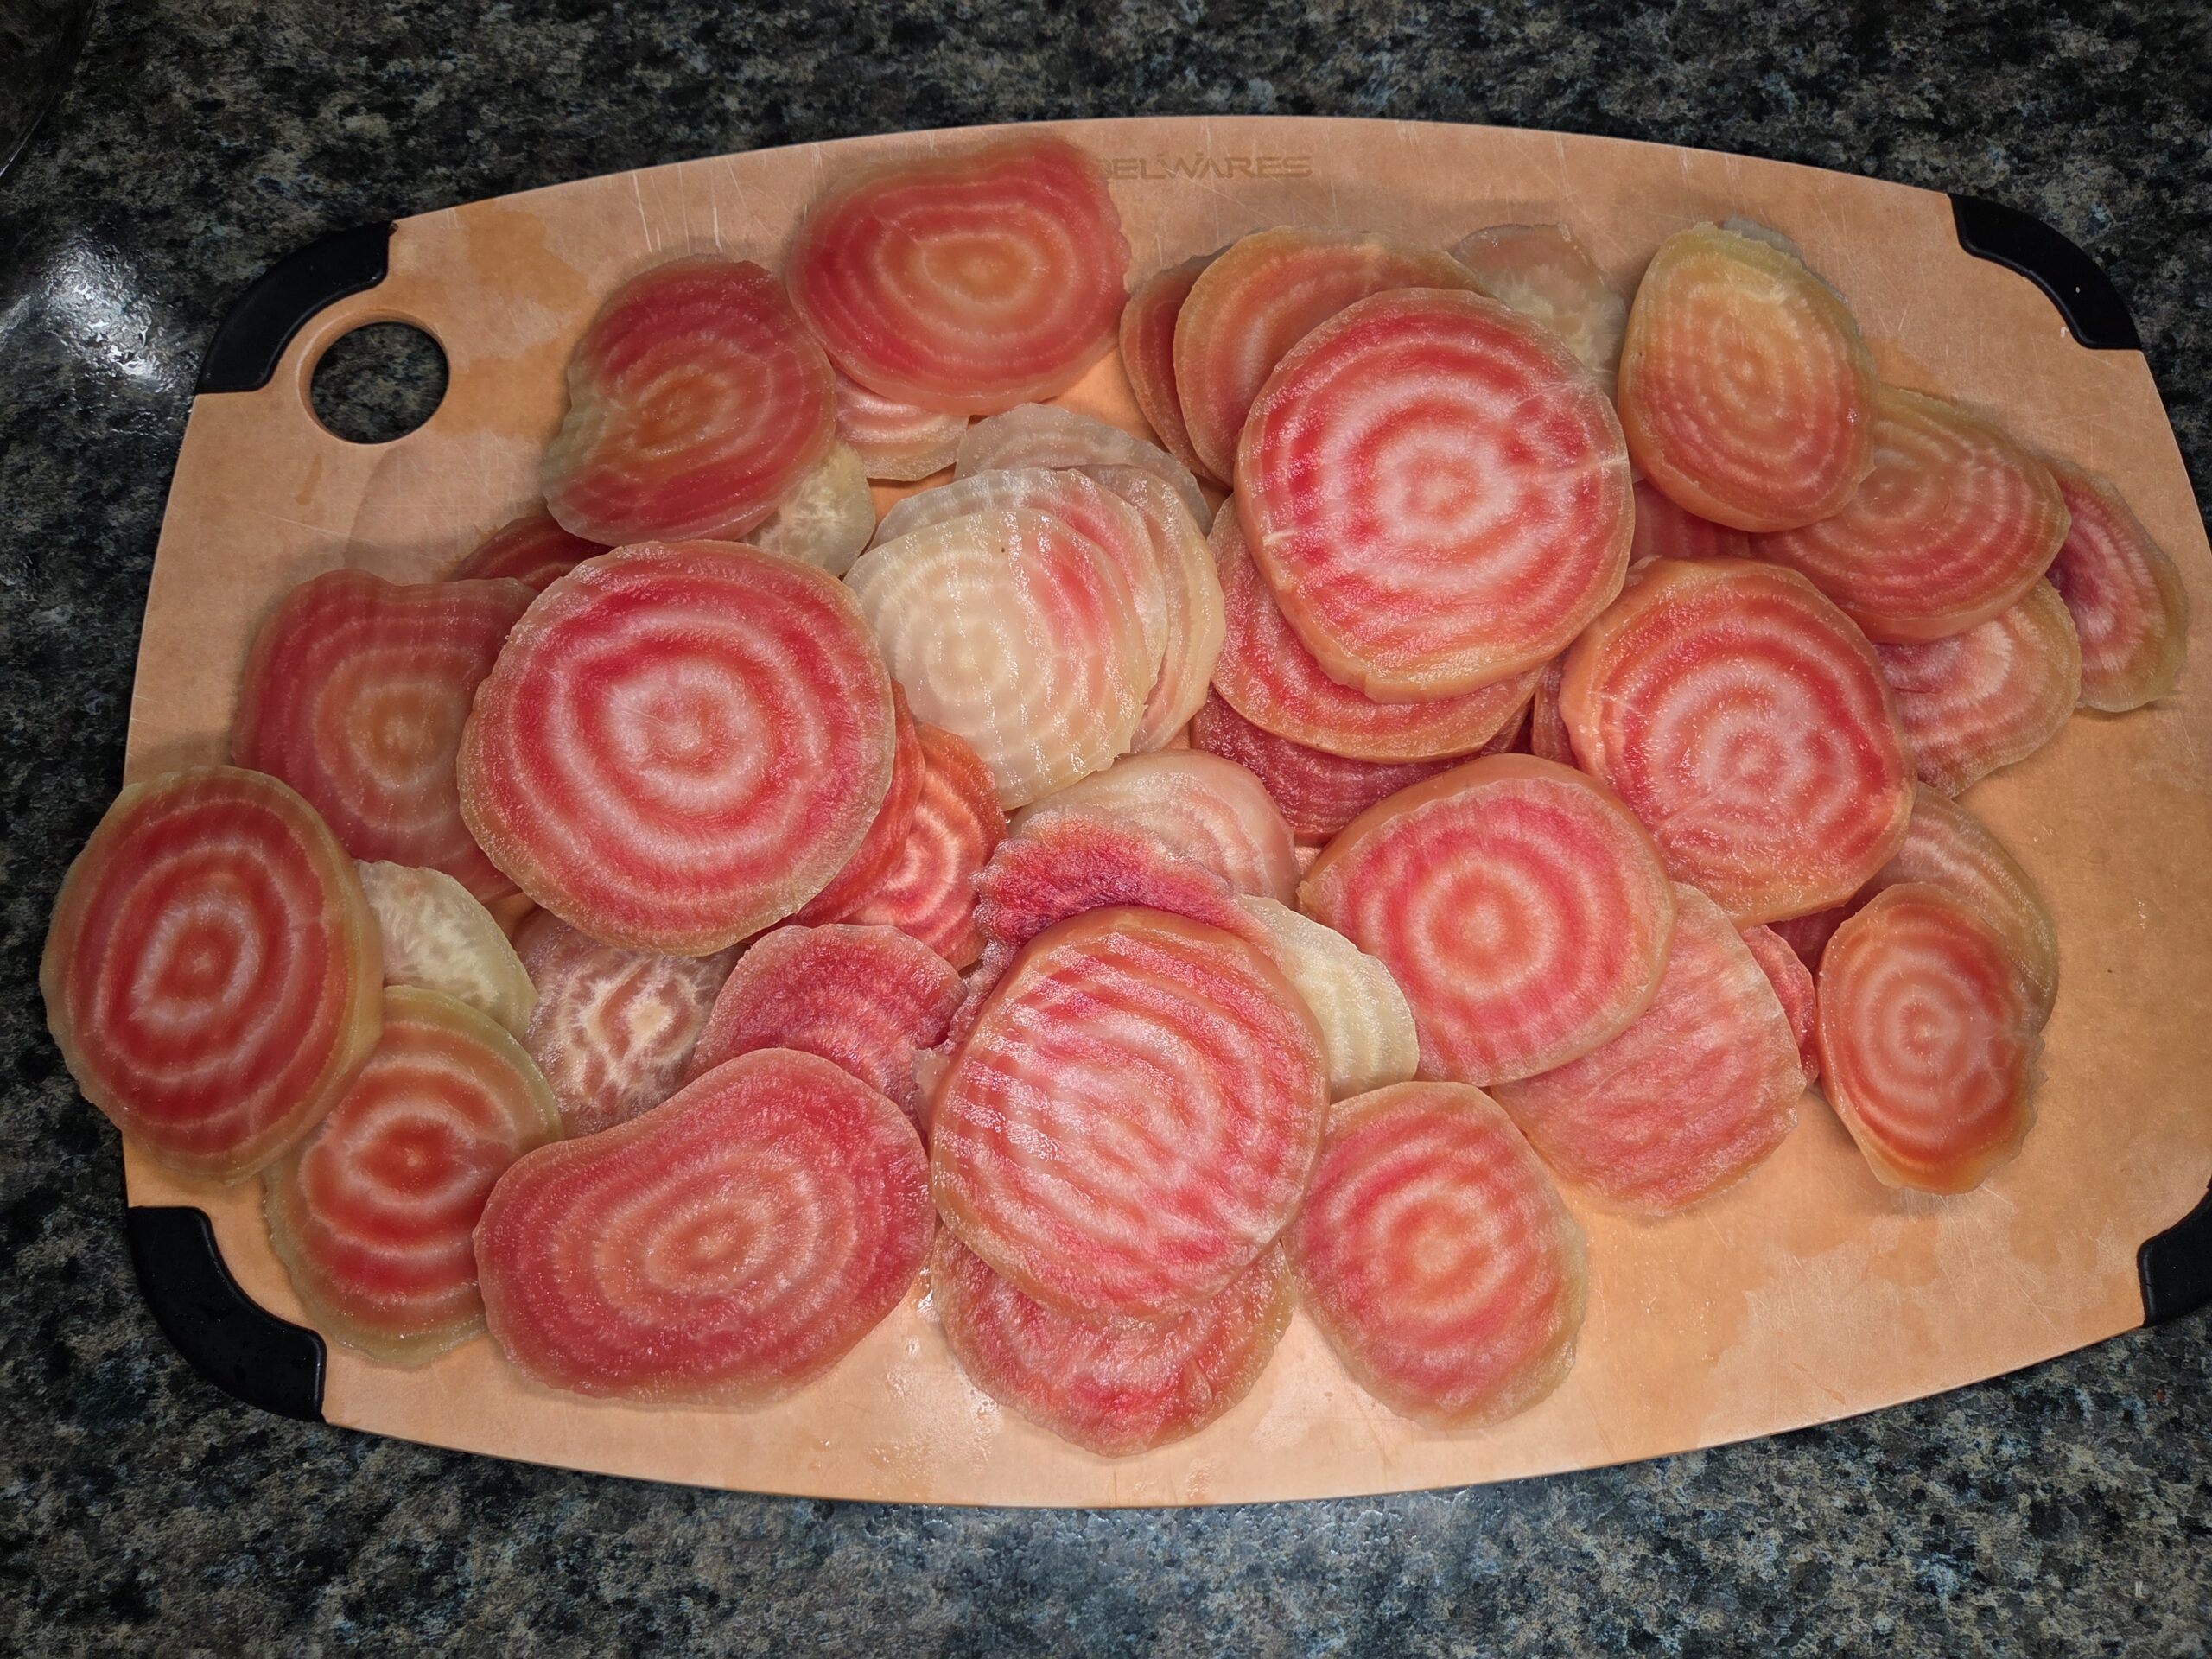
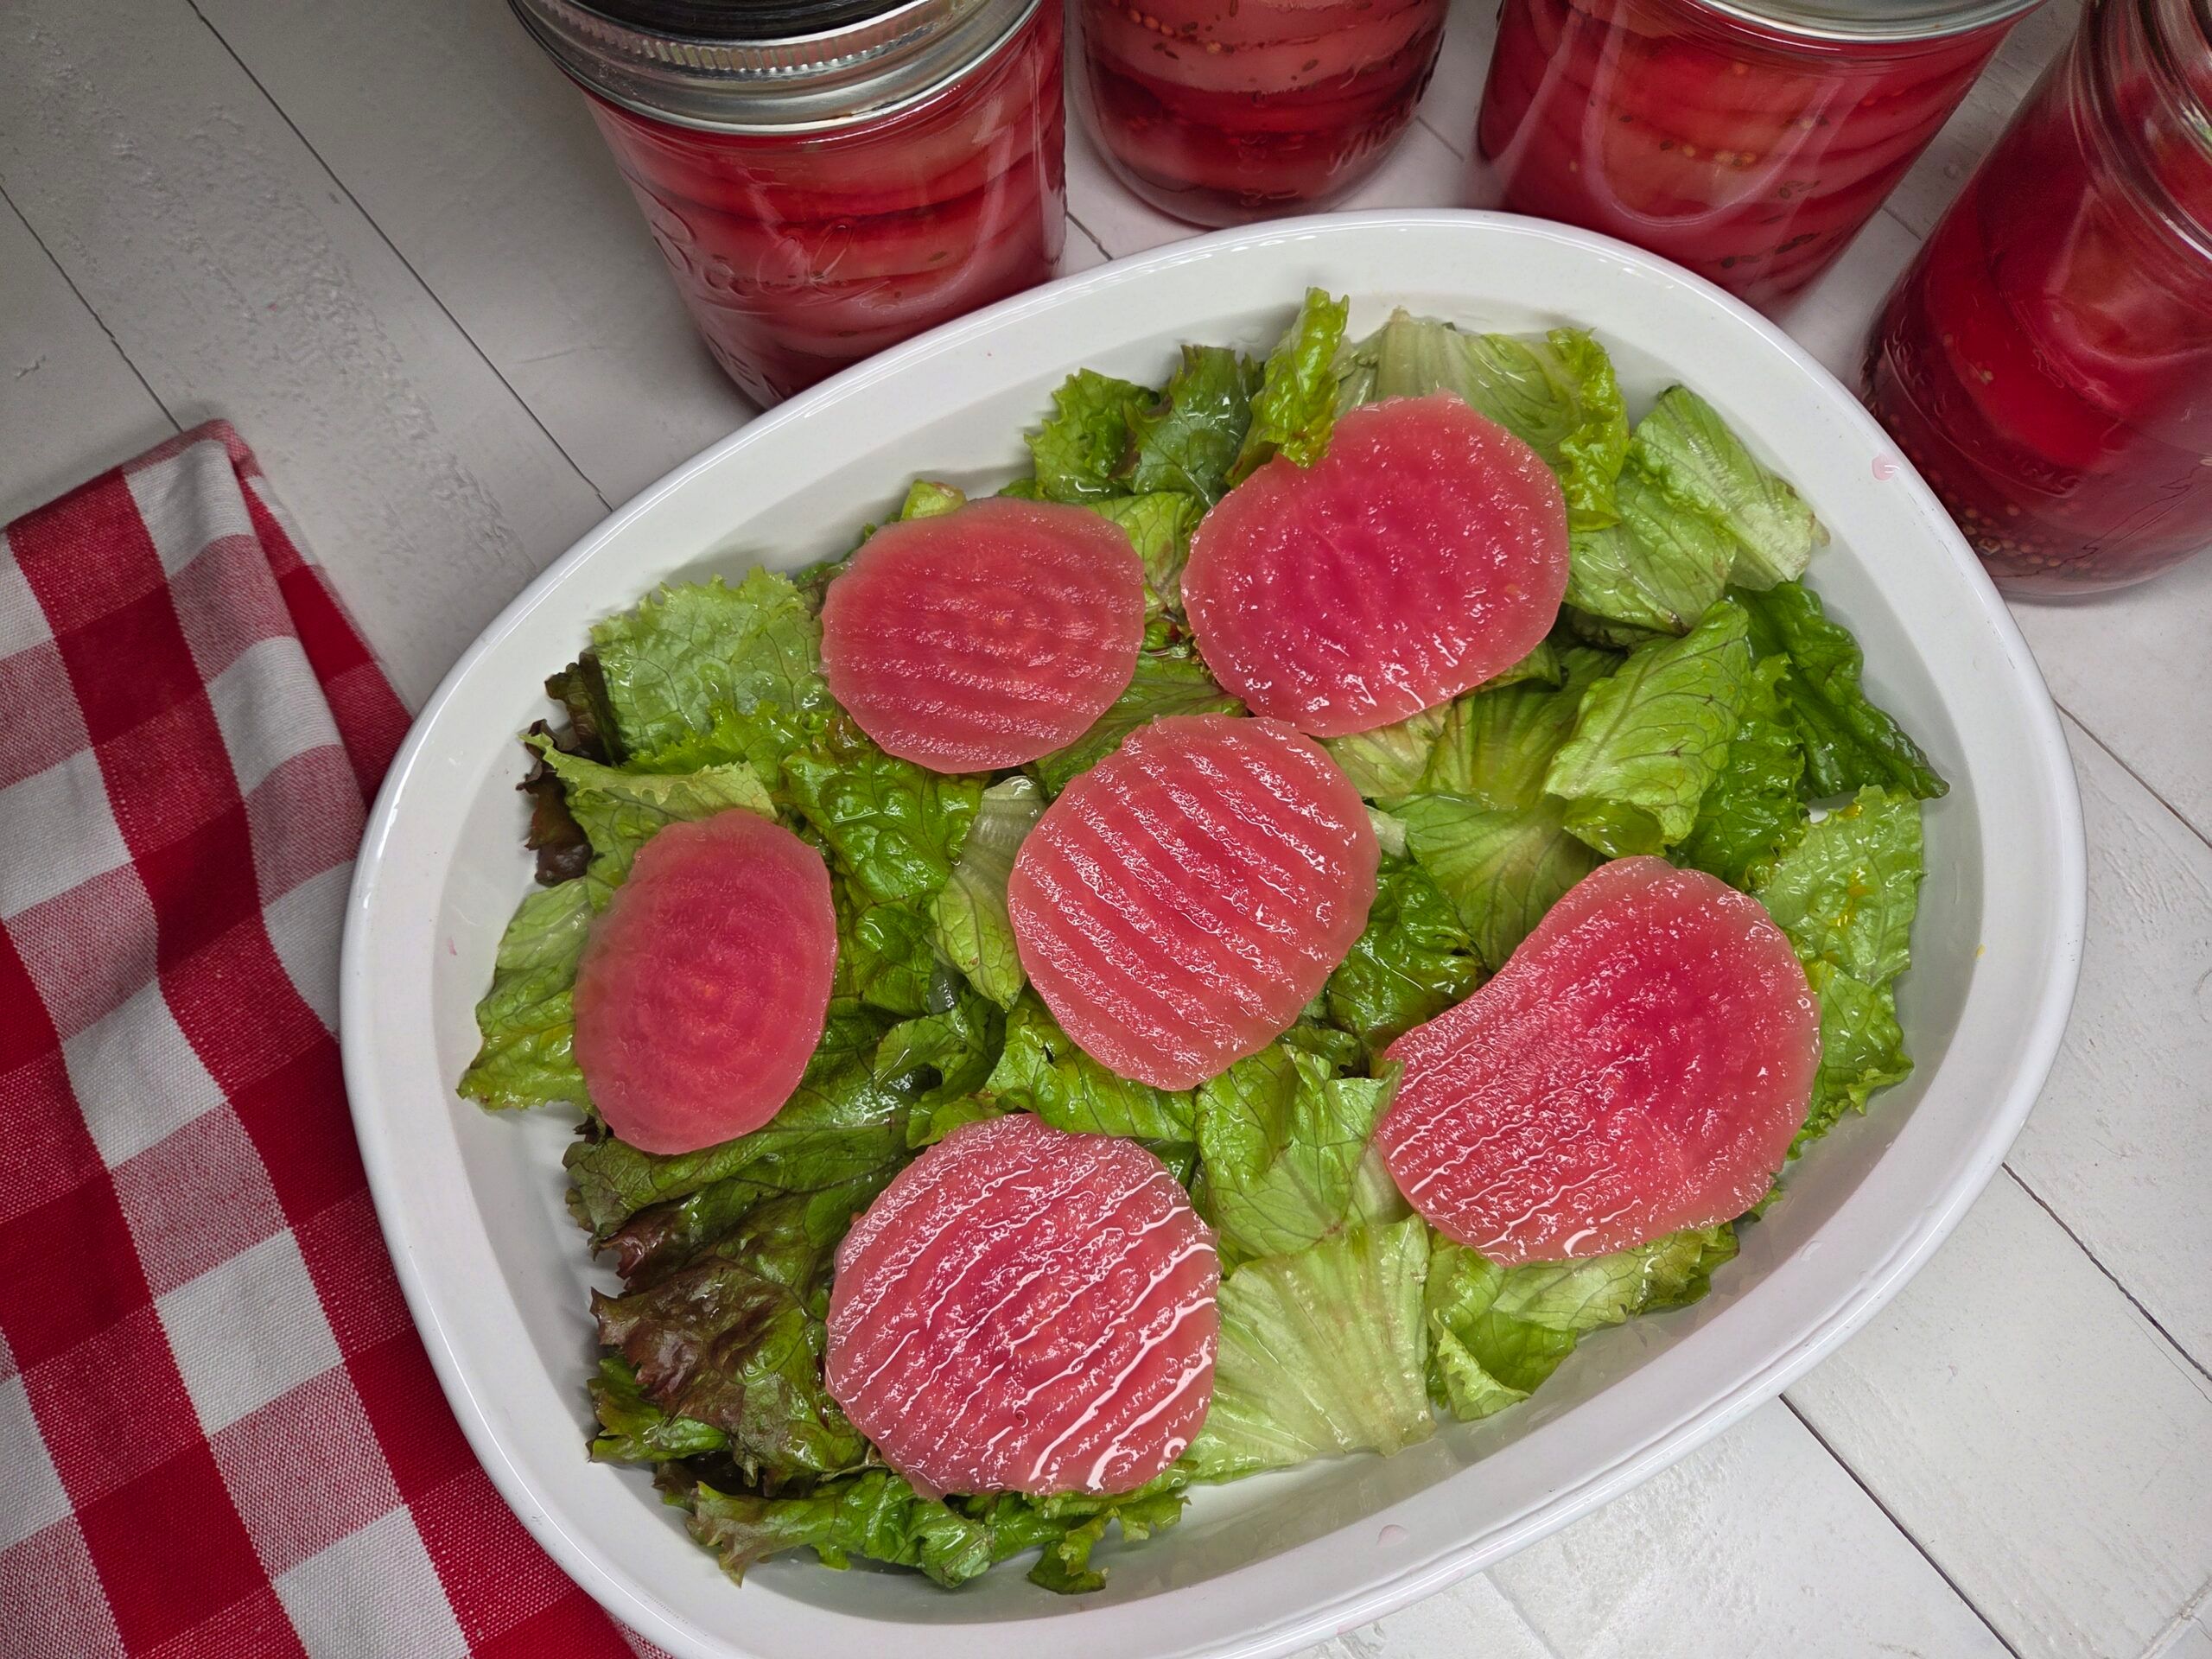
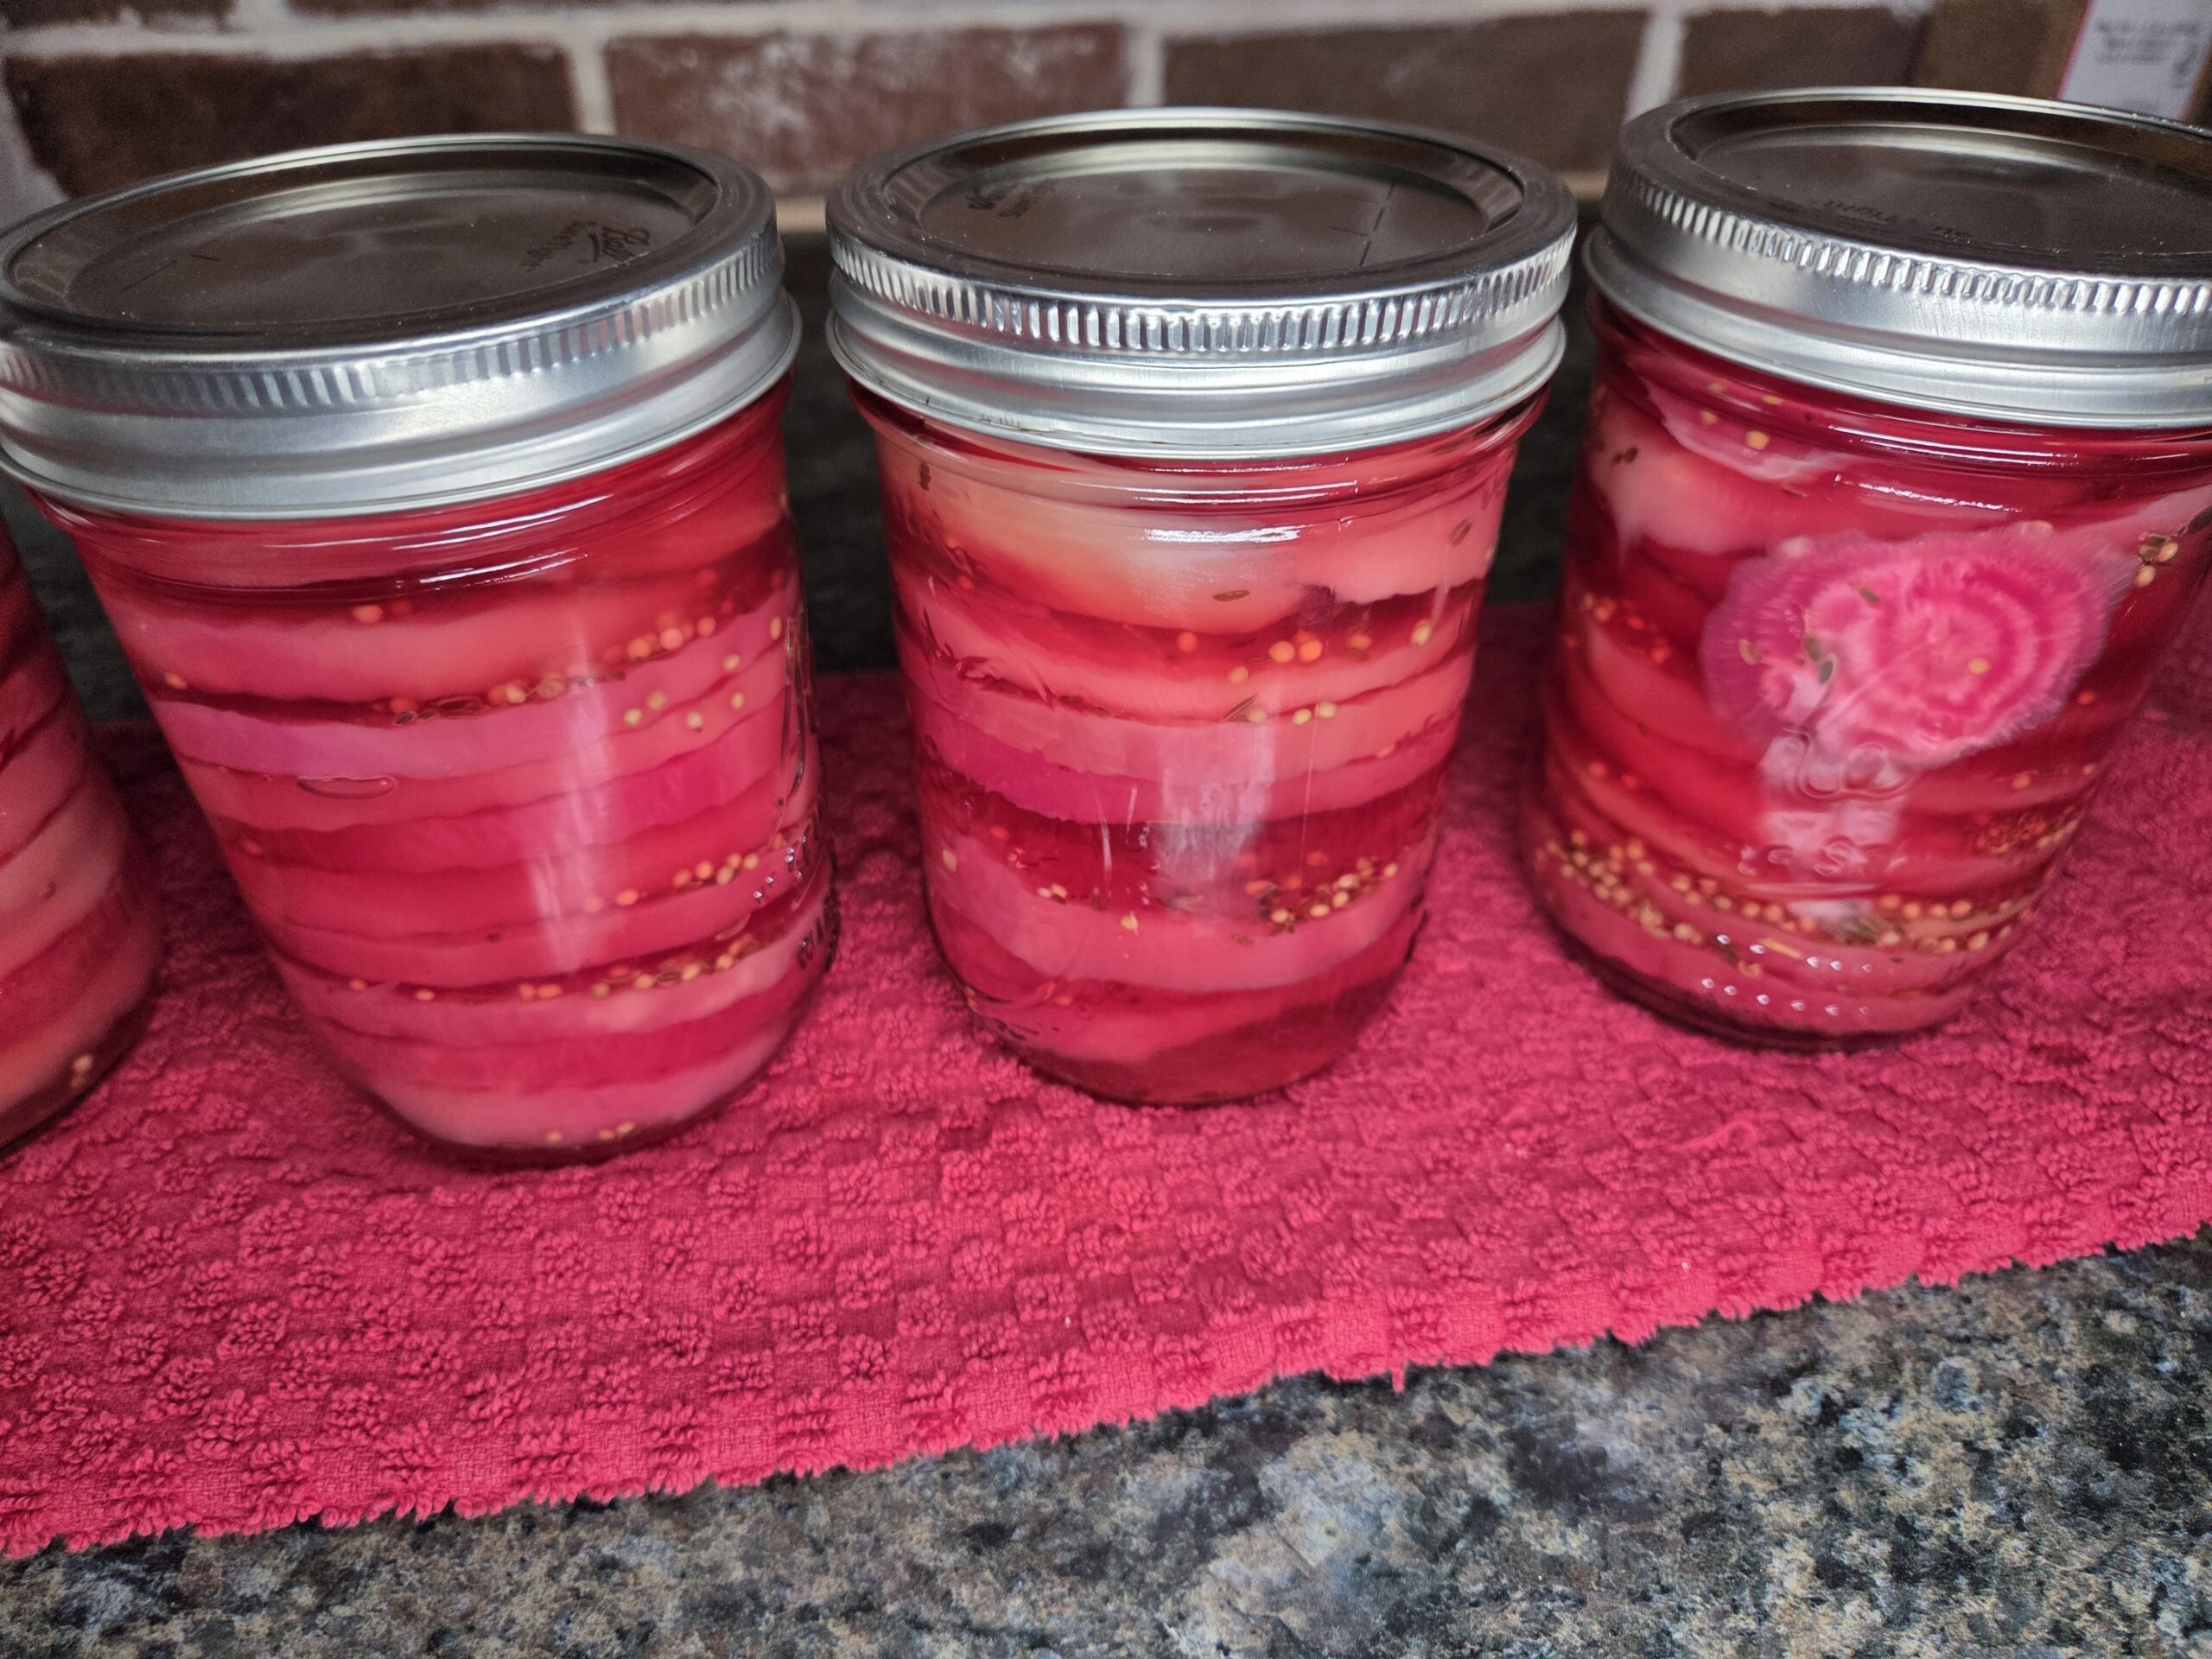
Rinse the beets thoroughly, then slice them into your preferred sizes and shapes. Their beautiful pink‑and‑white rings fade during cooking, often turning light pink. This is normal and doesn’t affect safety or flavor.
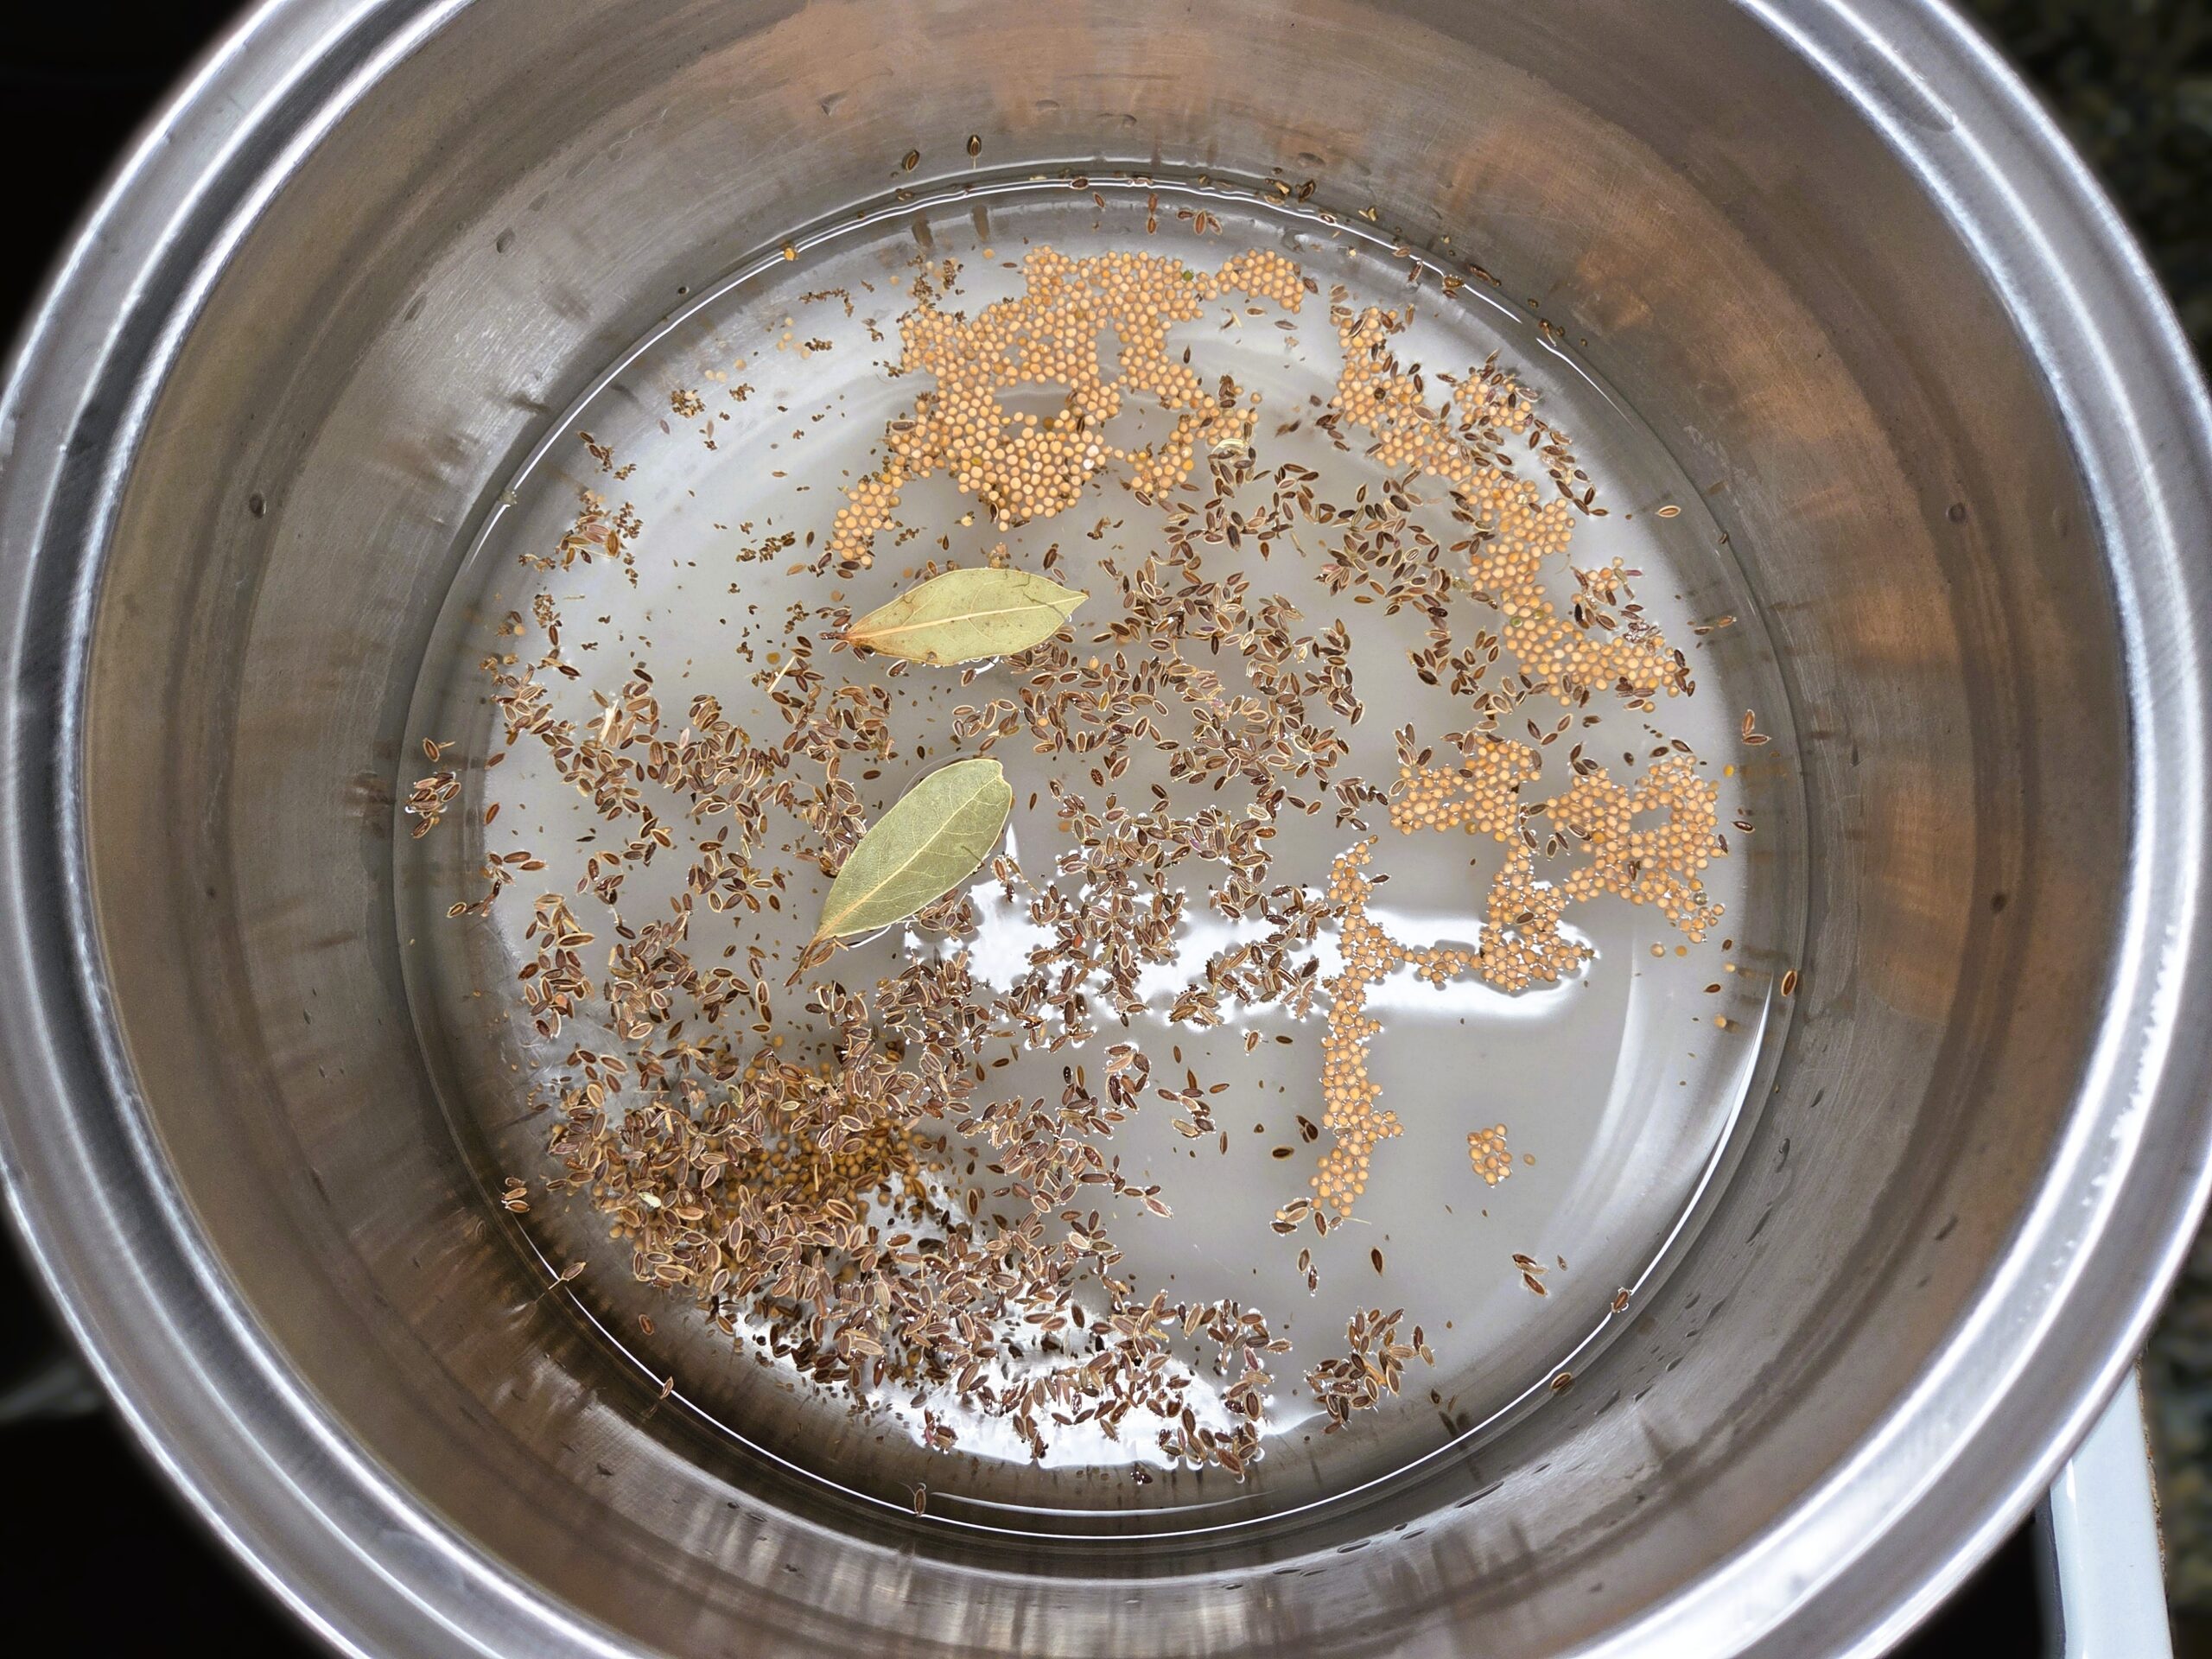
Wash and rinse the same stainless‑steel, nonreactive pot. Add 4 cups of 5% white vinegar, 2 teaspoons mustard seed, 2 teaspoons whole dill seed, 1/4 teaspoon celery seed, 1 1/4 cups sugar, 2 bay leaves, and 1 teaspoon salt. Bring the mixture to a boil.
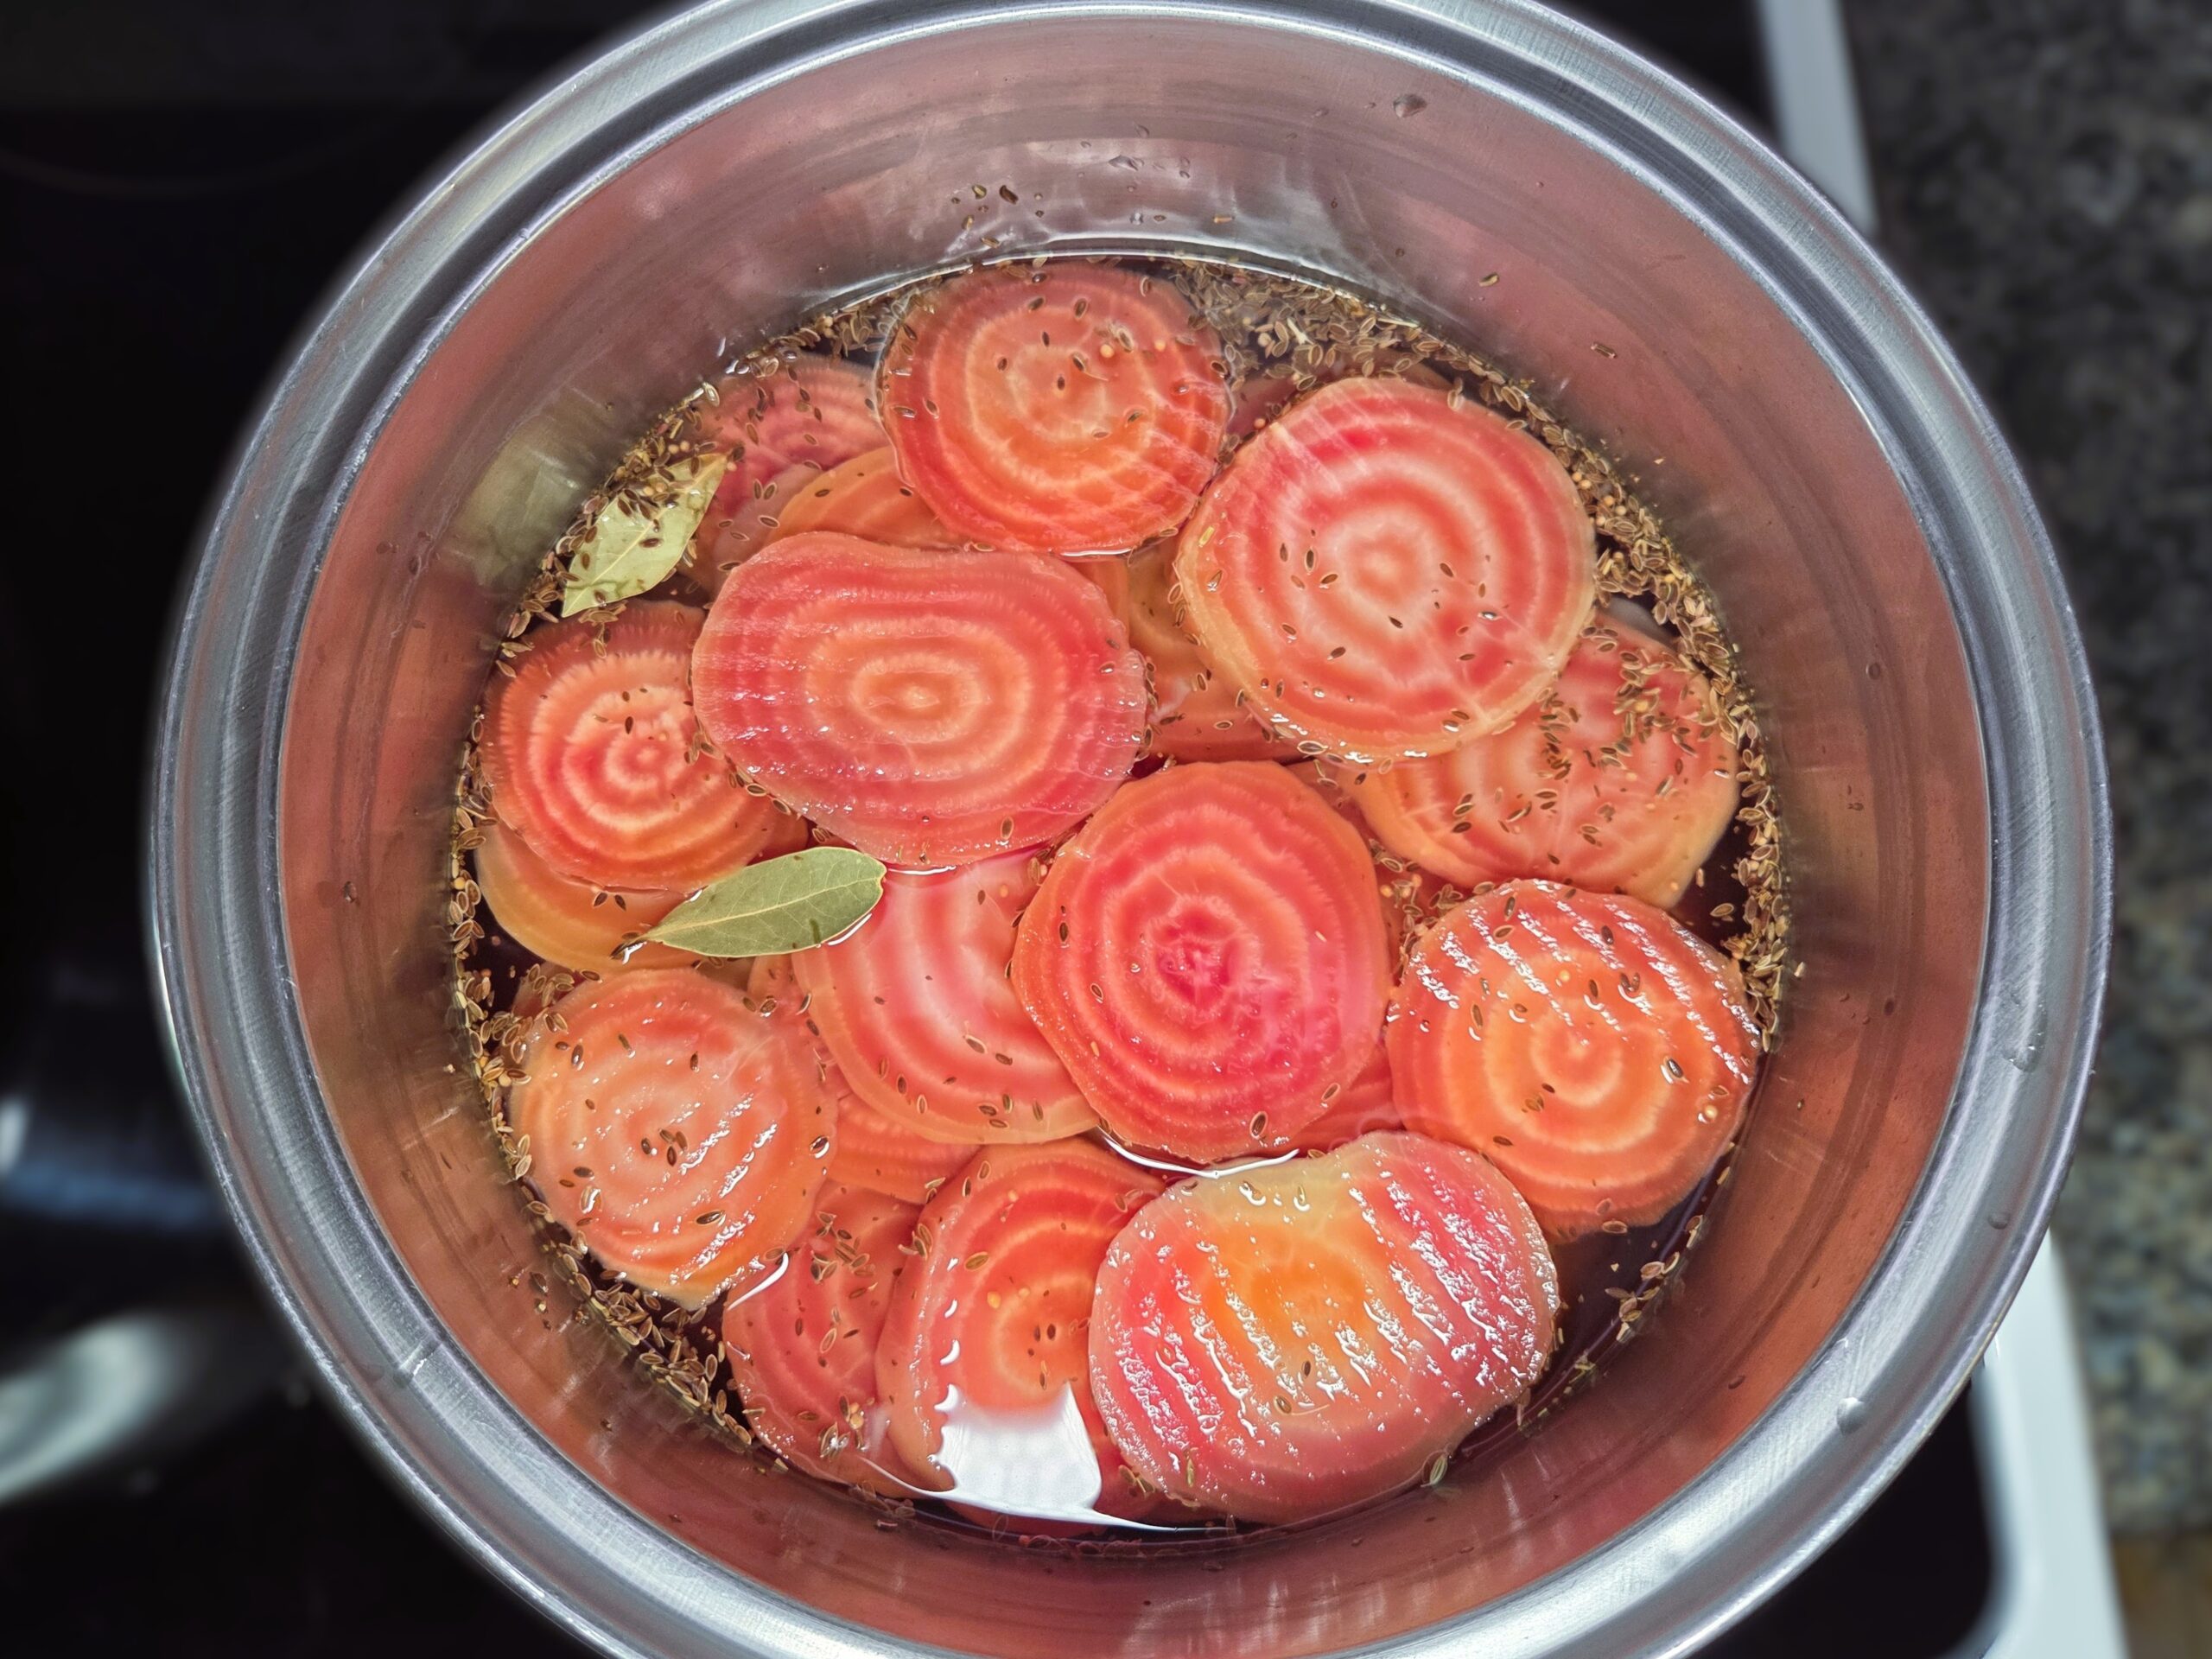
Add the sliced beets to the hot brine and heat them through, as they need to be hot when packed into jars. Remove and discard the bay leaves just before canning.
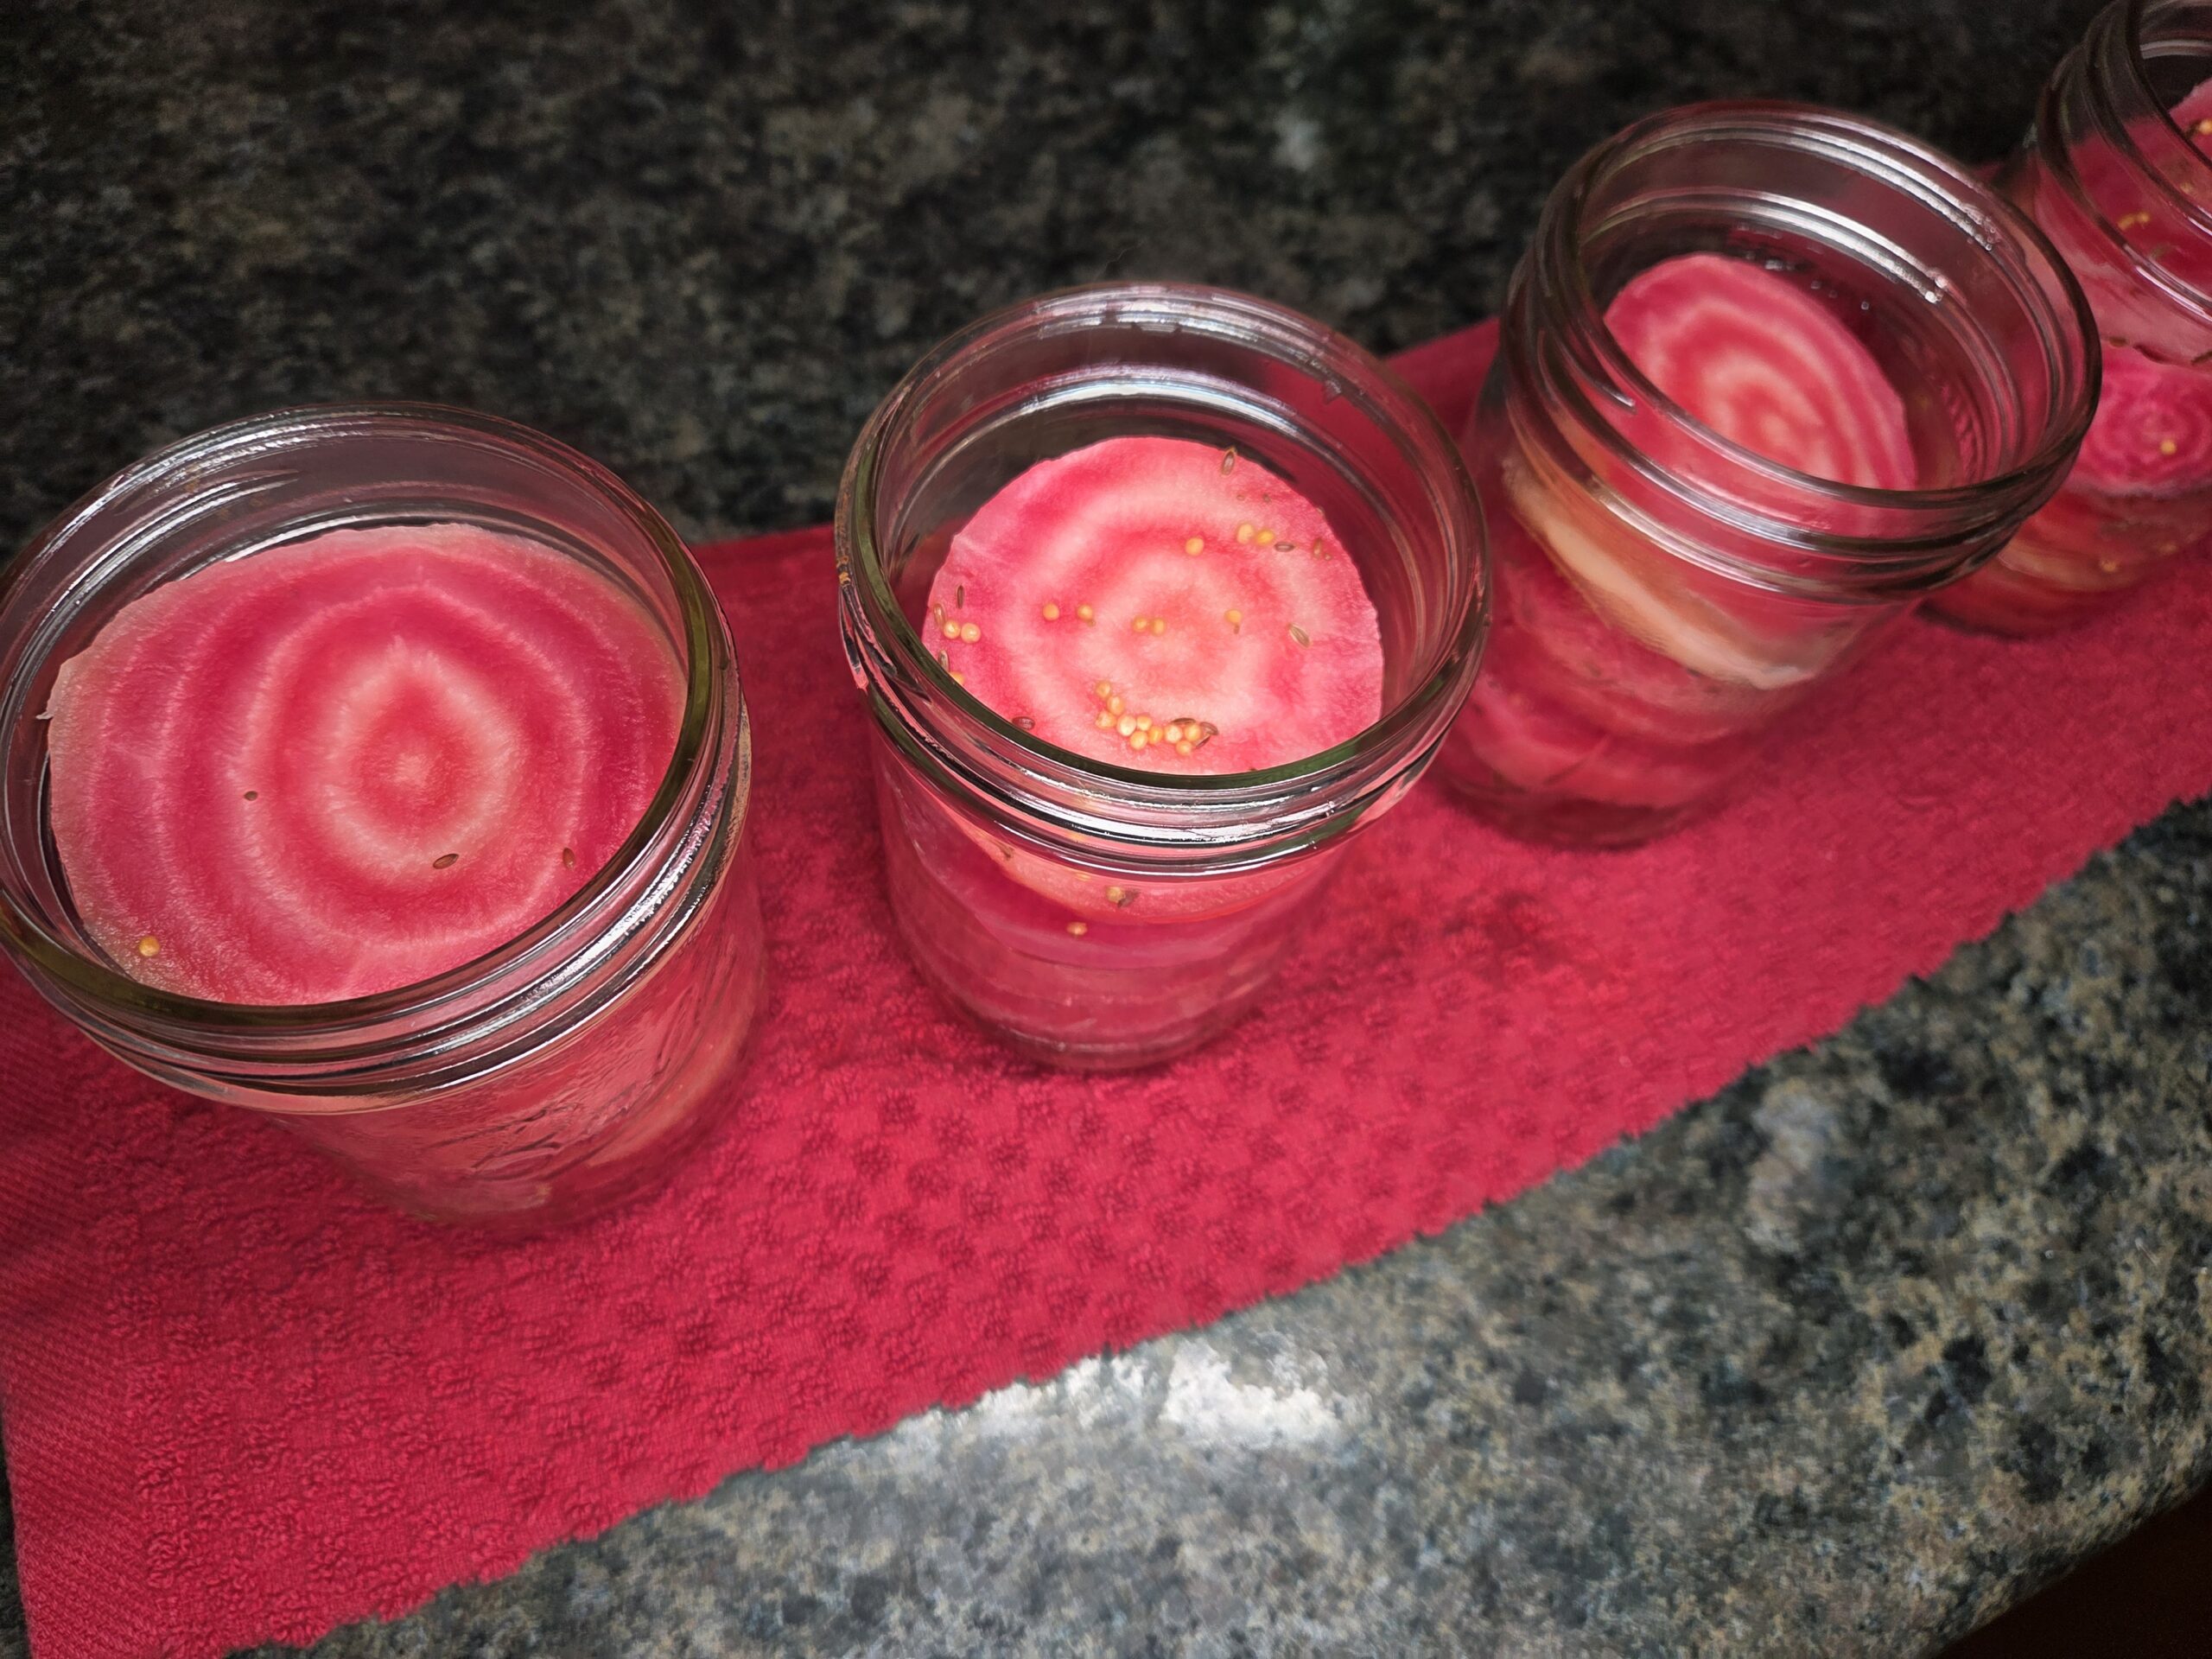
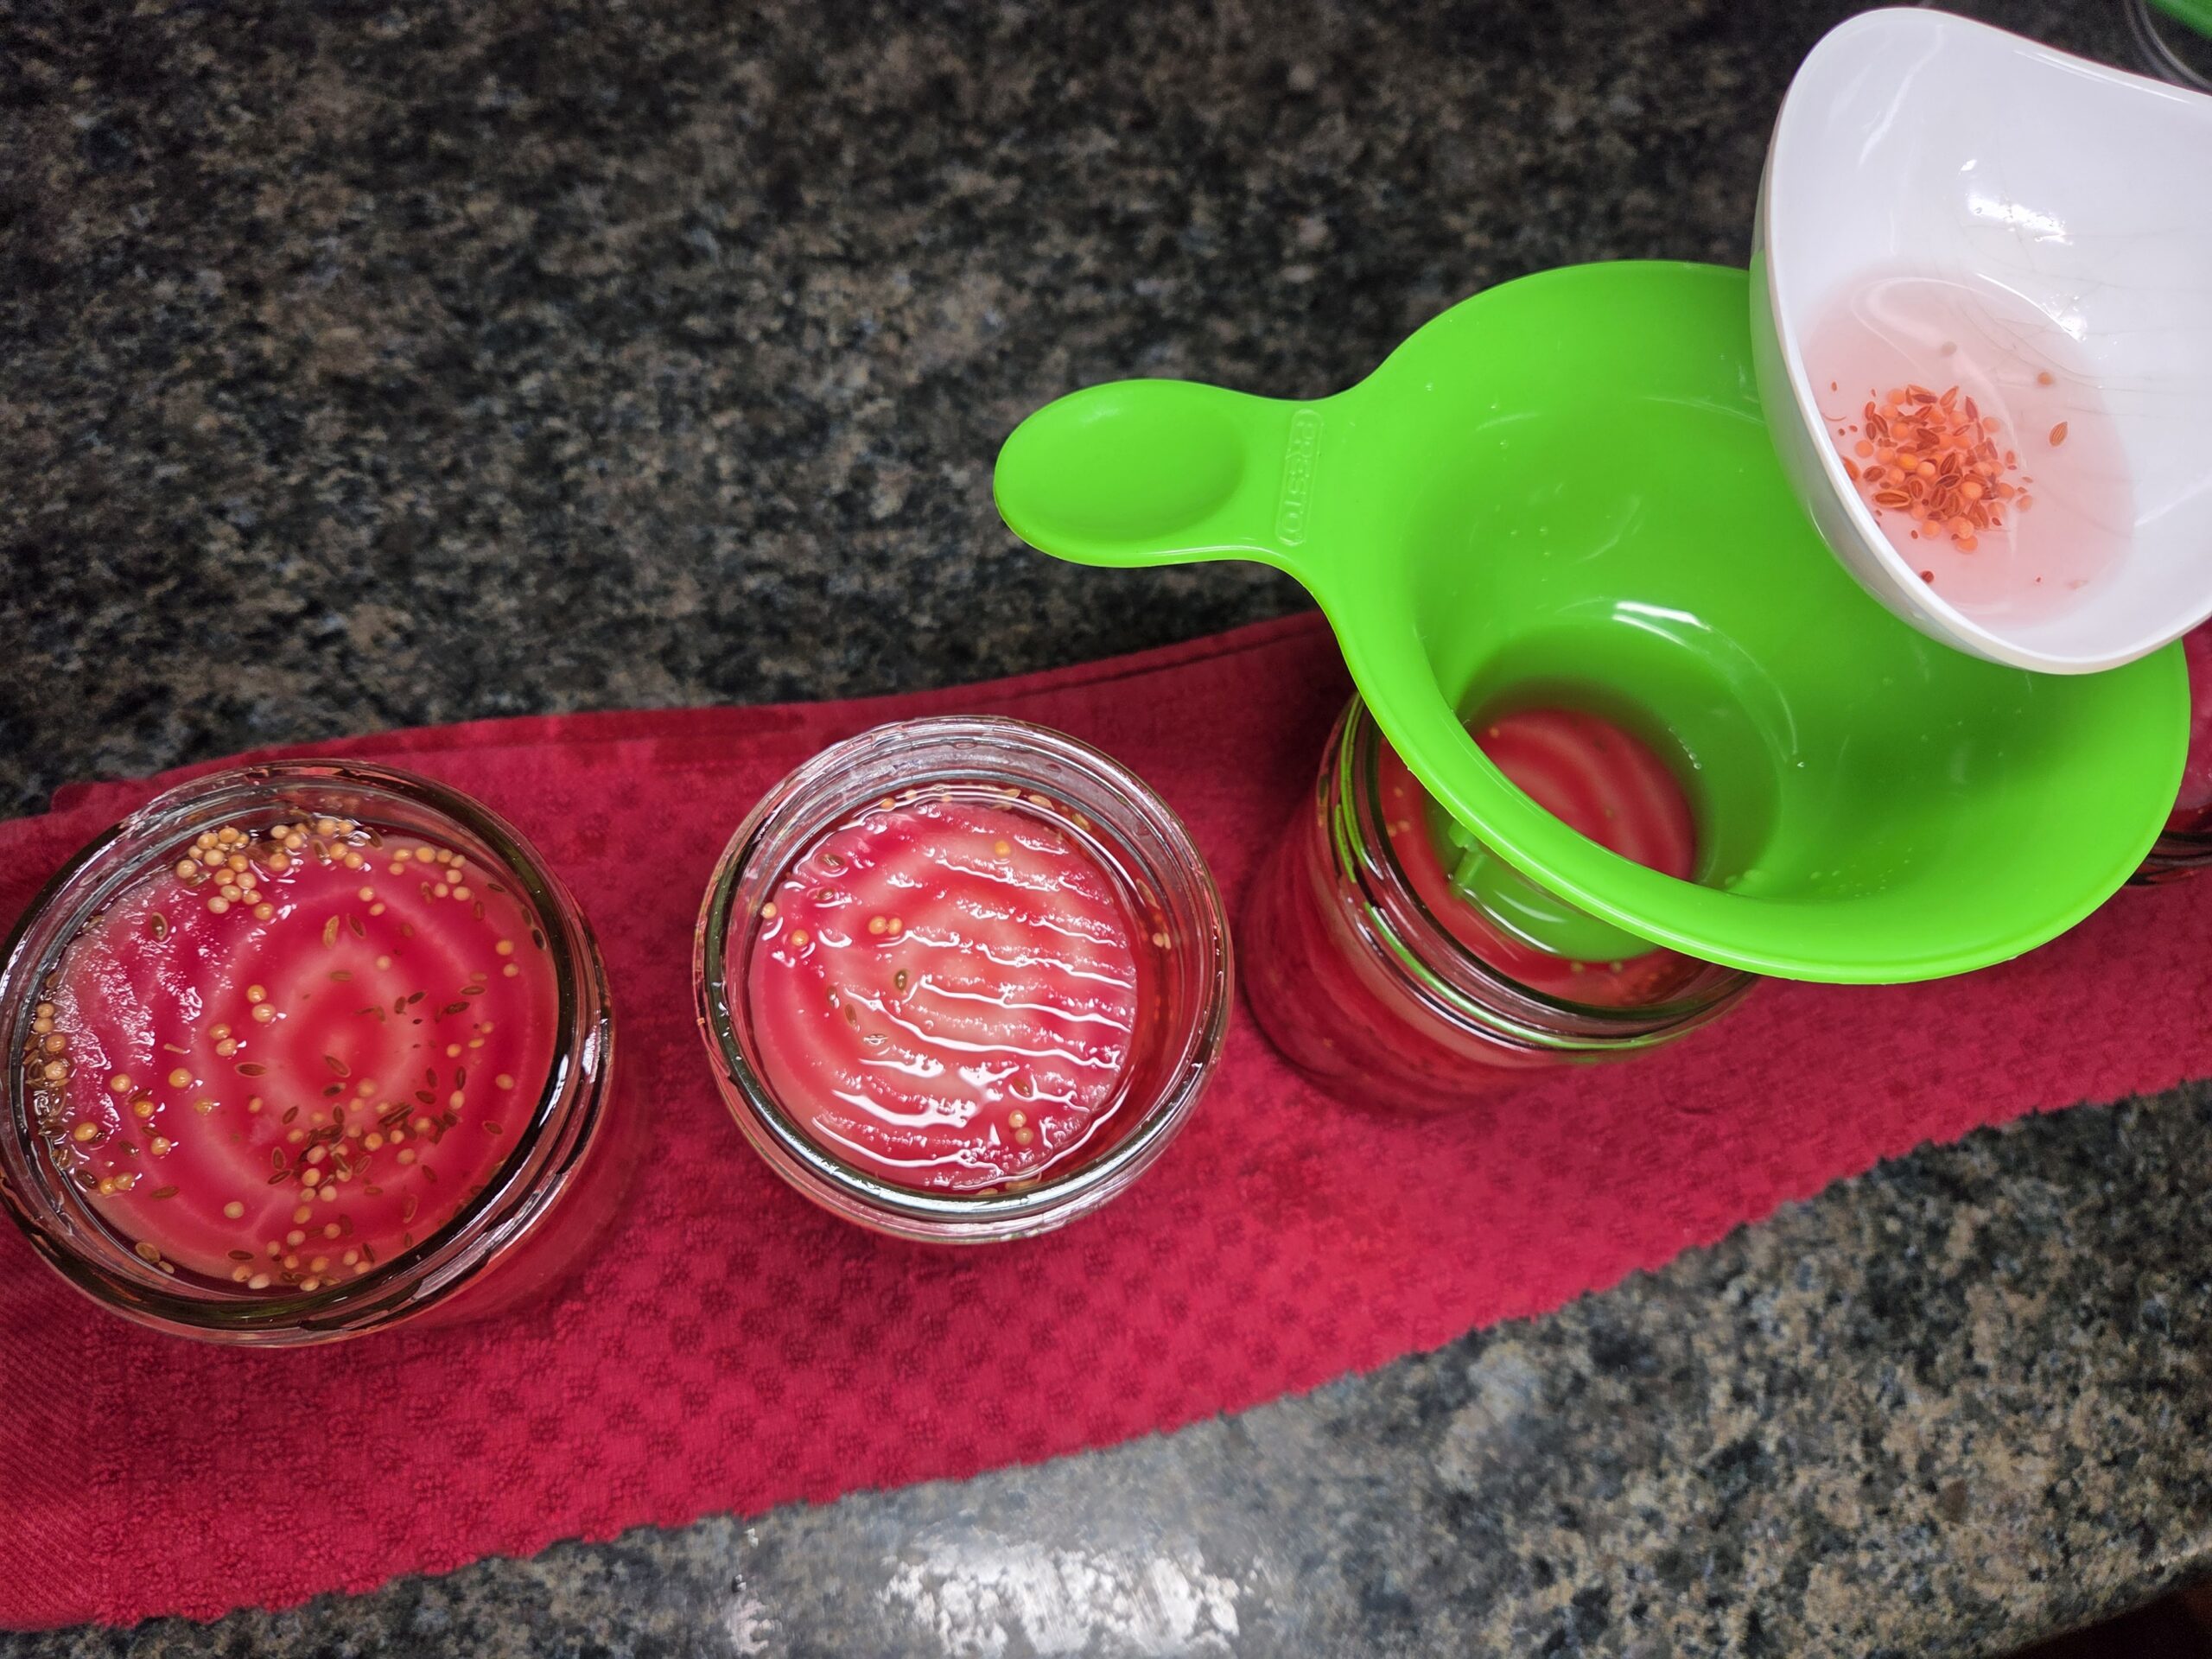
Place the beets into the hot jars, then pour the hot liquid over them, leaving 1/2 inch of space at the top. Use a non-reactive tool to release any trapped air bubbles or pockets.
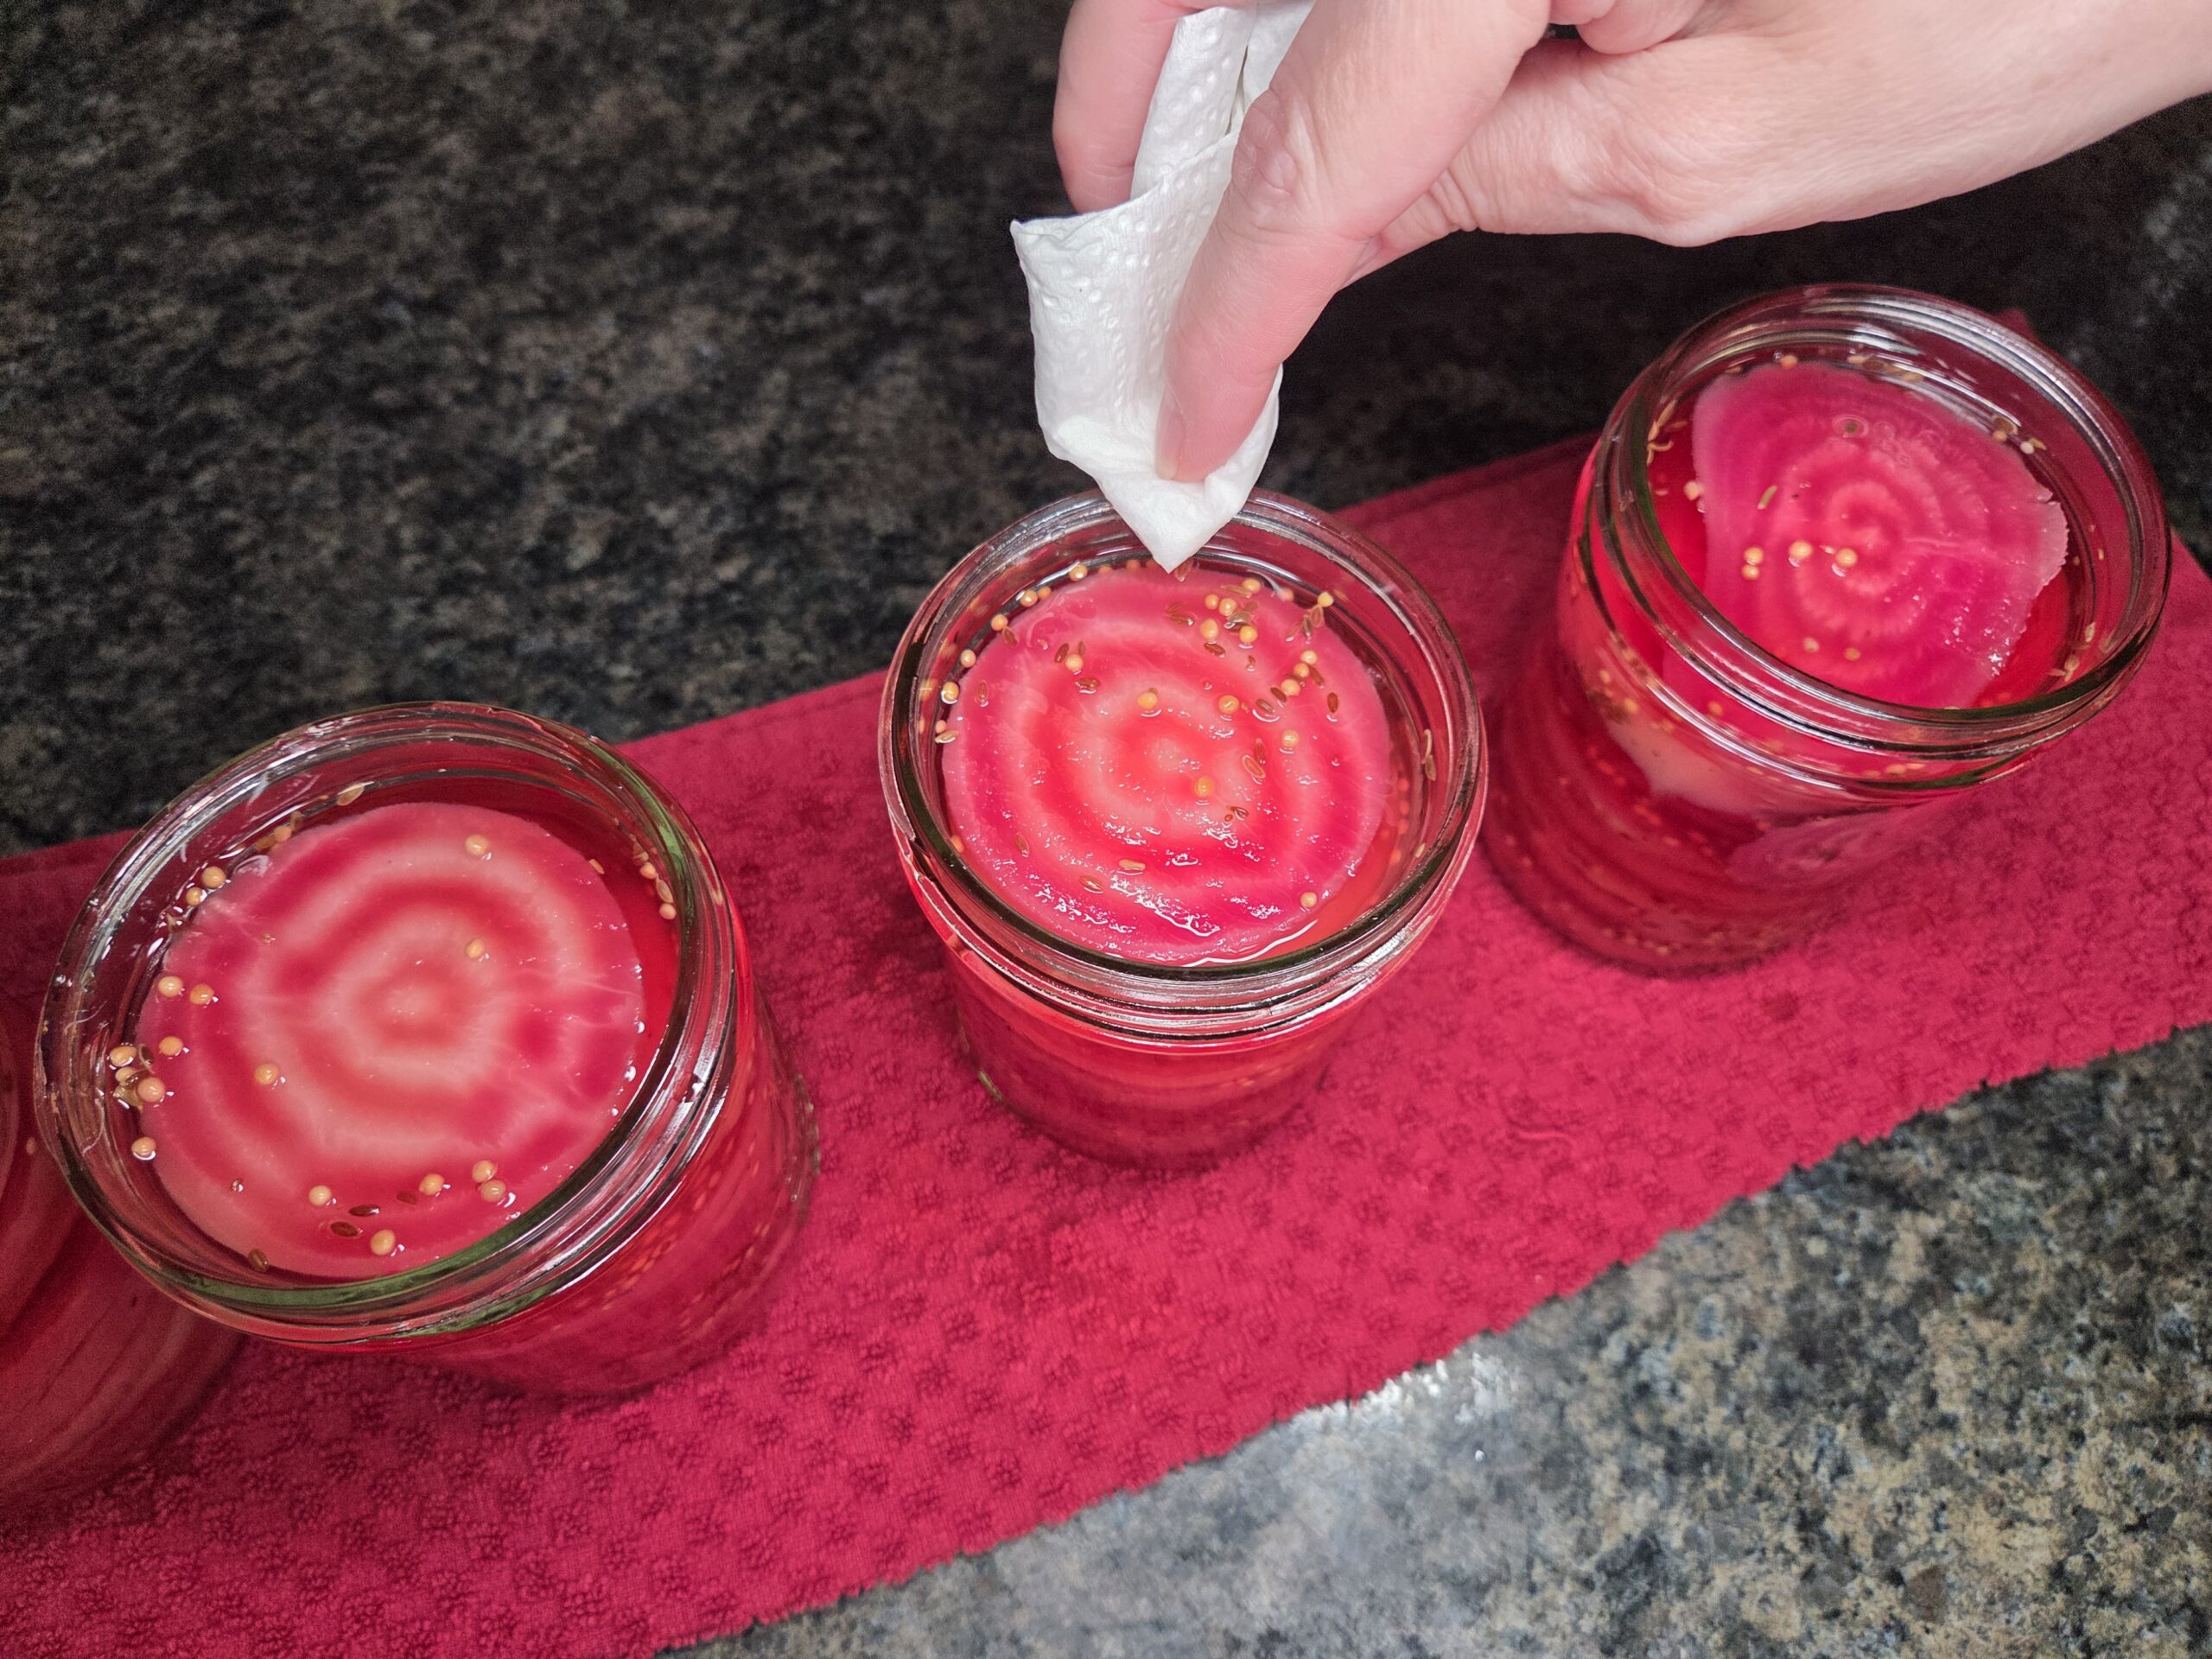
Wipe the jar rims with a clean, damp cloth to remove any residue that could prevent a proper seal. Place the lids on the jars, add the bands, and tighten them to fingertip tightness.
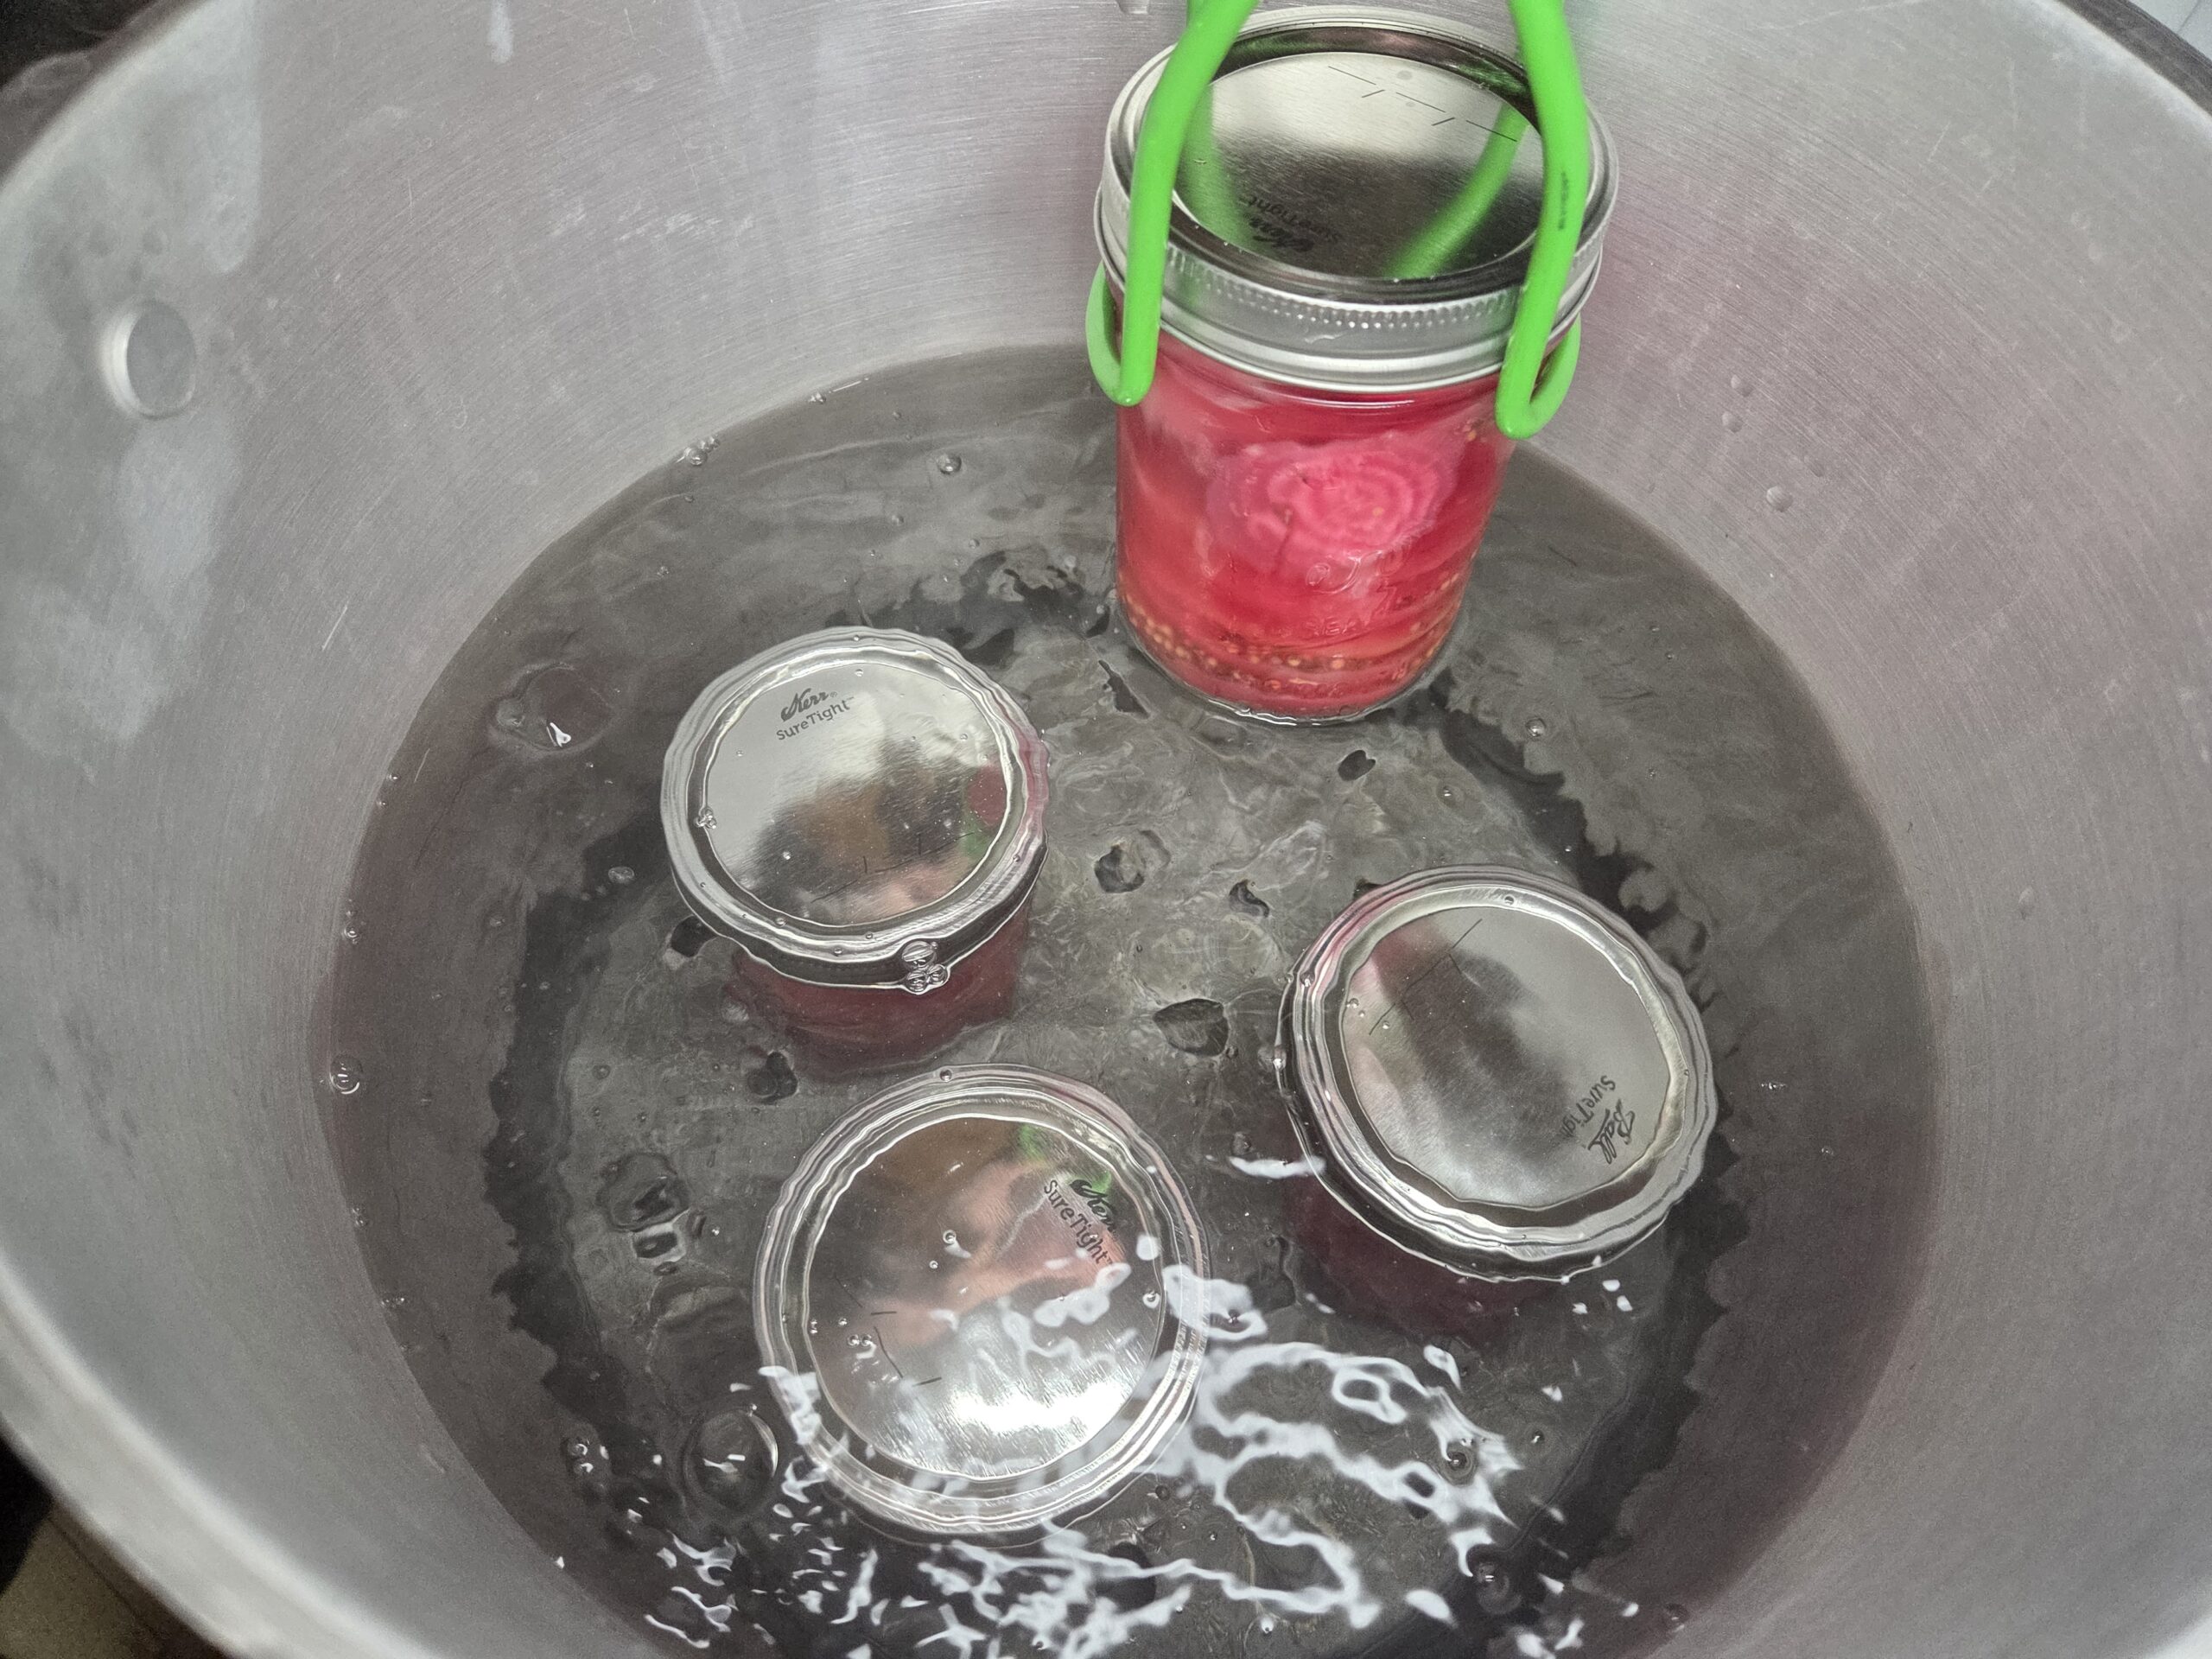
Carefully lower the jars into the boiling water, ensuring they remain upright. When using a jar lifter, make sure it is securely positioned below the neck of the jar (below the screw band of the lid). Keep the jar upright at all times. Tilting the jar could cause food to spill into the sealing area of the lid. Make sure the water covers the jars by 1–2 inches. Place the lid on the canner.
Begin timing once the water returns to a full boil. Process pints or quarts for 30 minutes at elevations from sea level to 1,000 feet. For 1,001–3,000 feet, process for 35 minutes; for 3,001–6,000 feet, process for 40 minutes; and for elevations above 6,000 feet, process for 45 minutes. When the processing time is complete, turn off the heat, move the canner off the burner if possible, and carefully remove the lid. Let the jars rest in the hot water for 5 minutes before lifting them out. Place the jars upright on a towel‑lined countertop and leave them undisturbed for 12 to 24 hours. Jars may take several hours to seal, though many seal within the first 30 minutes or even during processing. After 12 hours, check the seals and clean the jars. Label with contents and date. Store sealed jars for up to one year. Refrigerate any jars that did not seal.
Enjoy!
Conclusion
Kitchen Tools :Need some tools or ingredients to make this recipe? Use my Amazon Affiliate links to shop. I will make a small commission and it doesn't cost you any extra. Thank you for visiting.
Burpee Chioggia Beet Seeds Gardeners Basics, Beet Seeds Golden Detroit Beet Seeds McCormick Culinary Whole Yellow Mustard Seed McCormick Culinary Whole Dill Seed McCormick Gourmet Celery Seed Morton All Natural Canning & Pickling Salt Crinkle Cut Knife, Potato and Vegetable Cutter, Stainless Steel Presto 23-Quart Induction Compatible Pressure Canner, Silver, Aluminum
Leave a Review