-
Prep Time15 minutes
-
Cook Time15 minutes plus canning time
-
Serv SizeYields 3 pint jars
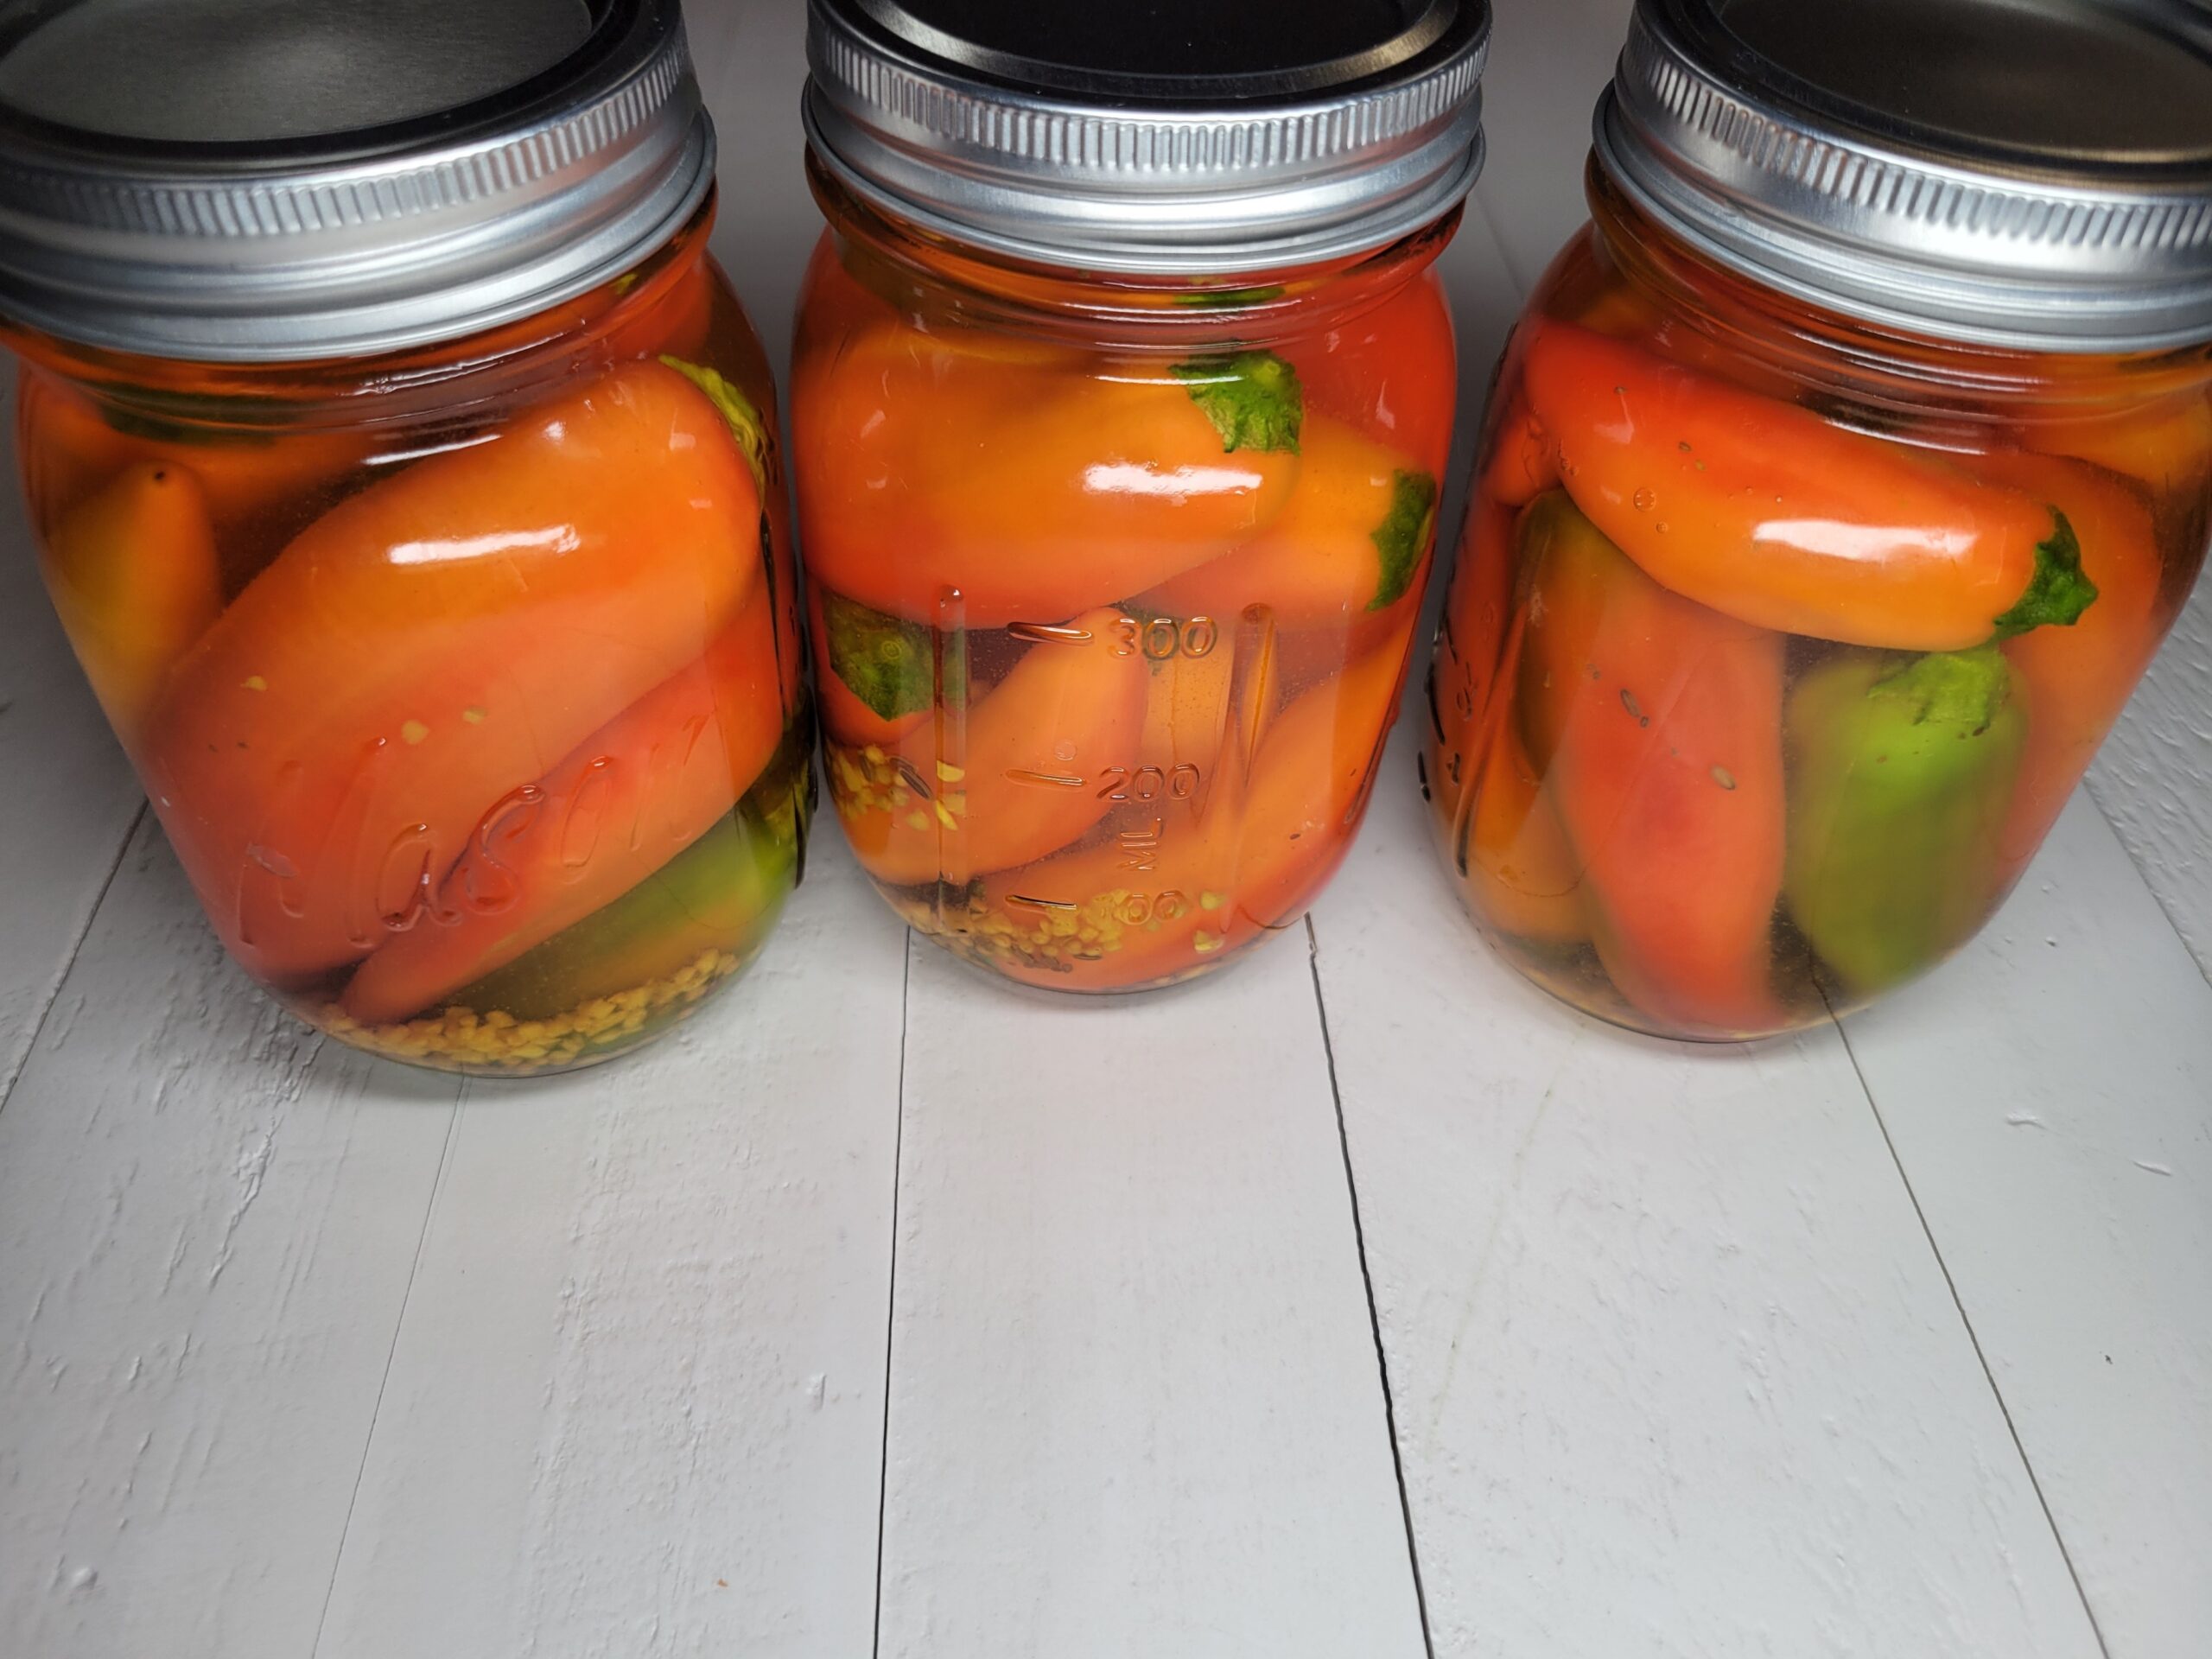
Pickled tangerine peppers boast a sweet, tangy flavor that goes perfectly with sandwiches, burgers, wraps, Italian pasta salads, pizzas, cheese and crackers, and so much more.
Ingredients
Directions
This recipe yields 3 pints of pickled whole tangerine peppers, accompanied by water bath canning instructions. If you aren't canning these but still want to do the recipe for refrigerator pickled peppers, follow steps 1-5, cool, refrigerate, and enjoy! We grow, pickle, and can a variety of peppers, and these specific ones we give to our friends and family as centerpieces because they look so festive for the fall season. You can also do a combination of red and green jalapenos for a festive Christmas design.
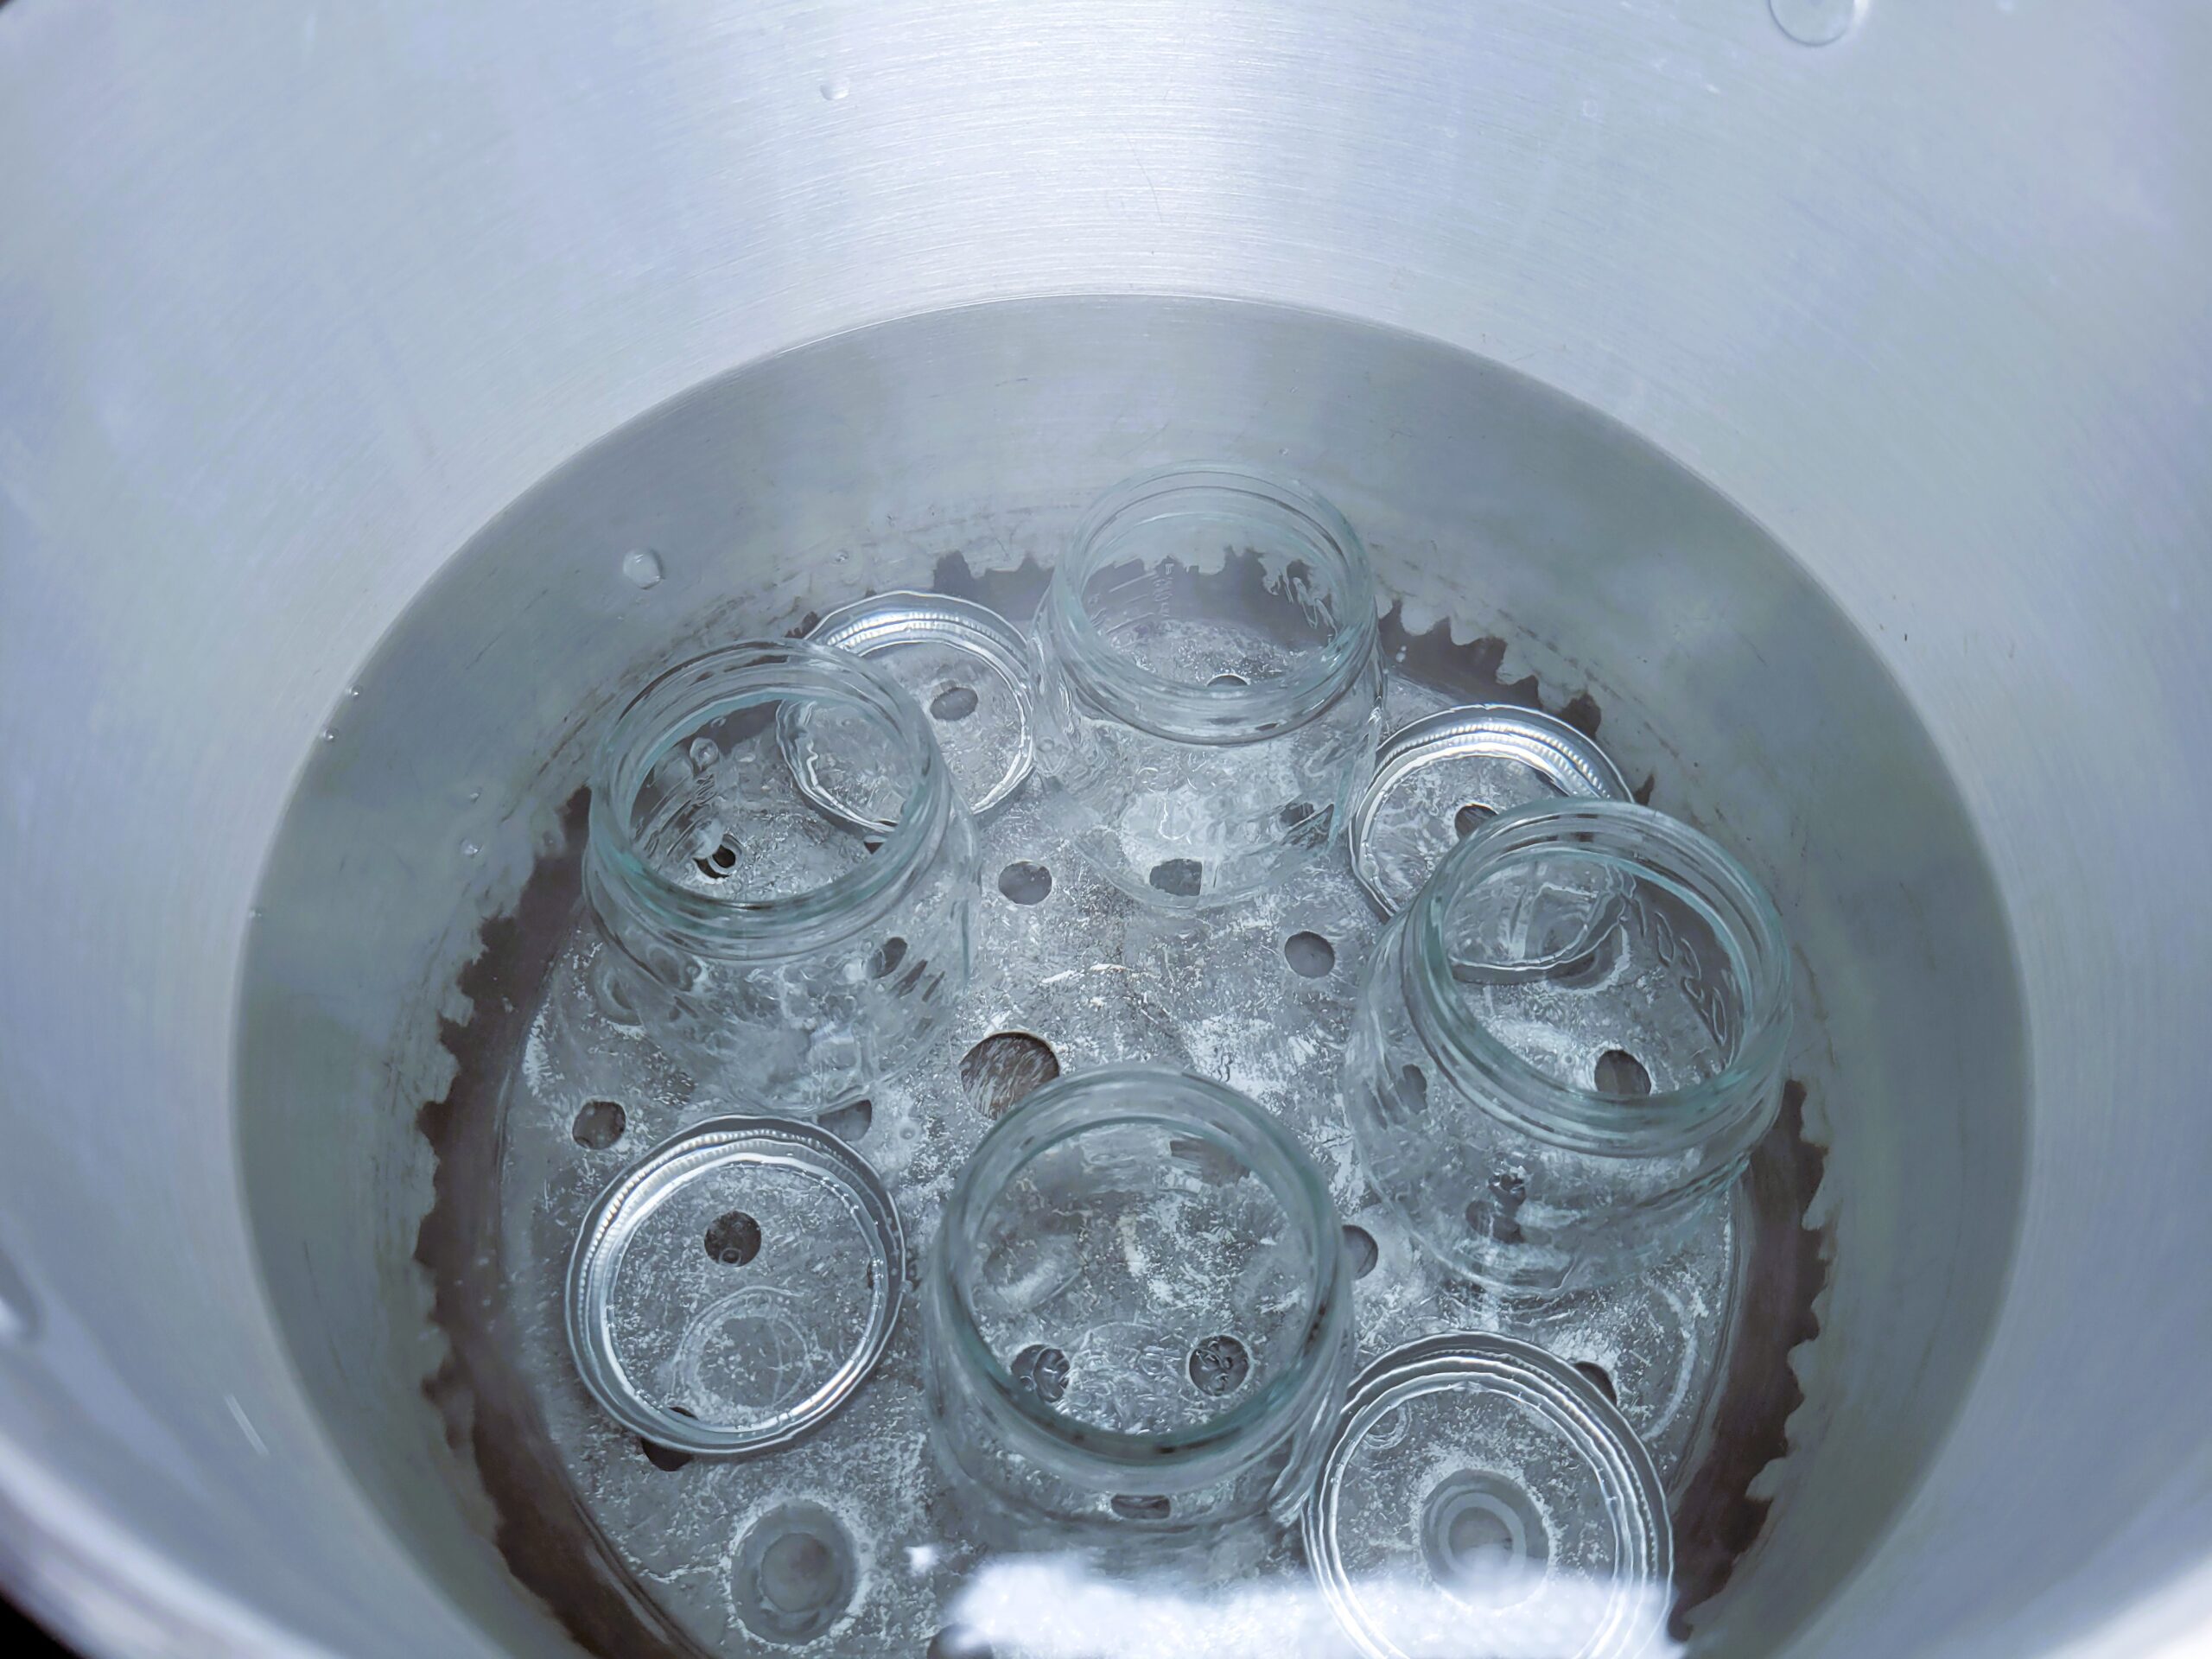
Wash jars, bands, and lids in warm, soapy water. Fill the canner with enough water to cover the jars while they are standing up. Boil jars and bands for at least 10 minutes before filling them. DO NOT boil lids, as this will compromise their sealing ability.
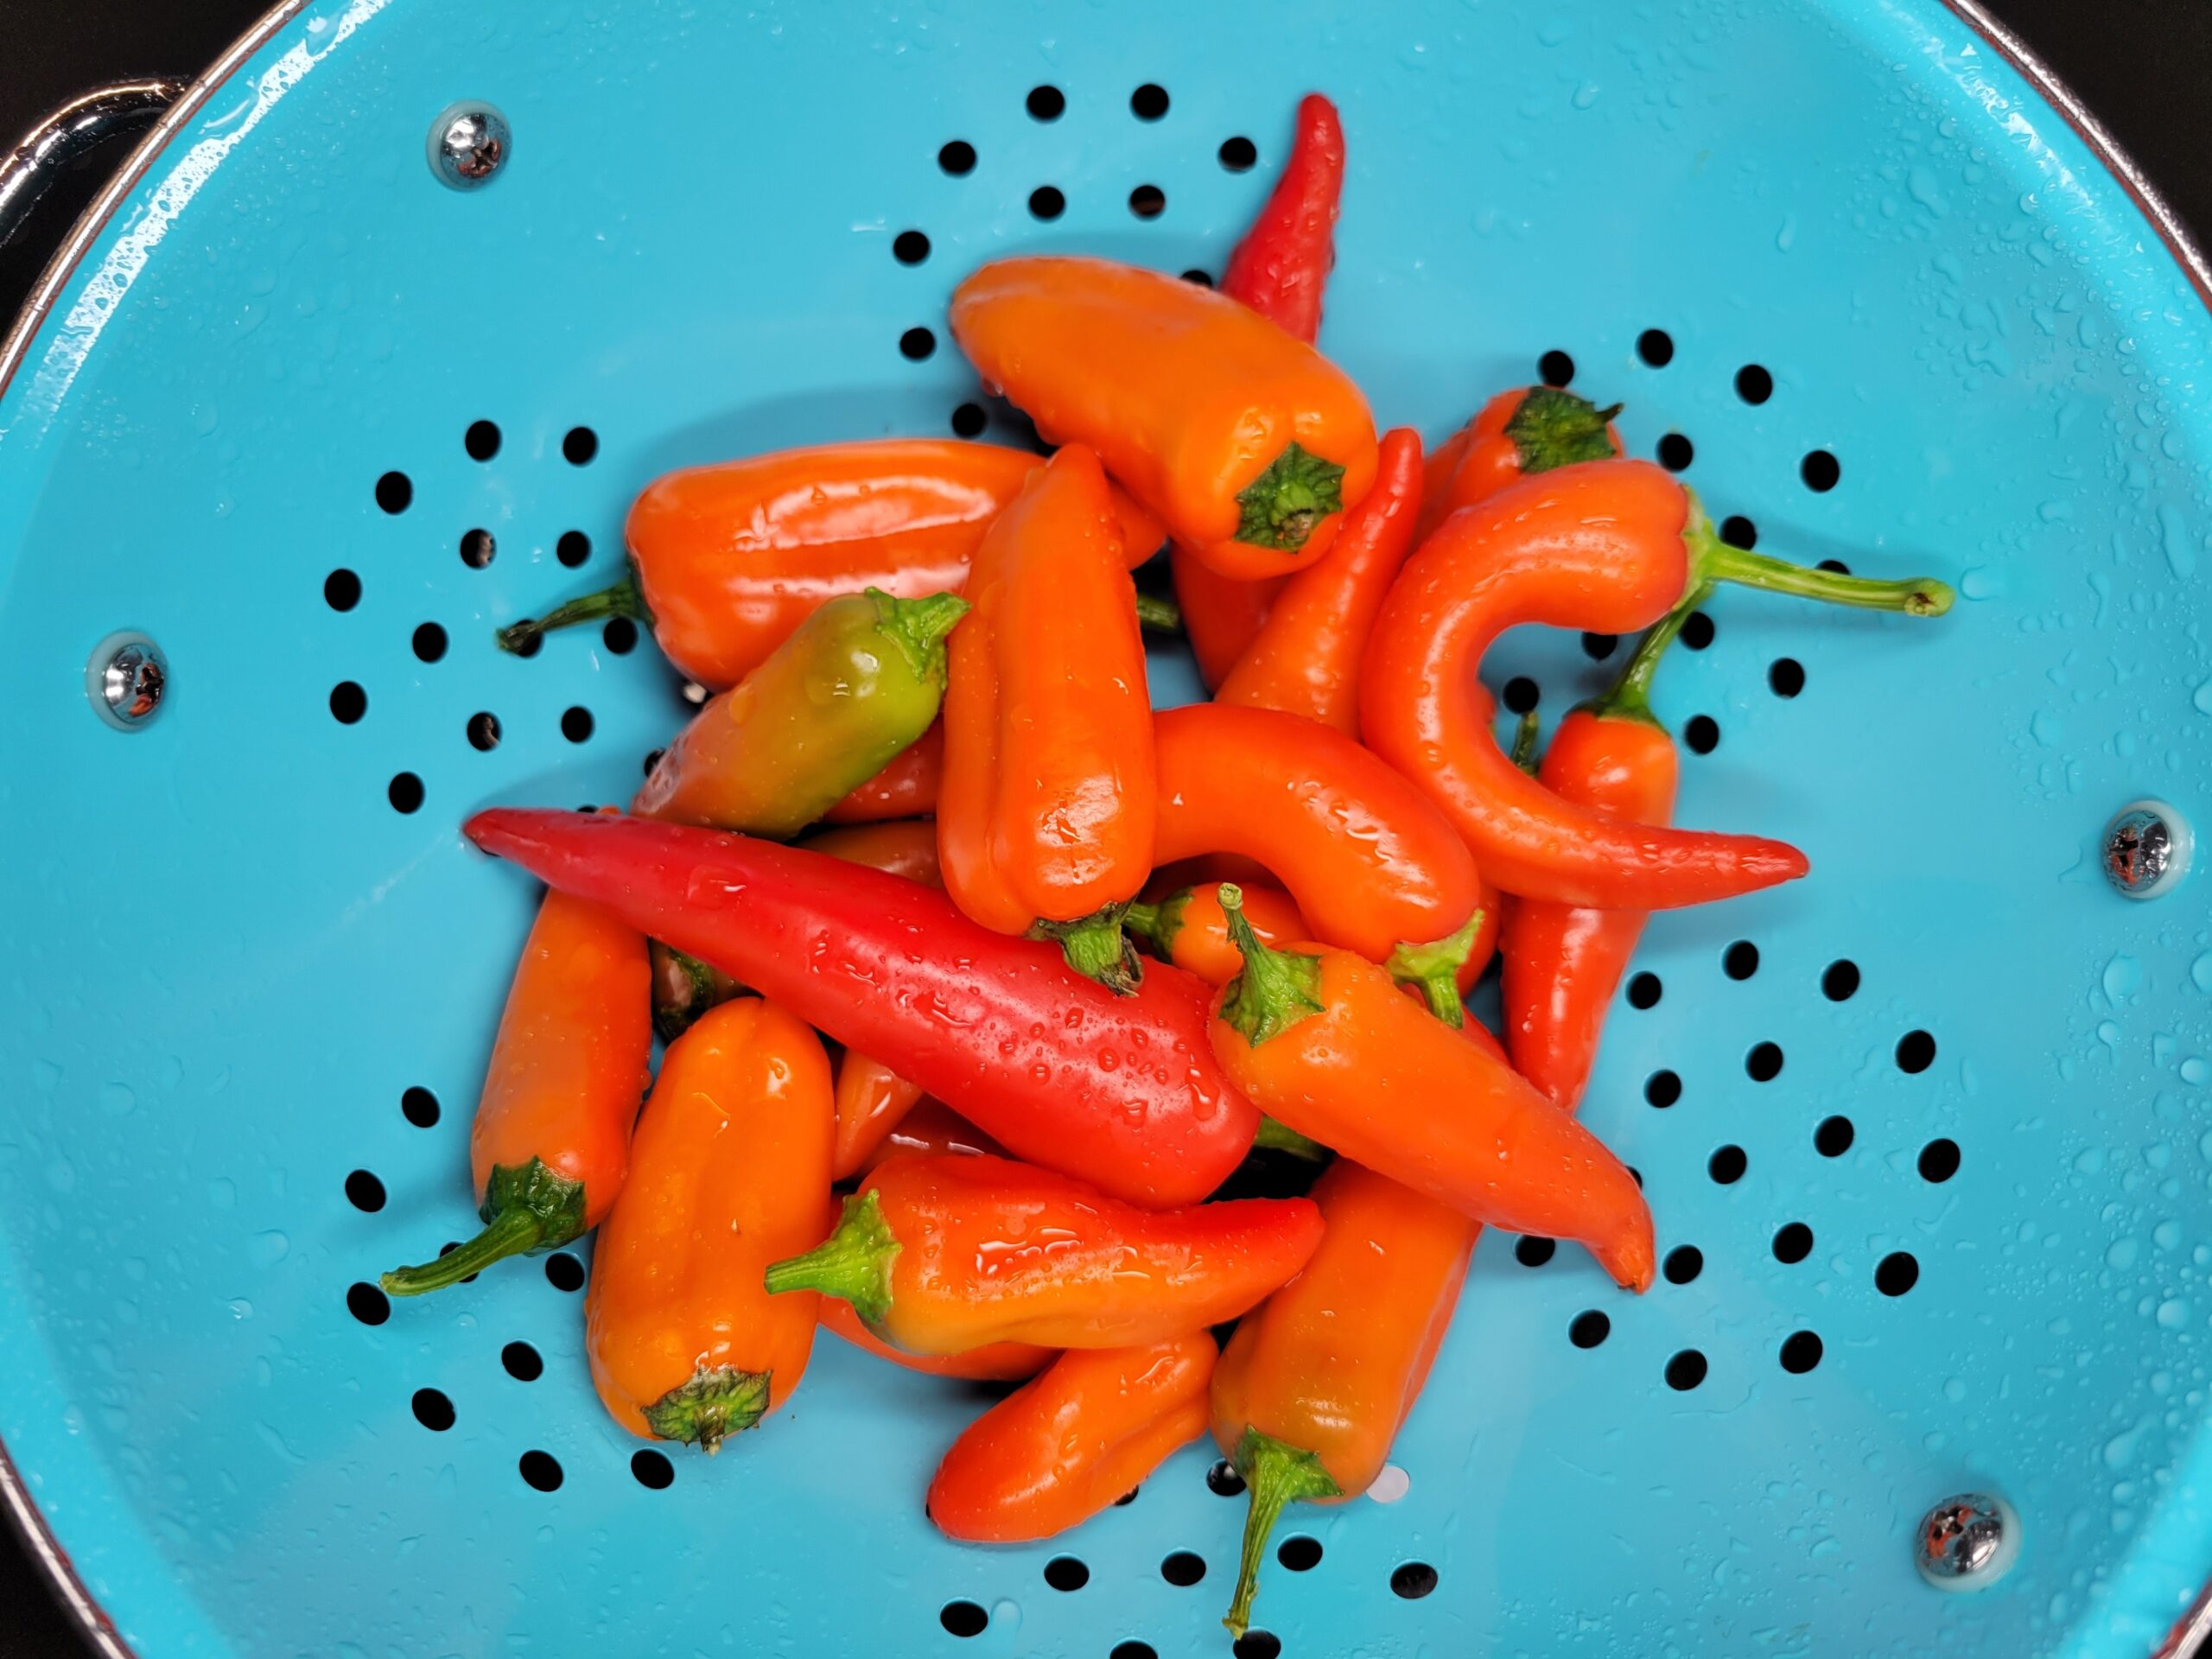
Wash tangerine peppers.
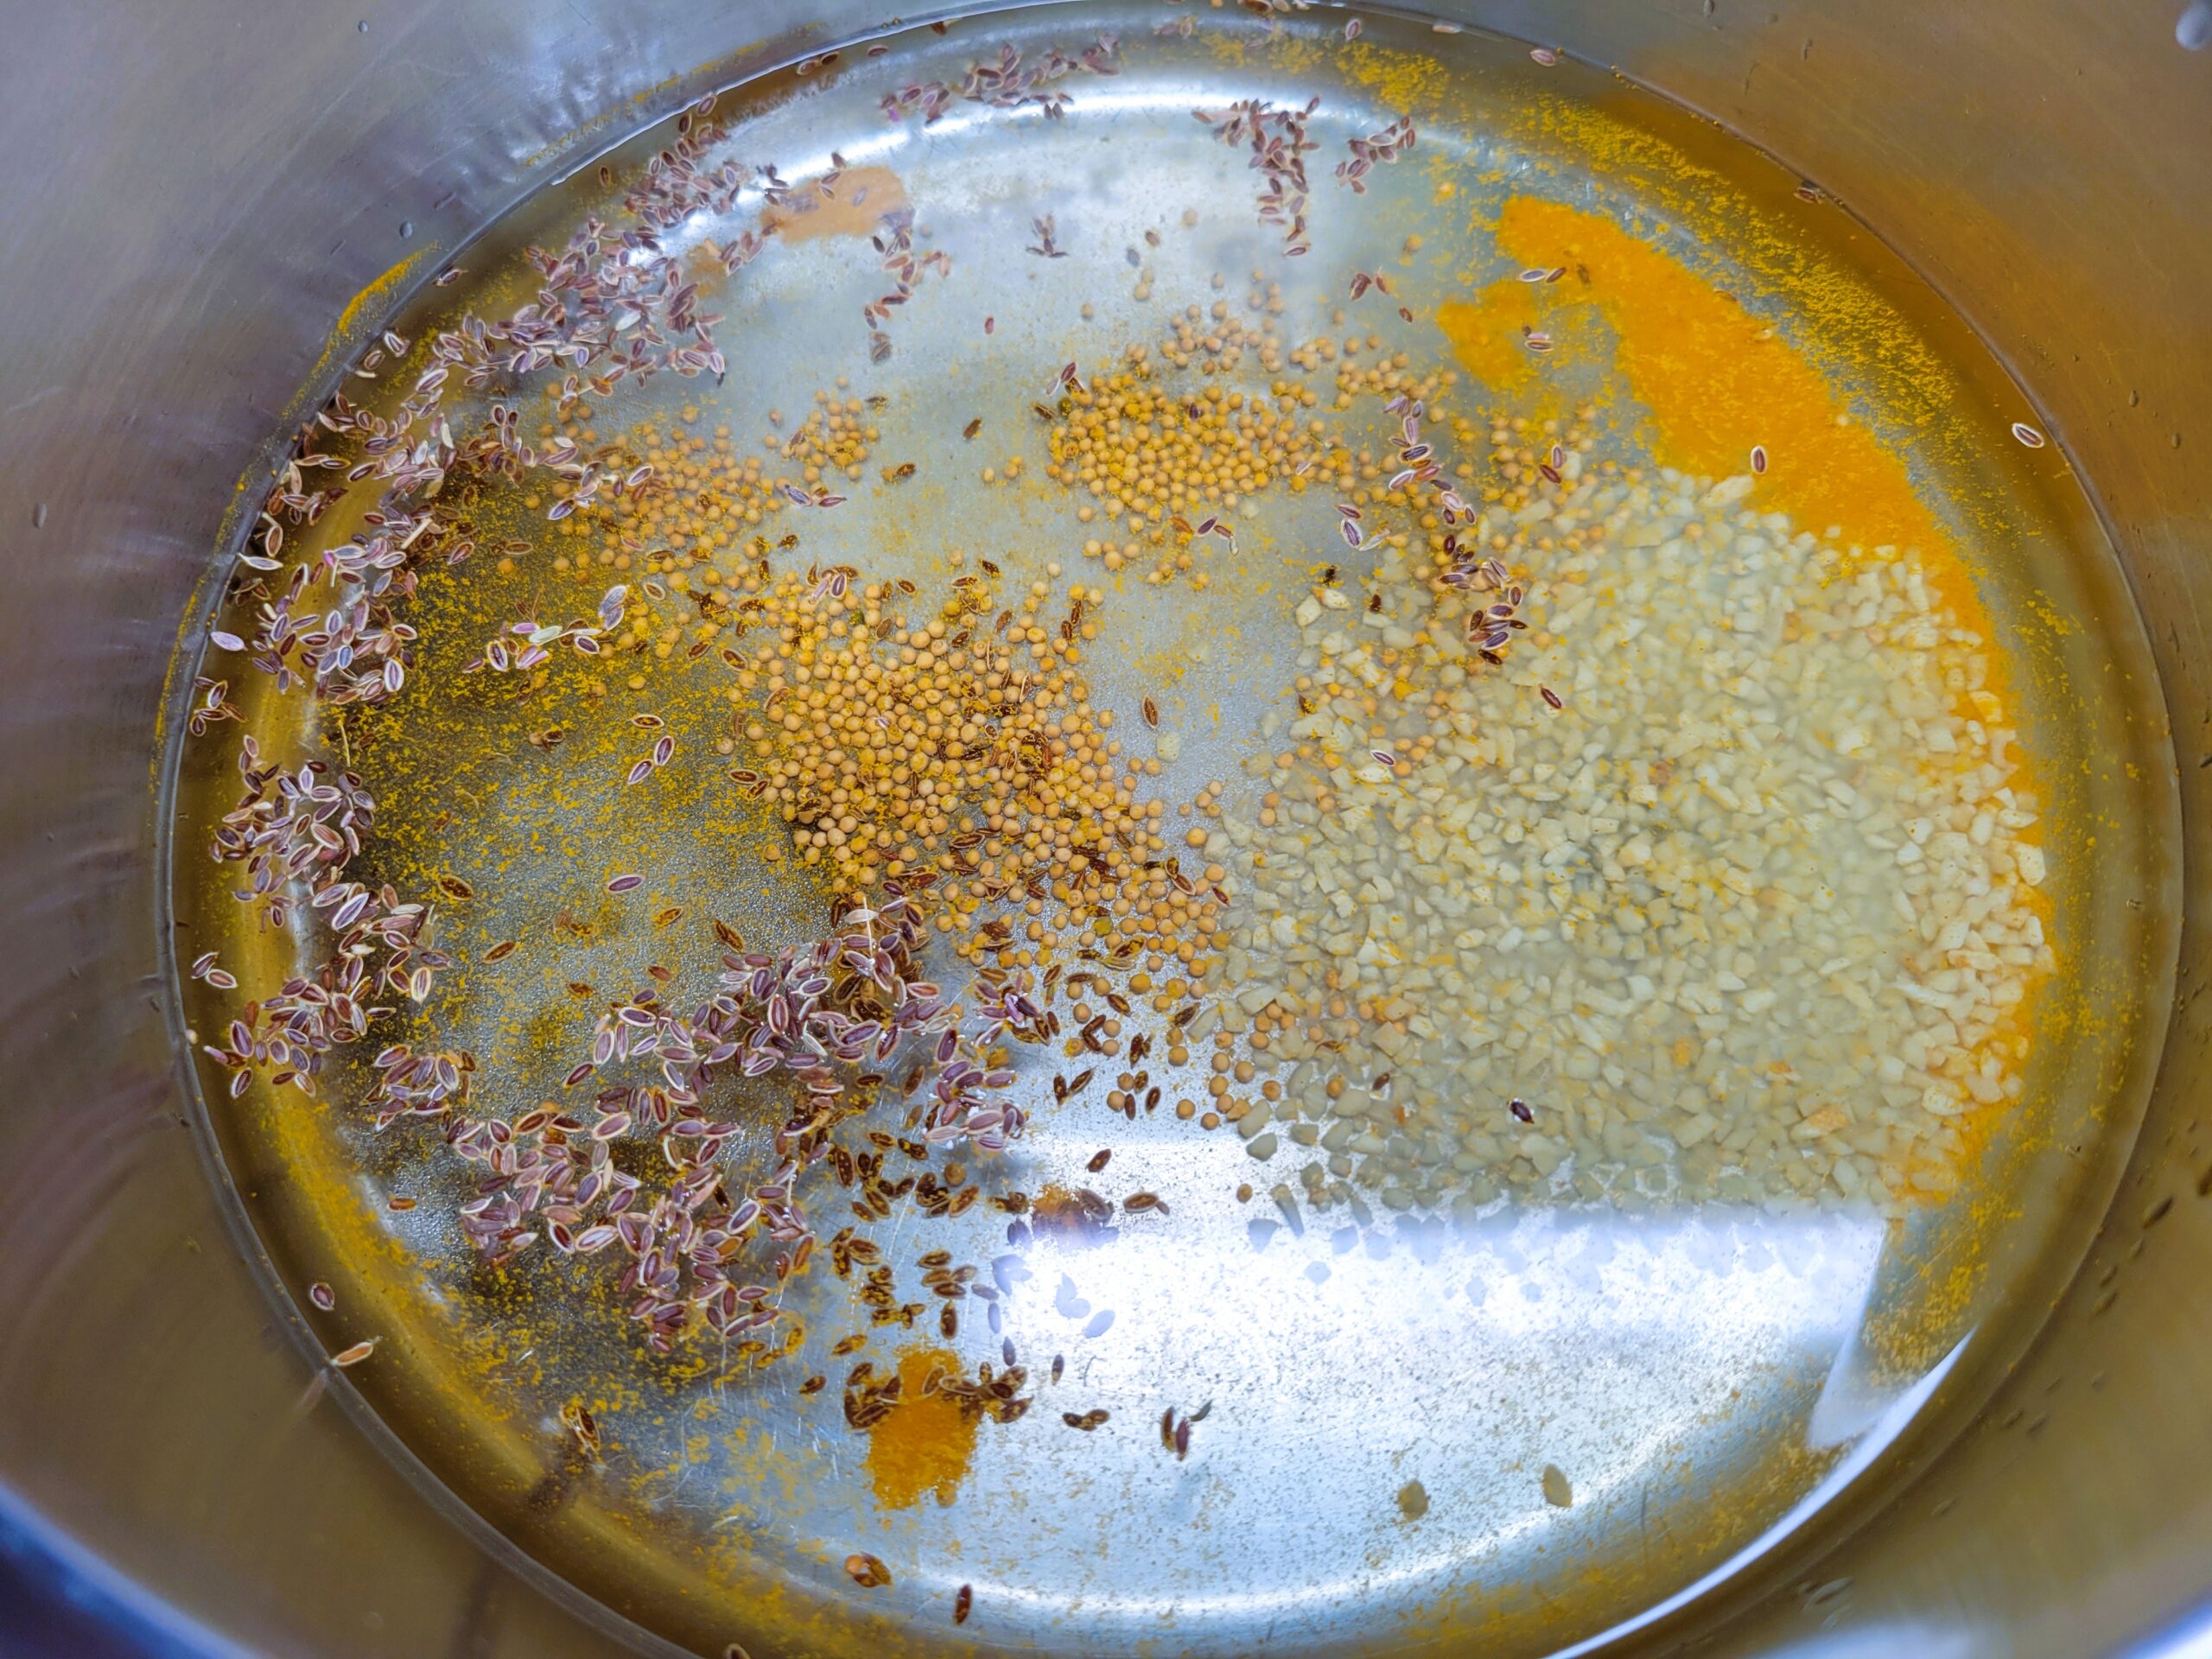
In a large stainless-steel pot combine 4 cups of white vinegar (5%), 1/4 teaspoon of turmeric, 1 tablespoon of minced garlic, 1/2 tablespoon of mustard seed, 1/2 tablespoon of dill seed, 1 tablespoon of granulated sugar, 1/4 teaspoon of celery seed, and 1 teaspoon of pickling salt. Bring to a boil, then reduce to a simmer for 10-15 minutes, ensuring the brine stays hot.

*Important* Make 2-4 cuts in each whole pepper to allow air to escape and brine to get in, ensuring it is preserved both inside and out.
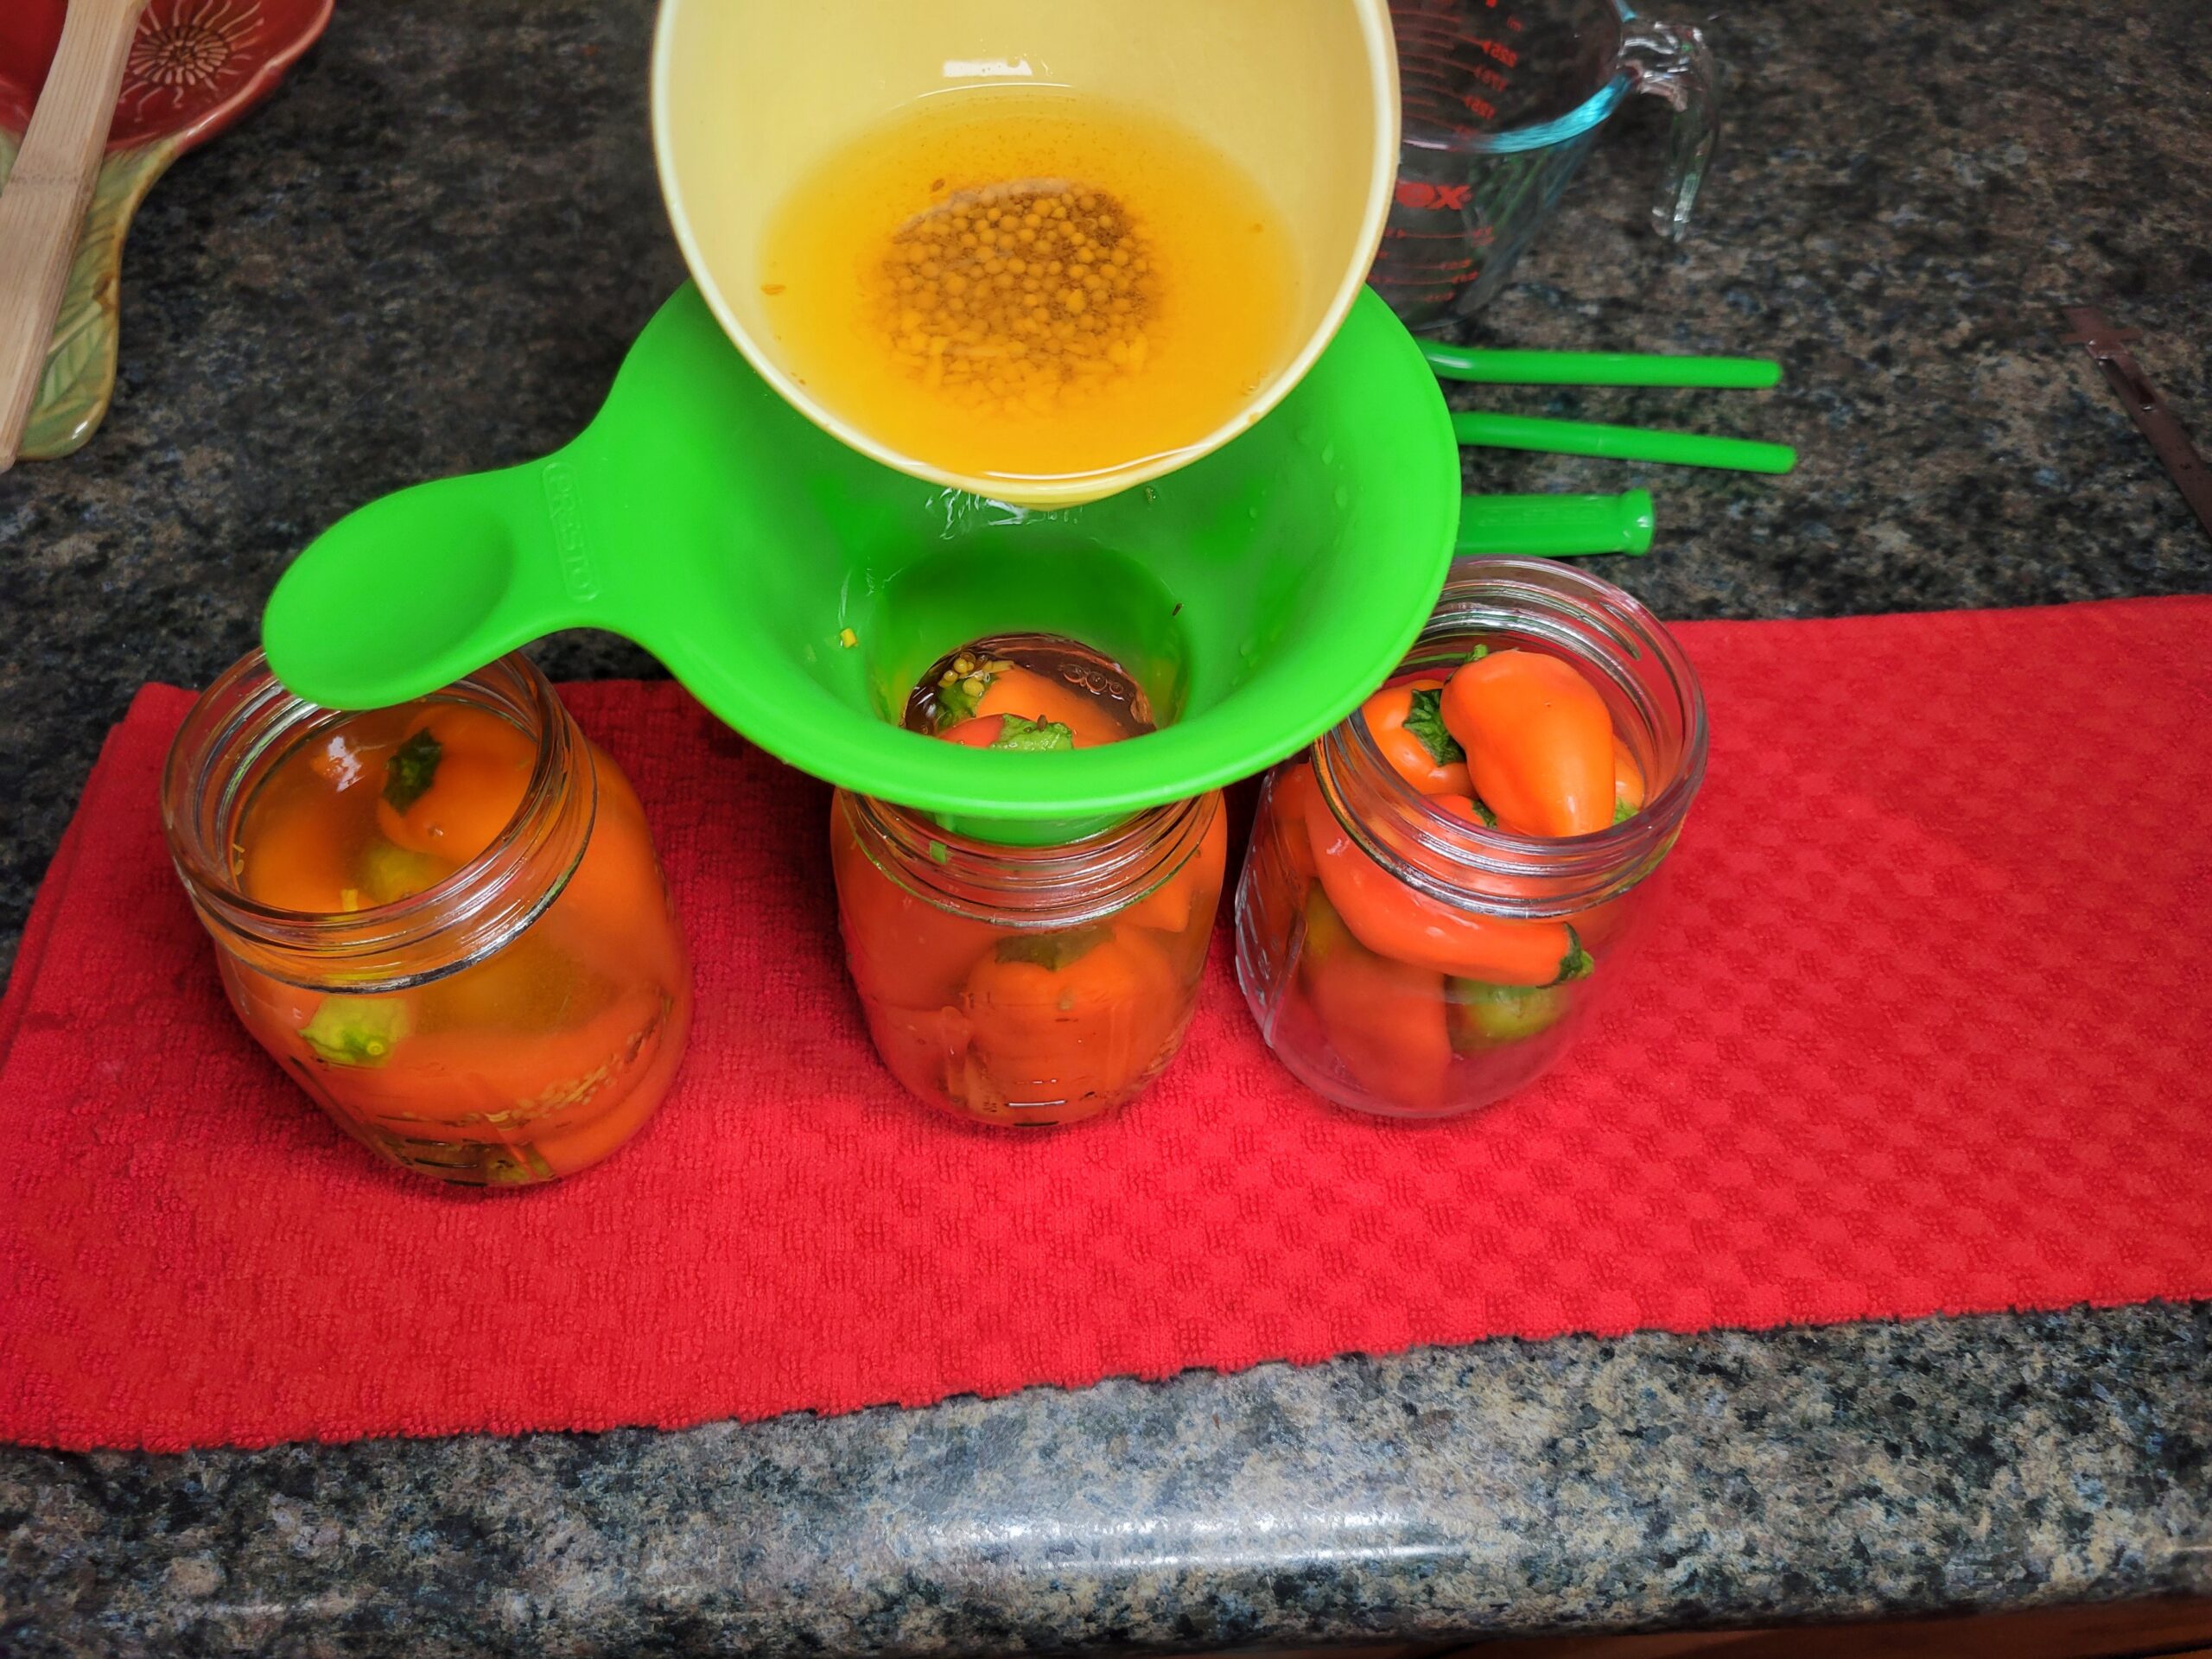
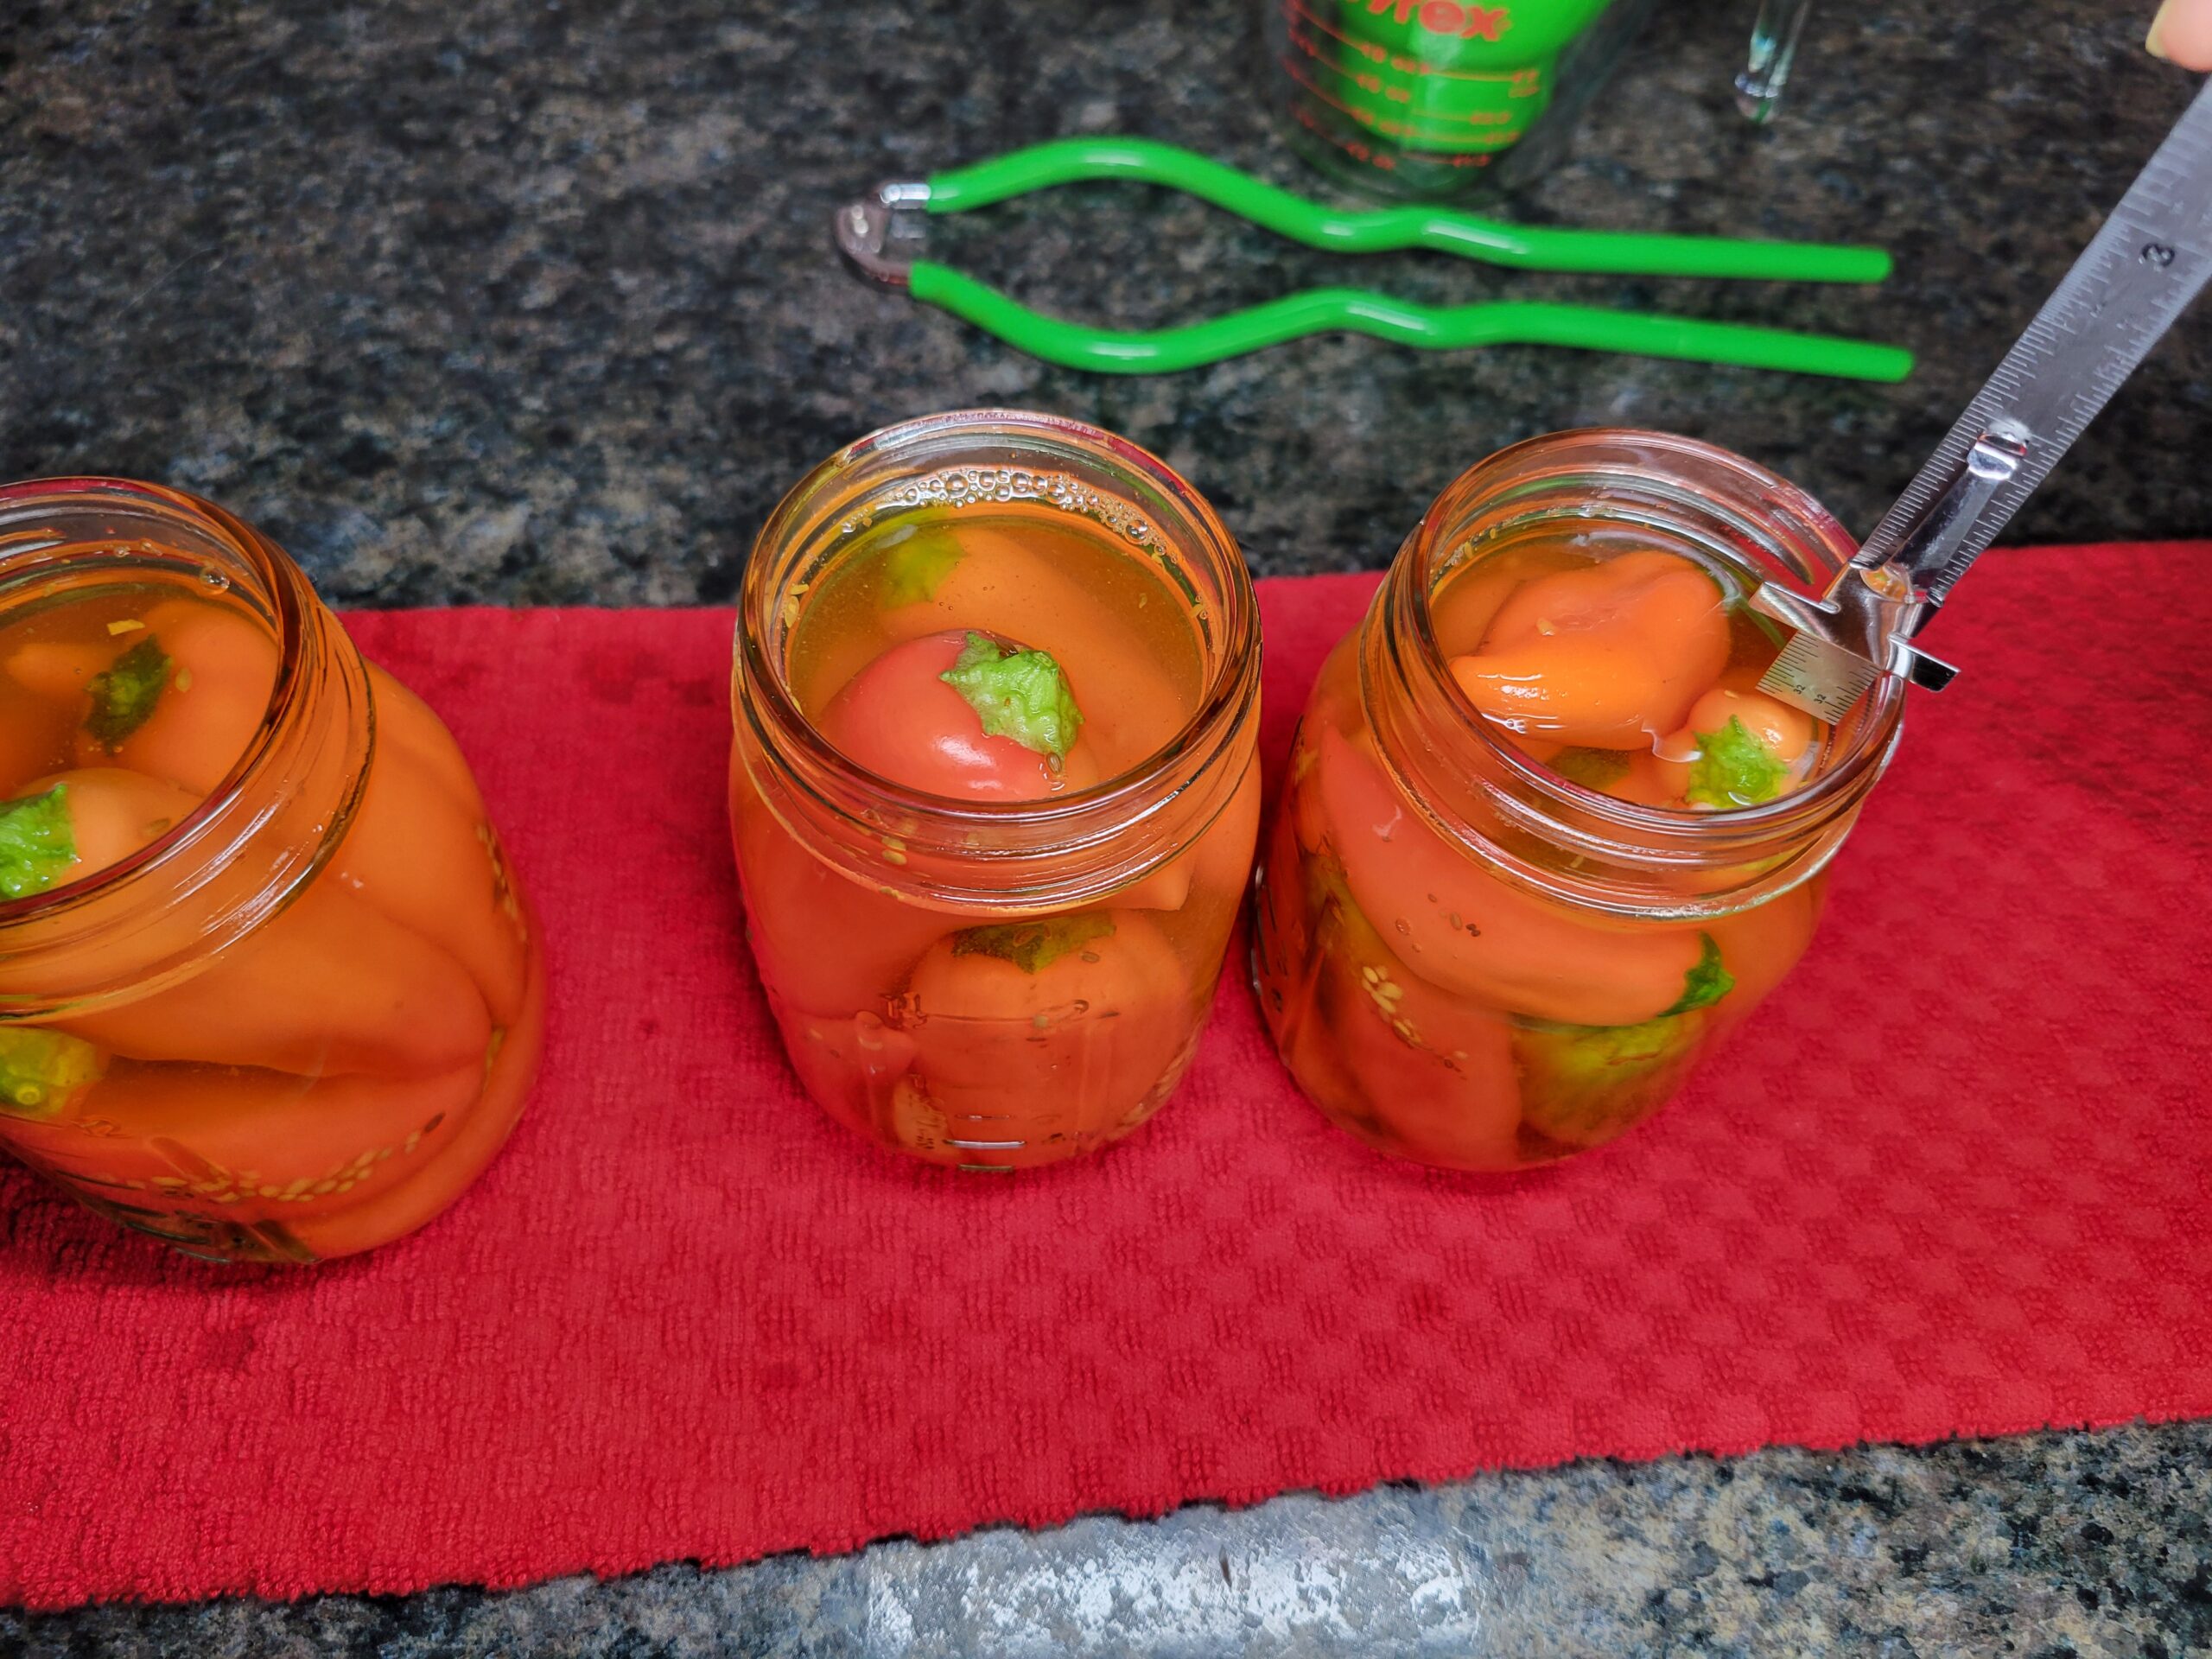
Pack the peppers into hot, sterilized jars and pour hot brine over them, leaving a 1/2-inch headspace. Wipe the rim of the jar with a damp clean towel, place the lids on, and tighten the bands with your fingertips.
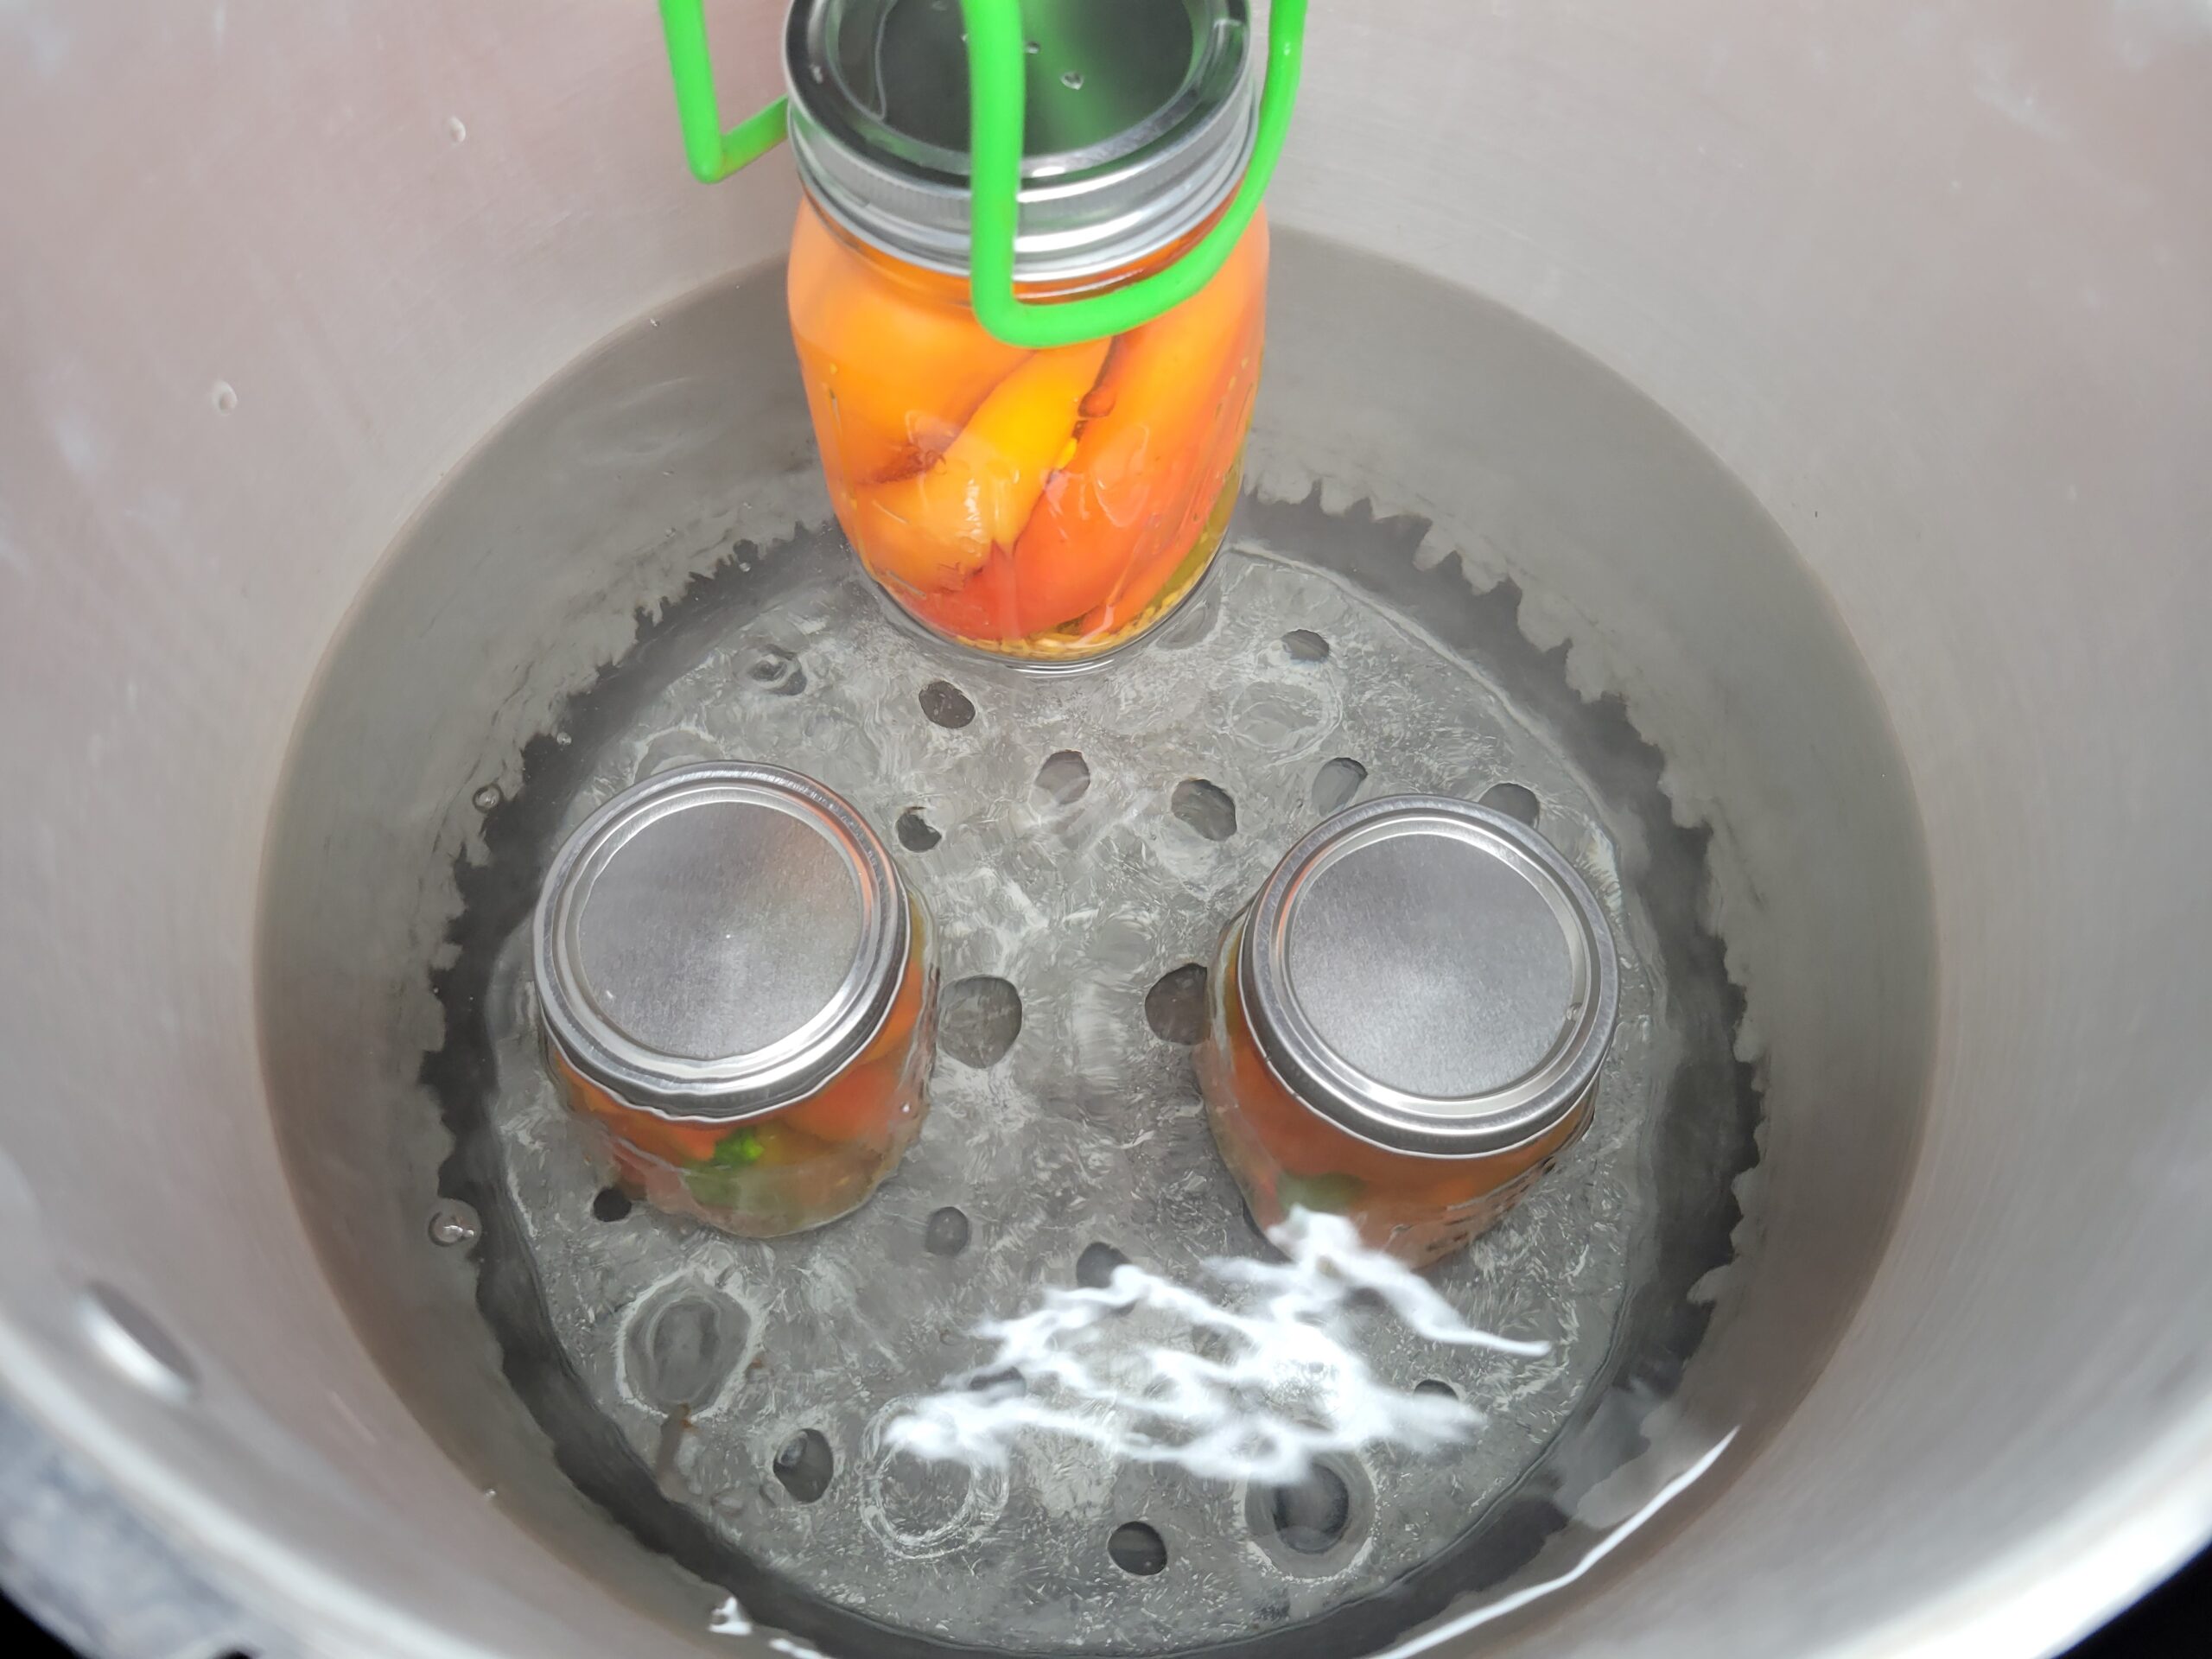
Carefully lower jars into the boiling water bath canner, spacing them slightly from one another and the canner walls. Water should cover the tops of the jars by 1 to 2 inches. Place the lid on the canner. This is important: don't start counting your canning time until the water is fully boiling. Canning times for 0-1000 ft. elevation above sea level are 10 minutes, 1,001-6,000 ft. elevation is 15 minutes, and above 6,000 ft. is 20 minutes. Once your time is up, turn off the heat and, if possible, remove the canner from the heat source. Remove the lid and allow the jars to sit undisturbed in the water for 5 minutes.
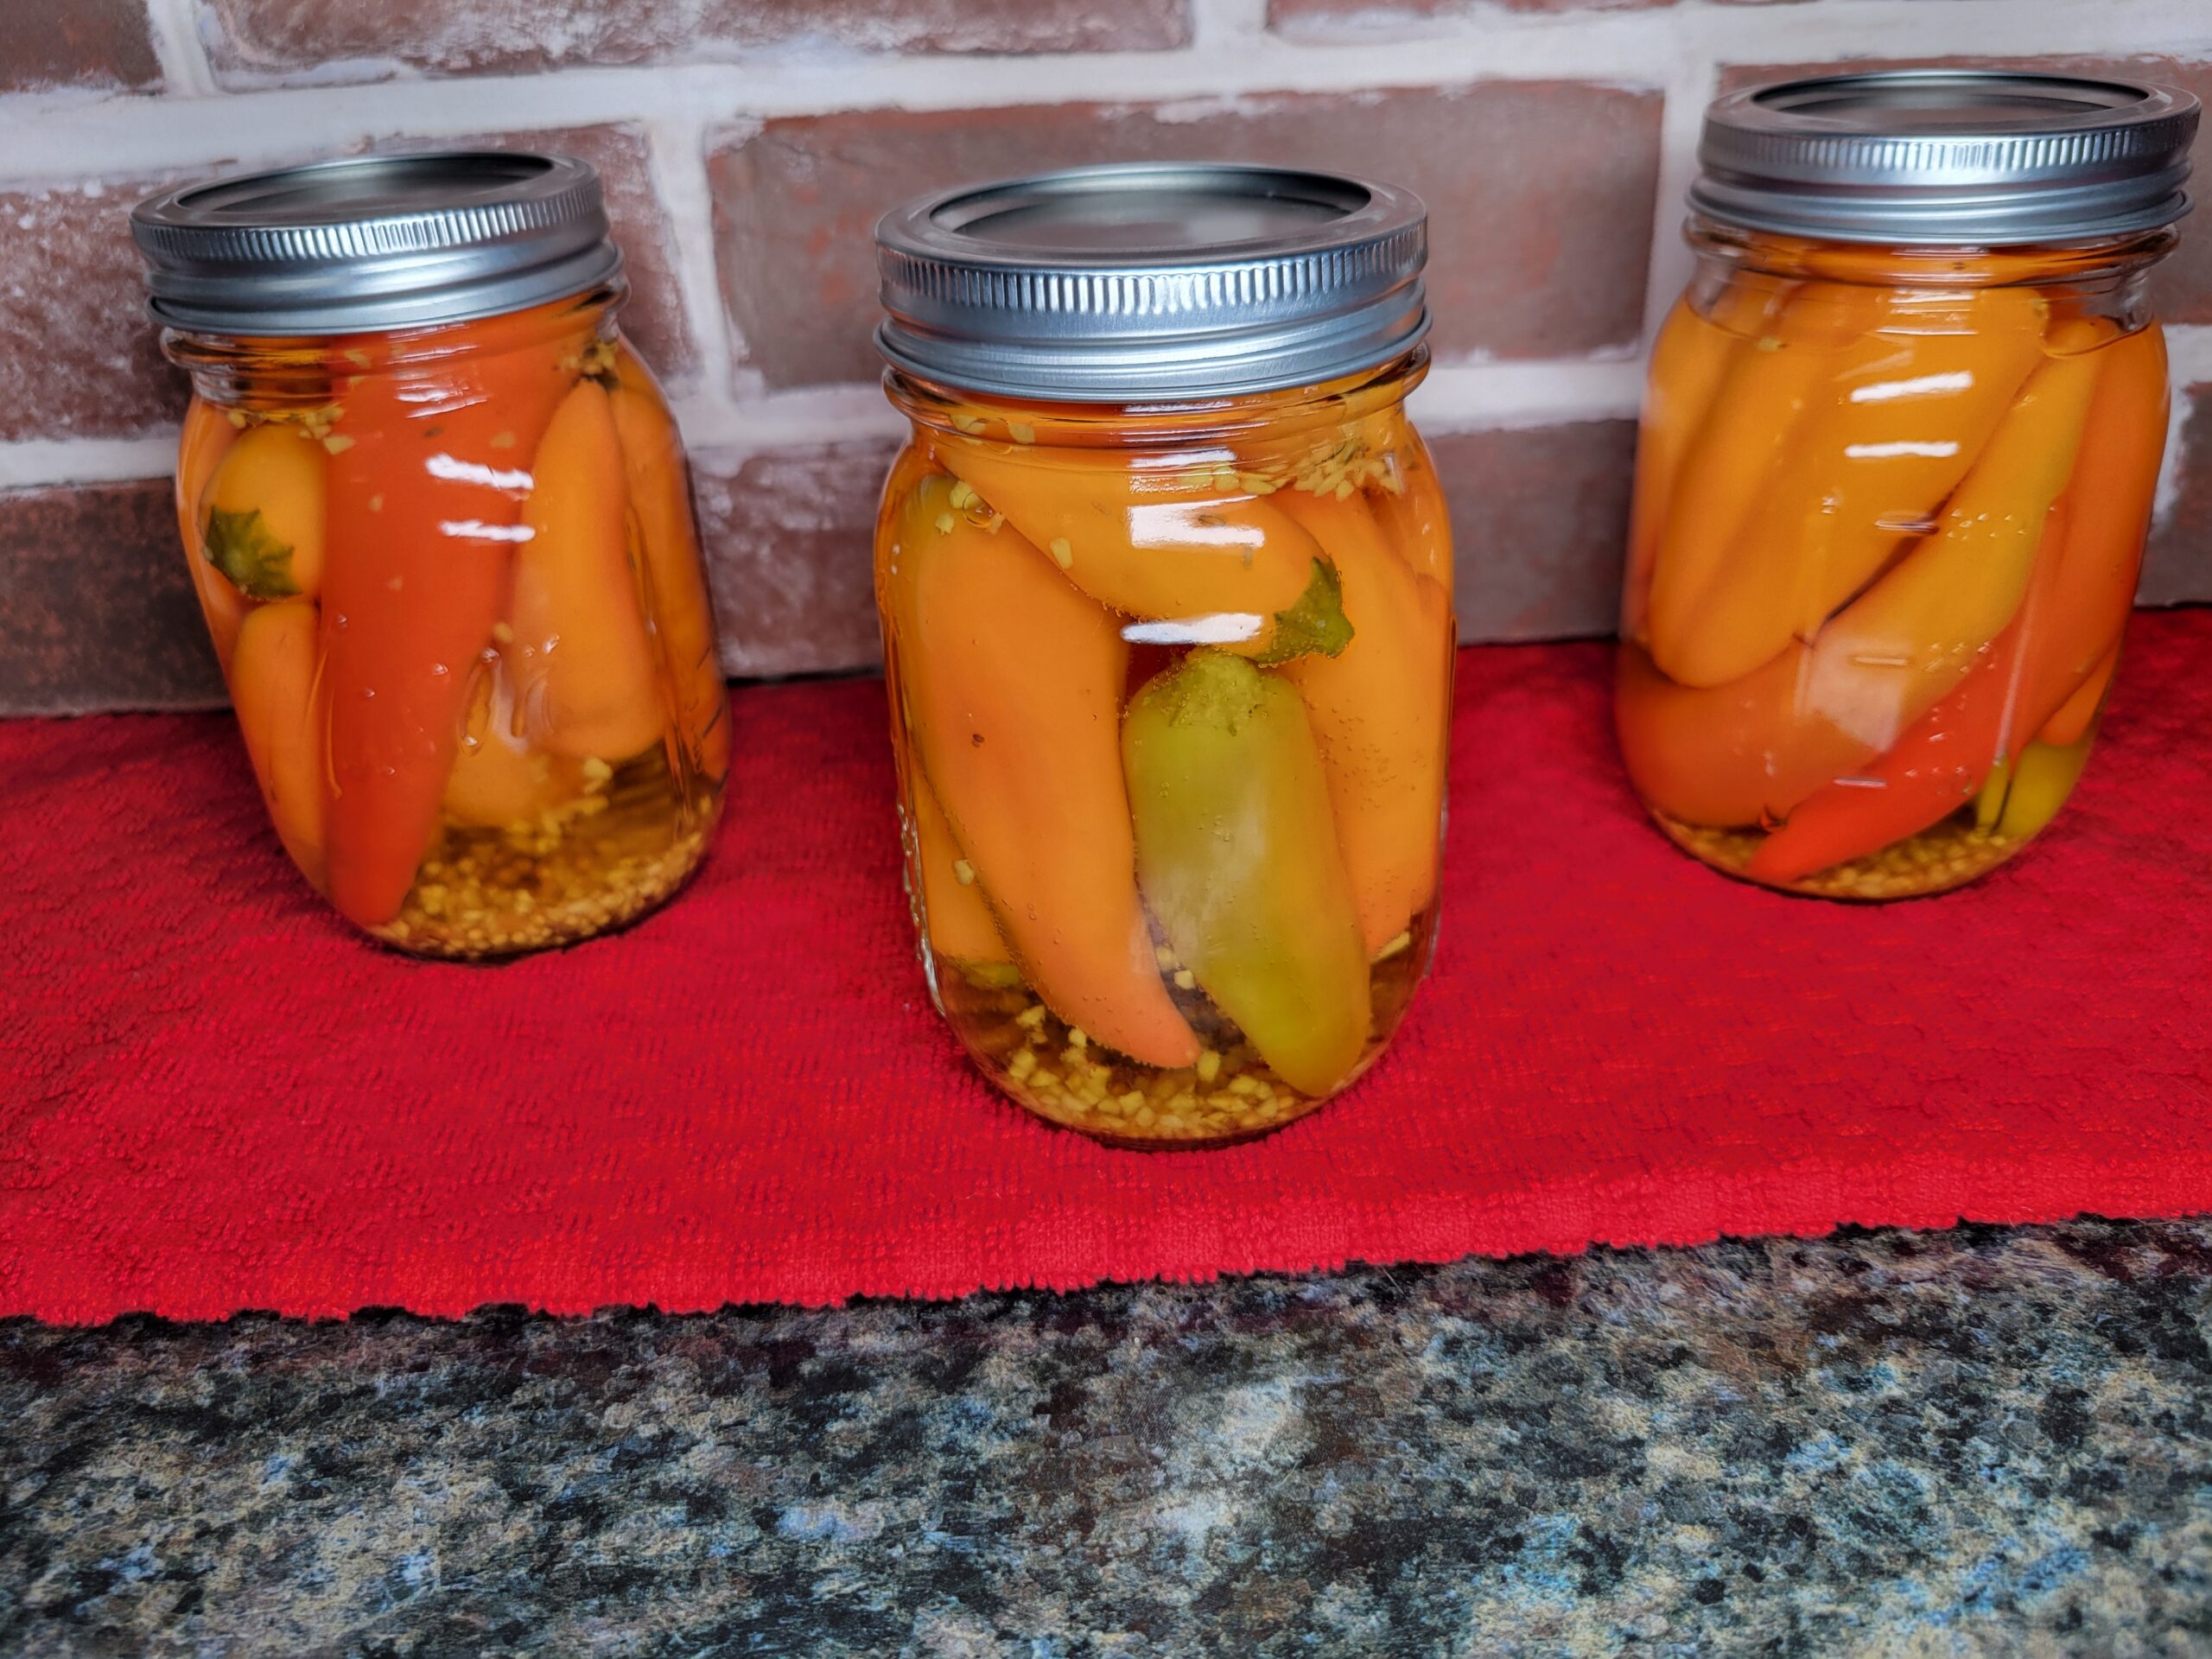
After 5 minutes, remove jars from the water bath and place them on a kitchen towel. Allow to cool undisturbed for 12-24 hours. Some jars can take hours to seal; however, most will seal within 30 minutes from being removed from the canner, and some may even seal during the water bath canning process. Remove the jar bands, clean the jars with a damp cloth, and label each jar with its contents and the date that it was canned. Store in a cool, dry place for up to a year. If there are any that don't seal, refrigerate them. Enjoy!
Conclusion
Kitchen Tools :Need some tools or ingredients to make this recipe? Use my Amazon Affiliate links to shop. I will make a small commission and it doesn't cost you any extra. Thank you for visiting.
Mason Jars - 10 Pack 16 Oz Regular Mouth Glass Canning Jars Tangerine Dream Pepper Seeds Simply Organic Ground Turmeric Root McCormick Culinary Whole Yellow Mustard Seed McCormick Culinary Whole Dill Seed McCormick Gourmet Celery Seed Morton Canning & Pickling Salt Presto 23-Quart Induction Compatible Pressure Canner SE Stainless Steel SAE Metric Ruler Set, Precision Ruler Measuring Tool Powder Coated Enameled Colander, 5 Quart, Turquoise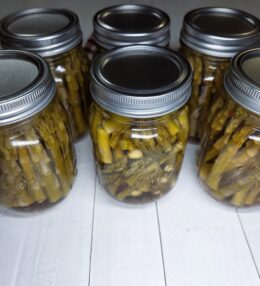
Leave a Review